Atdec Telehook TH-PS-S Installation manual User Manual
Th-ps-s, Short throw projector wall mount | single stud, Installation instructions
TH-PS-S
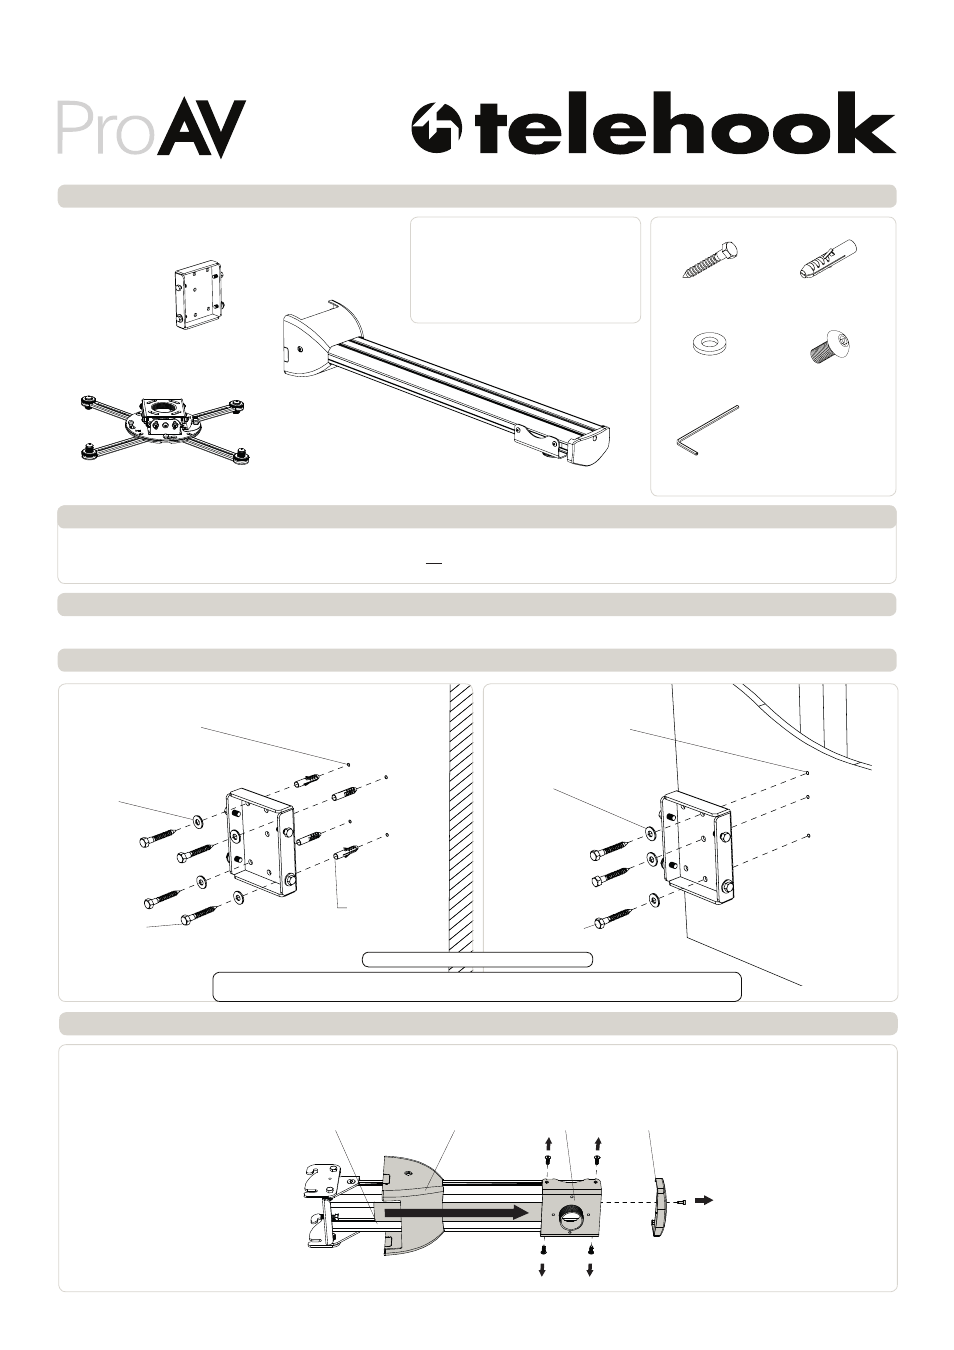
Component Checklist
Short throw projector wall mount | Single Stud
Support Arm
! IMPORTANT - Install Telehook Short Throw Projector Mount as per installation instruction.
! This product supports a maximum load of 25kg (55lbs.).
! The manufacturer accepts no responsibility for incorrect installation.
IMPORTANT INFORMATION:
Step 1. Check Components
Check you have received against the component checklist and hardware above.
Wall Plate
HARDWARE
Coach Screw
(x4)
Nylon
Anchor (x4)
Washer (x4)
3mm Security
Allen Key
Security Screw (x2)
Tools Required:
• Power Drill
• 6mm(0.23”) Drill Bit
• 12mm(0.47”) Masonry Drill Bit
• 13mm (0.5”) Socket Wrench Shifter
• Phillips Head Screwdriver
3.1. Remove screw from End Cap and slide End Cap off
3.2. Loosen screws on Sliding Pole Mount and slide the entire assembly off
3.3. Slide off Base Cover
3.4. Slide the Cable Cover out
Step 3.
Remove End Cap, Sliding Pole Mount, Base Cover and Cable Cover from Support Arm
Cable Cover
Base Cover
Sliding Pole Mount
End Cap
Step 2. Mounting Wall Plate
Masonary
Timber Stud
Coach Screw
Coach Screw
Washer
Washer
Ø12mm x 65mm deep
Drilled Hole
Ø6mm x 65mm deep
Drilled Hole
Nylon Anchor
IMPORTANT! Any structural elements must be capable of supporting the combined weight of
all the equipment and devices being mounted. If in doubt, consult a structural engineer.
TIP: Use Mount as a drilling template.
Installation Instructions
TH-PF
Pro AV Projector Mount