Hama VMPR1 User Manual
Page 10
ENGLISH
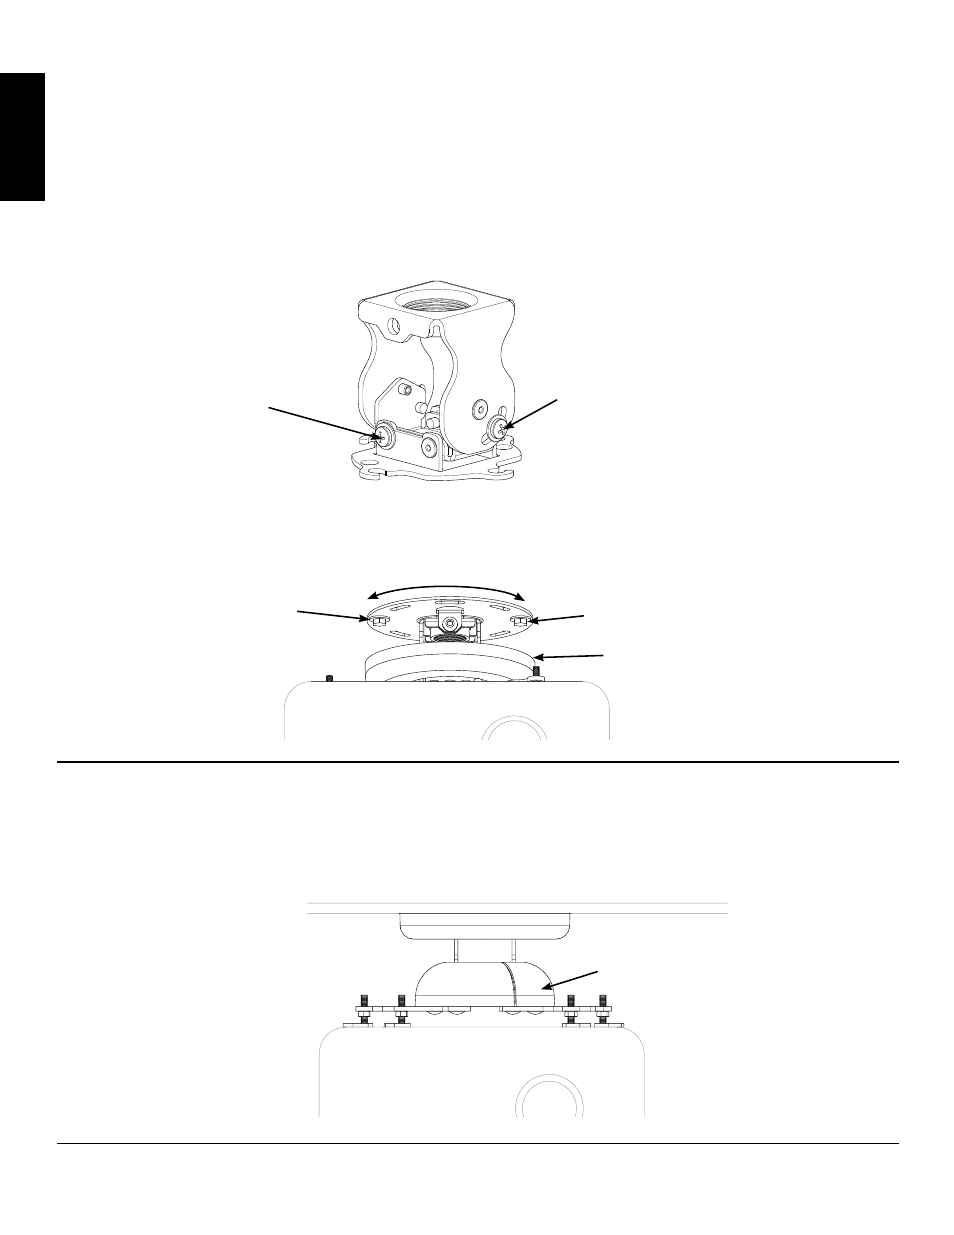
Step 6 - Projector Alignment
The VMPR1 can be adjusted for vertical elevation (Pitch), horizontal tilt (Roll), and rotation (Yaw).
Pitch Adjustment
Loosen the Pitch Adjustment Screws on both sides of the Adjustment Bracket (D) and adjust the projector to the desired
Pitch; then, retighten the Pitch Adjustment Screws as shown in Diagram 6A.
Roll Adjustment
Loosen the Roll Adjustment Screws on both sides of the Adjustment Bracket (D) and adjust the projector to the desired angle
and tilt; then, retighten the Roll Adjustment Screws as shown in Diagram 6A.
Diagram 6A
Yaw Adjustment
Lower the Top Cover (H) to expose the Lag Bolts (U). Loosen the Lag Bolts and adjust the projector to the desired angle or
yaw; then retighten the Lag Bolts and snap the Top Cover (H) back into place as shown in Diagram 6B.
Diagram 6B
Pitch Adjustment Screw
Roll Adjustment Screw
Lag Bolt (U)
Lag Bolt (U)
Top Cover (H)
Step 7 - Attach Bottom cover
Flex the Bottom Cover (G) at the seam, just enough to fit it around the Adjustment Bracket (D). Align the seam in the least
visible location, you may also stick a small piece of tape to the inside of the Bottom cover to secure the seam.
Diagram 7
G
Sanus Systems 2221 Hwy 36 West, Saint Paul, MN 55113 USA (6901-100023)
Customer Service: 800.359.5520. See complementary Sanus products at www.sanus.com