Installing the wall bracket – 3M 9000PD User Manual
Page 16
16
3M™ Digital WallDisplay
© 3M 2005. All Rights Reserved.
Installation and System Setup
Installing the Wall Bracket
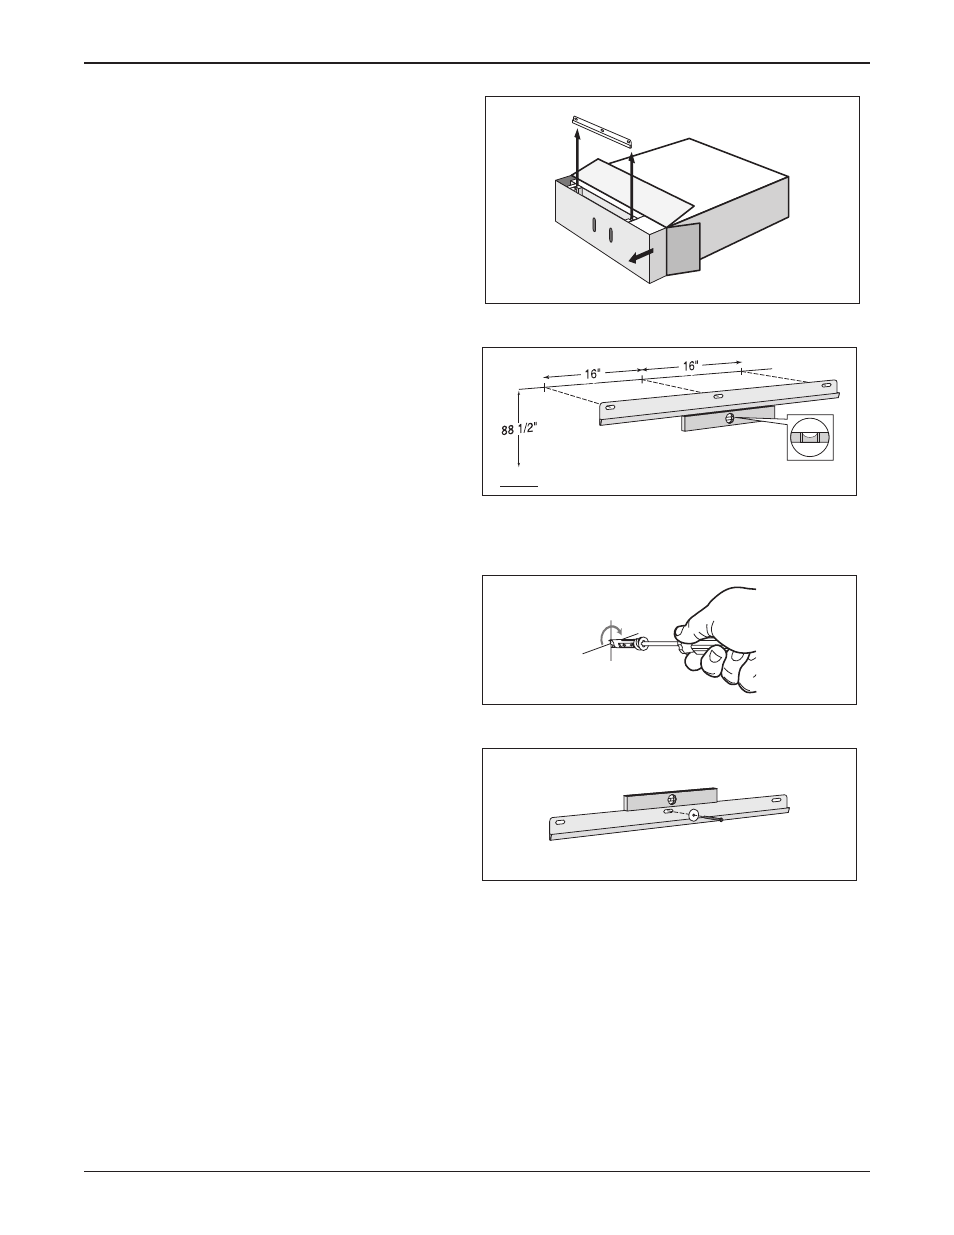
Unpacking Wall Bracket and Hardware
1. Place the shipping container face up on the floor.
2. Open the end of the shipping container.
3. Slide the shipping tray partially out the container.
4. Locate and Remove the wall bracket and hardware.
The hardware is taped to the wall bracket.
Installation for a Hollow Wall-Drywall
1. Determine the desired location of the unit. Locate
all wall studs in area.
2. While holding the bracket in place, use a
carpenter’s level to ensure the proper level and then
mark the three hole locations on the wall. Ensure
that no studs are behind the hole locations.
To Floor
3. Using a Phillips screw driver, screw the supplied
anchors into the wall until they are flush with the
wall surface.
4. Align the wall bracket holes over the wall anchors
and secure with the washer and anchor screws.
Confirm that the wall bracket is level before
tightening the screws.
Note: For other types of wall material (e.g. wood,
concrete, concrete block) use mounting hardware
that is properly rated for the weight of the unit and is
intended for specific wall material.