Ac power 8. music rack installation, Ac power, Music rack lnstallation – Yamaha DX21 User Manual
Page 6
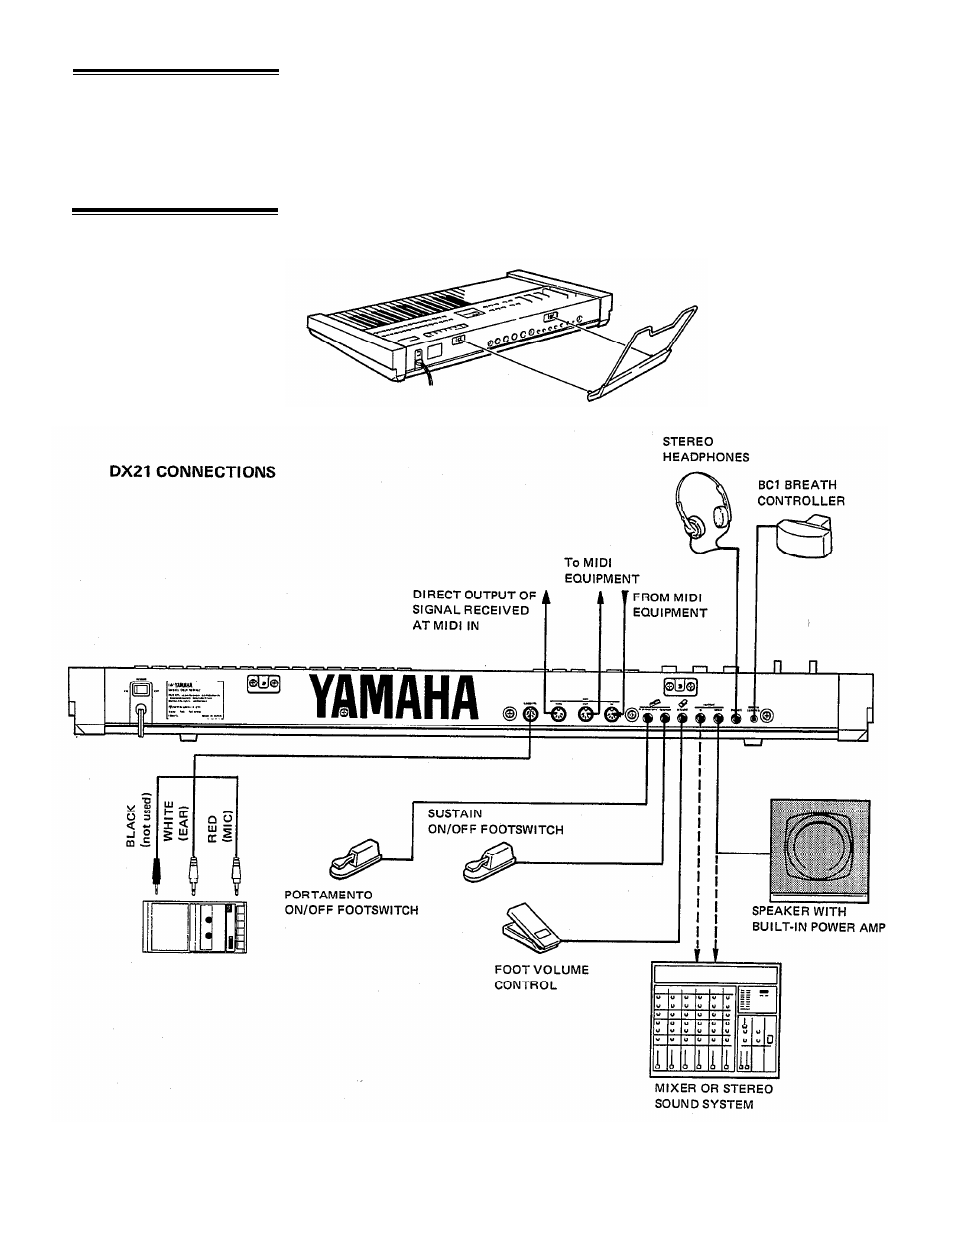
7. AC Power
Plug the DX21 AC power cord into an AC wall socket. Be sure that your local line
voltage matches that specified on the DX21 rear panel. The POWER switch is located
next to the AC cord on the rear panel. NOTE: When setting up your system, be
sure to turn the DX21 and any effects units used on BEFORE turning the main
amplifier system on. This will prevent the initial power-on shock surge from possible
damaging your amplifier and speaker system.
8. Music Rack
lnstallation
The music rack supplied with the DX21 fits into the two sockets on the rear panel
(see diagram).
4
See also other documents in the category Yamaha Synthesizers:
- PSR-1100 (176 pages)
- PSR-1100 (170 pages)
- PSR-290 (98 pages)
- YPT-310 (90 pages)
- CLP-230 (90 pages)
- CLP-230 (89 pages)
- YPT-300 (84 pages)
- DGX-205 (90 pages)
- MM8 EU (116 pages)
- MOX8 (14 pages)
- MOTIF XS8 (320 pages)
- PSR-4600 (30 pages)
- PSR-32 (20 pages)
- PSR-530 (130 pages)
- PSR-510 (77 pages)
- PSR-330 (90 pages)
- PSR-3500 (84 pages)
- PSR-500 (47 pages)
- PSR-41 (13 pages)
- PSR-4000 (165 pages)
- PSR-38 (55 pages)
- PSR-520 (102 pages)
- PSR-340 (128 pages)
- PSR-40 (16 pages)
- PSR-36 (28 pages)
- PSR-48 (45 pages)
- PSR-420 (73 pages)
- PSR-420 (75 pages)
- PSR-300m (39 pages)
- PSR-37 (30 pages)
- PSR-4500 (48 pages)
- PSR-50 (32 pages)
- PSR-410 (61 pages)
- PSR-540 (160 pages)
- PSR-540 (161 pages)
- PSR-31 (20 pages)
- CLP-100 (11 pages)
- CLP-122S (31 pages)
- CLP-123 (30 pages)
- CLP-30 (11 pages)
- CLP-300 (11 pages)
- CLP-250 (17 pages)
- CLP-260 (19 pages)
- CLP-280 (124 pages)
- CLP-550 (19 pages)