Previewing image sources, What to do if you see a blank screen, Epson powerlite 835p – Zyliss PowerLite 835p User Manual
Page 5
Epson PowerLite 835p
10/04
Epson PowerLite 835p
-
5
❏ The projector’s control panel has two
Source
buttons.
Use the
Computer/Component
button to switch between EasyMP,
™
and equipment connected to the
Computer
ports.
Use the
Video/S-Video
button
to switch between equipment
connected to the
Video
and
S-Video
ports.
❏ The remote control has five
Source
buttons. Use them to
switch between equipment
connected to the port identified on
each button, or select
EasyMP
to
project wirelessly or from a
memory card.
You can preview all sources to help you select the desired
source, as described below.
The
Computer/Component
ports can be set up to use different
input signals, so if you have equipment connected to one of
these ports, be sure to select the correct signal to match the
equipment you’re using. You can change the input signal
settings using the projector’s menu system.
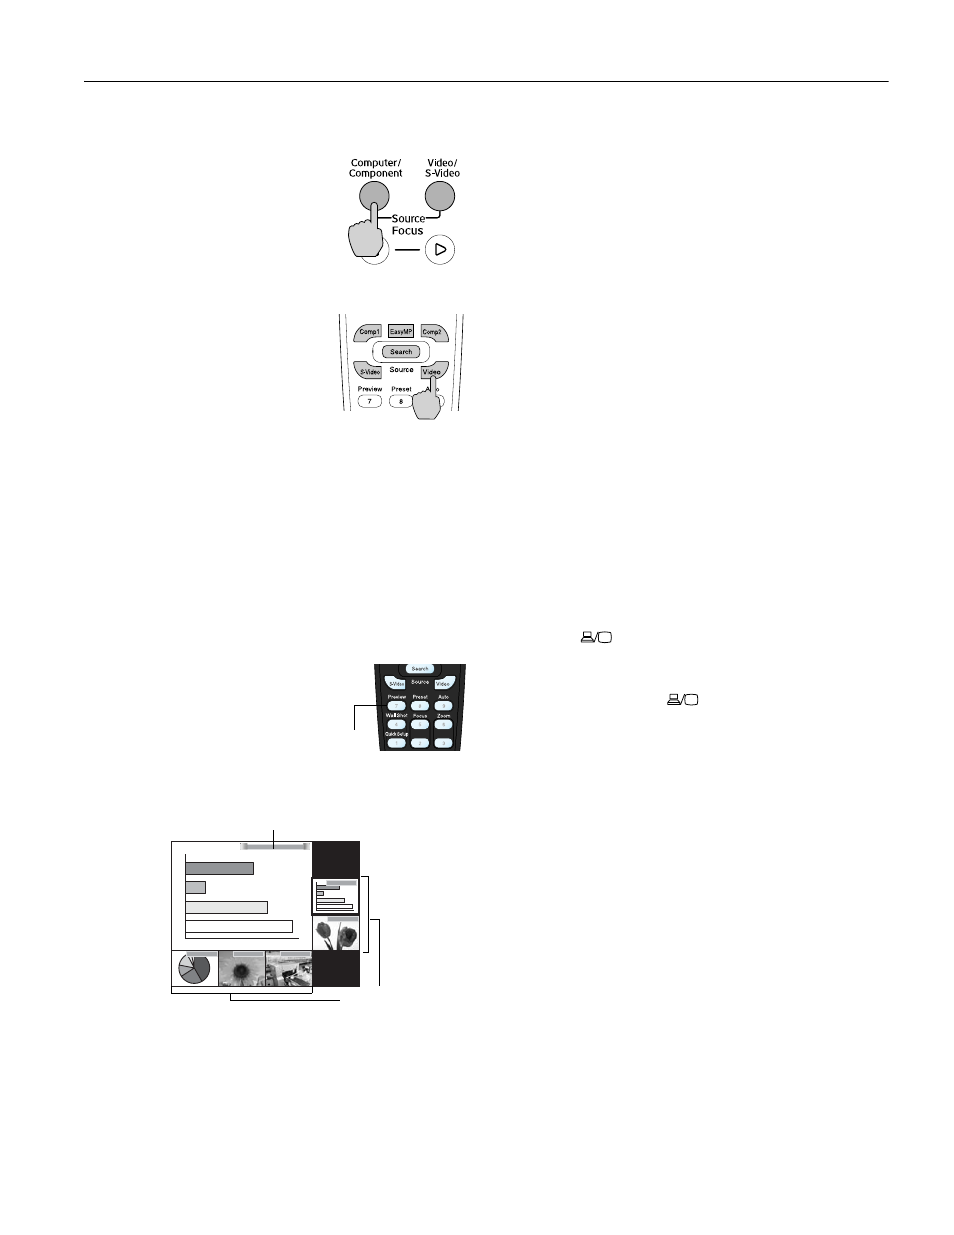
Previewing Image Sources
Use the preview function to select the image source when you
have connected multiple sources to the projector.
1. Press the
Preview
button on the
remote control.
You see the currently selected
source displayed on the screen,
as shown below. Other sources
(including the currently selected source) appear in smaller
preview windows on the right and bottom of the screen.
.
If no equipment is connected to a port, or if there is no
incoming signal, the preview window for that source
appears blank.
Note: Movies are displayed as still images on the preview
screen.
2. Press the corresponding
Source
button on the remote
control to switch to the desired source. Or press the
Esc
button to exit the preview screen without switching sources.
Note: A red border surrounds the preview window for the
currently selected source. You can use the pointer button on
the remote control to select a different source, and then press
Enter
to display it.
What To Do If You See a Blank Screen
If you see a blank screen or a blue screen with the message
No Signal
after turning on your computer or video source, try
the following:
❏ Make sure the cables are connected correctly.
❏ Make sure the
Power
light is green and not flashing and the
lens cover is off.
❏ Try restarting your computer.
❏ Press the correct
Source
button on top of the projector or
on the remote control. (Allow a few seconds for the
projector to sync up after pressing the button.)
If you’re using a PC laptop:
❏ Hold down the
Fn
key and press the function key that lets
you display on an external monitor. It may have an icon
such as
or it may be labeled
CRT/LCD
. Allow a few
seconds for the projector to sync up after pressing it. Check
your laptop’s manual or online help for details.
On most systems, the
or
CRT/LCD
key lets you
toggle between the LCD screen and the projector, or
display on both at the same time.
❏ Depending on your computer’s video card, you might need
to use the Display utility in the Windows Control Panel to
make sure that both the LCD screen and external monitor
port are enabled. See your computer’s documentation or
online help for details.
Preview
Computer (Analog-RGB)
BNC
Video
S-Video
DVI
Computer
Currently selected source
Preview windows