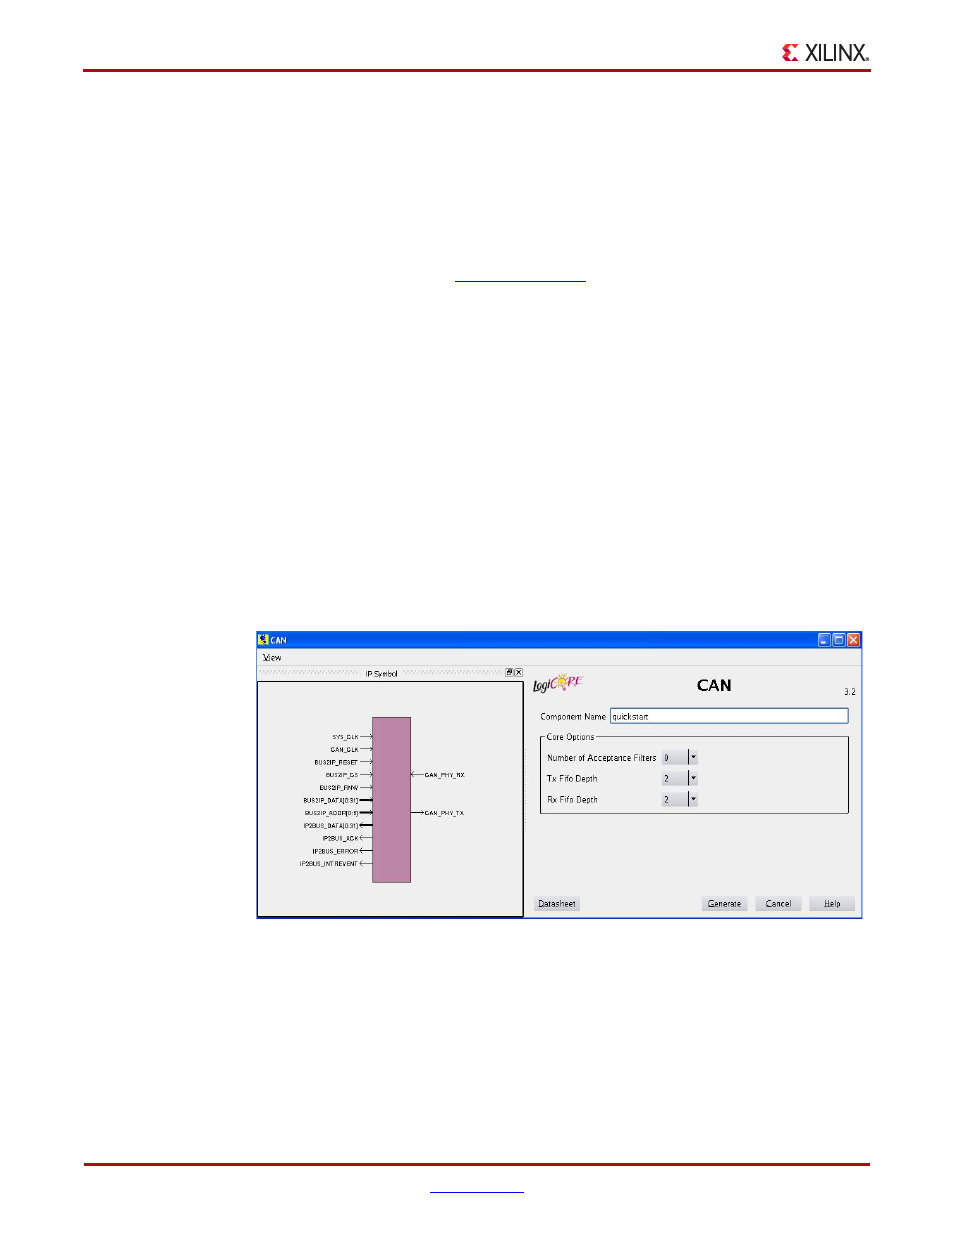
Generating the core, Figure 3-2 – Xilinx LogiCORE IP CAN 3.2 User Manual
Page 14
14
CAN Getting Started Guide
UG186 April 19, 2010
Chapter 3: Quick Start Example Design
Generating the Core
This section describes how to generate a CAN core with default values using the Xilinx
CORE Generator™ tool.
To generate the core:
1.
Start the CORE Generator tool.
For help starting and using the CORE Generator tool, see the Xilinx CORE Generator
Guide, available from the
web page.
2.
Choose File > New Project.
3.
Type a directory name.
This example uses the directory name design.
4.
Do the following to set project options:
♦
Part Options
-
From Target Architecture, select the desired family. For a list of supported
families, see the CAN Data Sheet.
Note
: If an unsupported silicon family is selected, the CAN core will not appear in
the taxonomy tree.
♦
Generation Options
-
For Design Entry, select either VHDL or Verilog.
5.
After creating the project, locate the CAN core in the taxonomy tree under Automotive
& Industrial >Automotive > CAN.
6.
Double-click the core to display the main CAN configuration screen.
X-Ref Target - Figure 3-2
Figure 3-2:
CAN Main Screen