Installation – Weil-McLain EGH-125 User Manual
Page 4
EGH-105 to EGH-125
EGH-105 to EGH-125
EGH-105 to EGH-125
EGH-105 to EGH-125
EGH-105 to EGH-125
Control Supplement
Part Number 550-110-677/0299
4
Installation
I
Place the boiler
Refer to the
EGH Manual.
Read Section I and follow all of its guidelines. Complete the
following steps of Section I of the
EGH Manual:
•
Placing the boiler
•
Installation of optional water heaters, steam boilers only (including pages 13–14)
•
Hydrostatic pressure test
•
Installation of flue collector hood
•
Installation of (burner) drawer assembly and front access panel and back base channel
•
Jacket installation
•
Draft hood installation
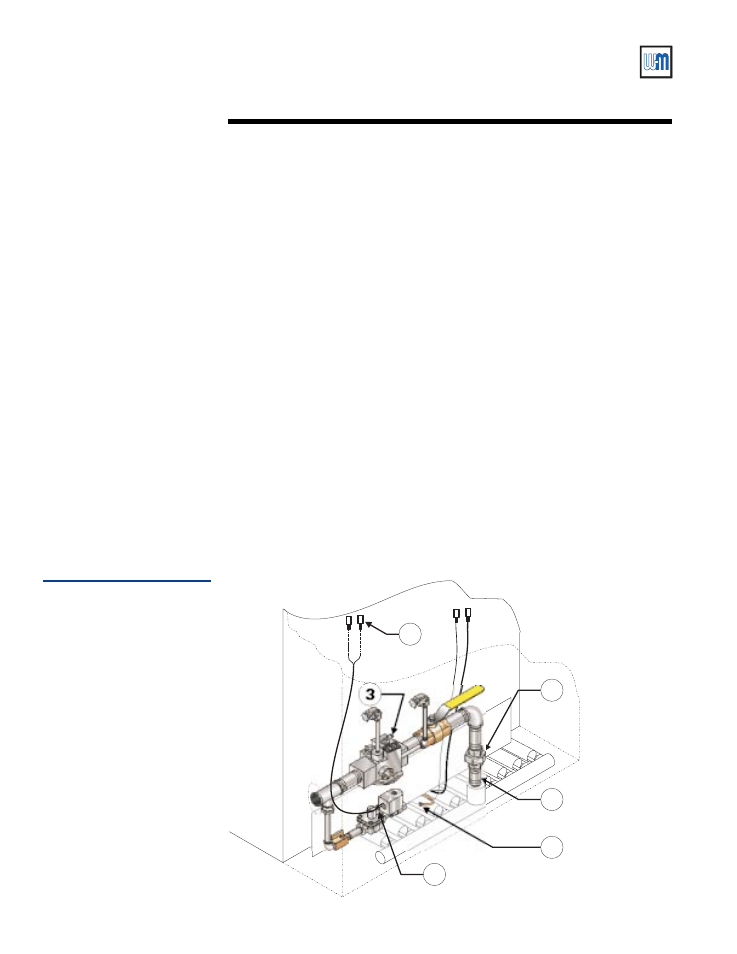
Install gas train
Connect gas train assembly to burner manifold:
•
Apply pipe dope to 1" nipple for insertion into burner manifold coupling (Figure 1,
item 1). Insert and tighten nipple.
•
Pipe lower half of ground joint union to the 1” nipple (Figure 1, item 2).
•
Knock out the jacket gas valve opening on the desired side of the boiler (may be routed
through either right or left side).
•
Place gas train in position (either routed to the left, as shown, or to the right) and tighten
the ground joint union loosely. Position the gas train assembly and tighten the union.
•
Connect vent lines (routed to outside per code requirements) to ¼" tubing vent
connections on main gas valve and pilot gas pressure regulator (Figure 3, item 3).
•
Connect pilot gas tubing (
1
/
8
" aluminum) to adapter in pilot gas valve outlet
(Figure 1, item 4).
•
Crimp connect two ¼" spade terminals (provided) to ends of pilot gas valve wires
(Figure 1, item 5).
Figure 1
Gas train assembly
Install vent/breeching
Install vent system and breeching per
EGH Manual
Section I. If optional vent damper is used,
install vent damper (using Section I of this Supplement) before installing breeching.
677-09
4
5
3
3
1
2