Machine setup, Replacement of guide bearings, Replacement of blade edge bearings – Wilton 7020/7040 User Manual
Page 16: Replacement of the wire brush, Uncrating and spotting
17
Refer to Figure 18.1.
1. Remove the cap screw and remove the carbide
guide. Discard the carbide guide.
2. Install the replacement carbide guide on the guide
bearing support. Install the cap screw. Set the
guide so it just contacts the side of the saw blade.
3. Using a machinist's square, check squareness of
the blade to the table.
Replacement of Guide
Bearings
Referring to Firgure 18, remove the cap screw from
the bearing being replaced. Separate the bushing and
cap screw from the bearing. Discard the bearing.
NOTE: There is a light press fit between the bearing
and the bushing.
2. Install bushing in replacement bearing. Install cap
screw through bushing and into guide support.
3. If the bearing being replaced is on an eccentric
bushing, install the bearing on the operator side of
the blade.
4. Turn the eccentric bushing in the guide support
until the bearing contacts the blade.
Replacement of Blade Edge
Bearings
1. Remove the capscrew from the blade edge bearing
being replaced and discard the bearing. Be care-
ful not to lose the spring washer that separates the
bearing from the floating block (see figure 19).
2. Insert the capscrew into the new bearing. Replace
the spring washer onto the capscrew and re-install
into the floating block.
3. If re-adjustment is necessary, loosen the pivot
capscrew and move the floating block so that the
Guide Support
Cap Screw
Blade Edge
Bearing
Figure 19: Blade edge bearing replacement
Adjustment
Cap Screw
Floating Block
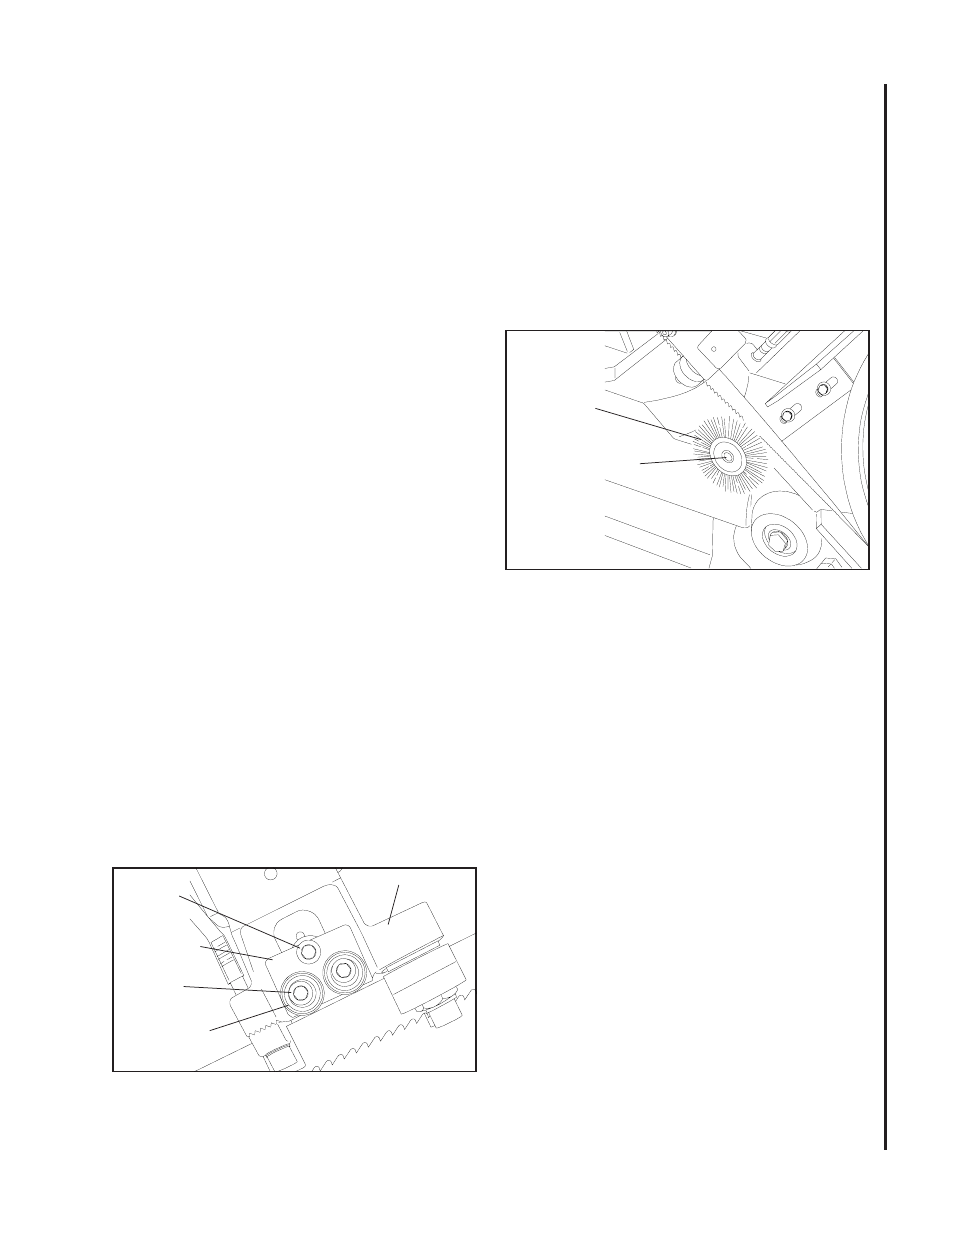
Replacement of the Wire
Brush
1. Loosen four knobs securing the blade cover. Lift
the cover and swing it backward.
2. Remove the attaching screw, spring washer and
washer. Remove and discard the brush (see figure
20).
3. Install replacement brush and secure with screw,
spring washer and washer.
Figure 20: Wire brush
Wire Brush
Screw and Washers
Machine Setup
The saw delivered to you has been adjusted at the
factory. A number of test pieces have been cut using
the saw to verify the accuracy of cutting. Therefore,
the only setup operations required before releasing
the saw for service are spotting the saw and establish-
ing the electrical connections to the motor.
Uncrating and Spotting
Spot the saw where it makes the most sense for the
operations you will probably be doing. If you are go-
ing to be doing cut-off work on very long pieces of
stock, allow plenty of room for the stock, and the infeed
and outfeed supports. Remove the saw from the ship-
ping skid and discard any hold-down devices that were
used to secure the saw to the skid.