Step 1: determine projector location, Step 2: attach mounting plate to projector – Vidikron 30 User Manual
Page 3
3
Vidikron Vision30/50 Ceiling Mt. Kit Installation Instructions
rev. 10-07-05
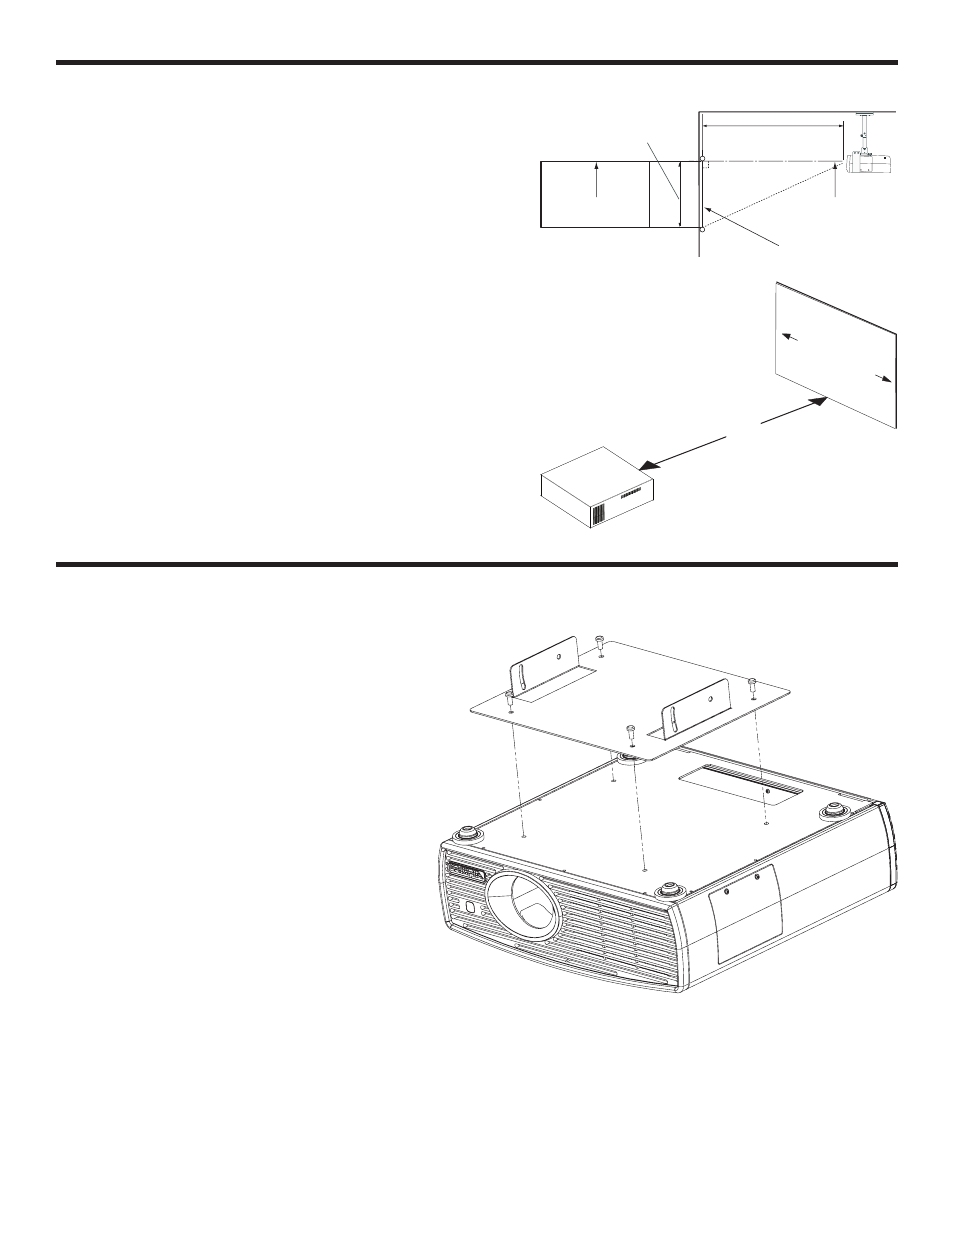
Step 1: Determine Projector Location
Proper placement of the projector relative to the screen will yield
a rectangular, perfectly-centered image that completely fills the
screen.
Ideally, the projector should be positioned perpendicular to the
screen and in such a way that the lens center is aligned with the top
edge of the screen area, and centered horizontally. (The top of the
projected image is even with the lens center when the projector is
inverted.)
You must also take into account the screen width and
the lens throw ratio for the projector you are mounting.
Multiplying these two parameters tells you roughly how
far back the projector should be positioned from the
screen in order to project a focused image large enough
to fill the screen. This is known as throw distance.
Lens Throw Ratios
•
Vision Model 30 = 1.38 to 1.80 x Screen Width
•
Vision Model 30ET = 1.88 to 2.45 x Screen Width
•
Vision Model 50 = 1.82 to 2.42 x Screen Width
Step 2: Attach Mounting Plate to Projector
Note: The diagram at right shows the Vision Model 30.
1. Lay the projector upside down on a padded
surface to prevent damage to the projector
top cover.
2. Place the Projector Mounting Plate (item #2)
on the projector so all four holes on the plate
align with the four mounting inserts in the
bottom of the projector. (If necessary, remove
the feet.)
3. Use the four (4) Phillips Pan Head screws
(item #3) to secure the mounting plate to the
projector. Start them by hand, then securely
tighten them using a Phillips screwdriver.
Screen
Height
Throw Distance
Ceiling
x
Lens Center
Lens Center
�������������������������
������������������������������������������������������������
���
�������������
��