Operation, Connecting the pump suction line priming the pump, Tes ting the gfci – Vita Spa Portable Spa User Manual
Page 12: Top side digital control
P
AGE 10
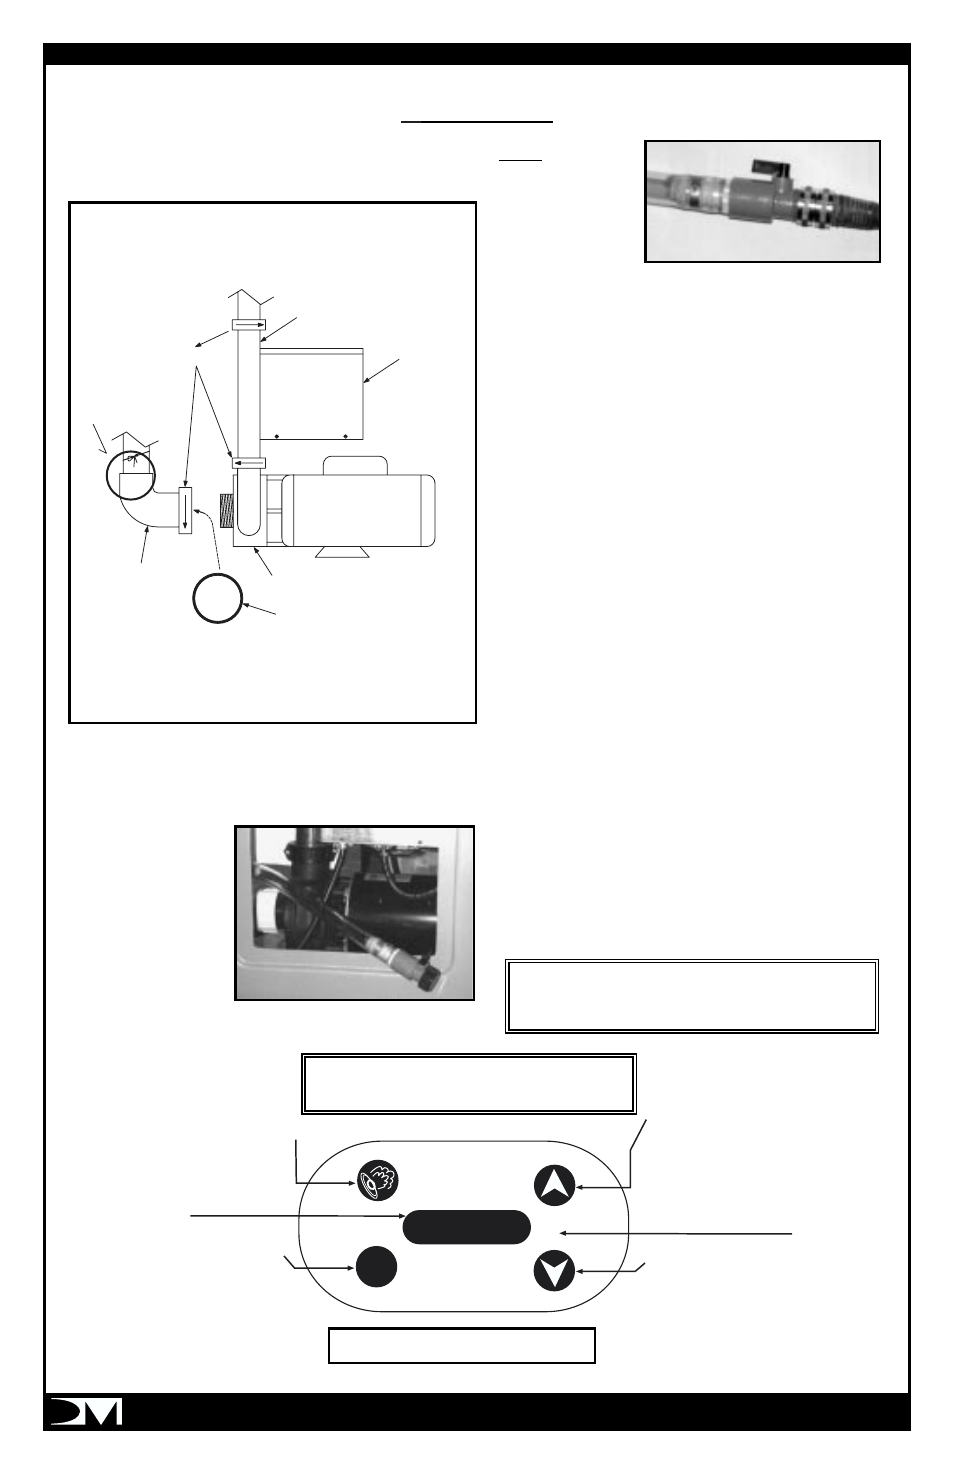
CONNECTING THE PUMP
SUCTION LINE
PRIMING THE PUMP
1. Fill the V
oyager till the water is approximate-
ly 4” over the jets. Do not overfill.
2. Remove the
access door from
the module and
locate the prim-
ing hose system.
3. Remove the
valve cap.
Note: the prim-
ing valve has an
open (inline),
closed (across)
valve handle.
4. Attach by threading onto the priming valve
the male to male hose adapter.
5. Connect your garden hose to the adapter.
6. Open priming valve (inline position) and
start the water flow from your hose.
7. Plug in the voyager GFCI protected cord and
follow start up and programming directions.
8. Once the pump “starts” and you note a con-
tinuous flow of water at the jets-the Voyager
priming phase is complete.
9. Shut off water to hose.
10. Close (across position) prime valve handle.
11. Replace valve cap.
12. Store for future use the adapter
.
TES
TING THE GFCI
Plug in the Ground F
ault Circuit Interrupter
(GFCI)
into a standard 1
10V-15A outlet (See correct type
of outlets on page 5 ).Now is a good time to test
the
GFCI. Please do so as follows:
T
he GFCI is a very important safety device.
T
he
GFCI shuts off the electricity in a fraction of a
second if there is a short anywhere in the system.
The
GFCI plug fits conventional 1
10V
outlets. It is recommended that the
GFCI be
tested prior to each use. Test as follows:
O
PERATION
PROG
HEAT
AM
PM
JET BUTTON:
Controls Hydro jets
• Low Speed
• High Speed
• Off
UP BUTTON
• Raises Temperature
• Forwards Time
• Reverts to Factory Defaults
(Temperature = 102°F - Time = 12PM)
If Held Down For 5 Seconds
DOWN BUTTON
• Lowers Temperature
• Sets Back Time
• Re-Boots System
If Held Down For 5 Seconds
PROGRAM "PROG" BUTTON
• Switches Display From Time
To Temperature and Vice Versa
• Initiates Temperature and Time Settings
if Held Down For 5 Seconds
LED DISPLAY
Shows Time
and Temperature
AM/PM
Indicator
TOP SIDE DIGITAL CONTROL
V
OYAGER LV15 TOP SIDE CONTROL
See Next Page For Instructions
R
EMINDER: DO NOT USE AN EXTENSION CORD.
DOING SO MAY CAUSE DAMAGE THAT WILL
NOT BE COVERED UNDER THE WARRANTY.
UNION
HEATER
CONTROL
PACK
MOTOR
"O"-RING TIED
TO PIPE FOR
SHIPPING ONLY
SUCTION
PIPE
PUMP
"O"-RING
REMOVE O-RING TIED TO PIPE FOR SHIPPING AND INSTALL
THE "O"-RING INTO THE GROOVE ON THE UNION OF THE
SUCTION PIPE UNION. MATE THE UNION TO THE PUMP AND
ROTATE CLOCKWISE UNTIL SNUG. HAND TIGHT ONLY.
IMPORTANT
TIGHTEN UNIONS BEFORE
INSTALLING UNIT INTO SPA