VIEWSONIC DPG807 User Manual
Page 3
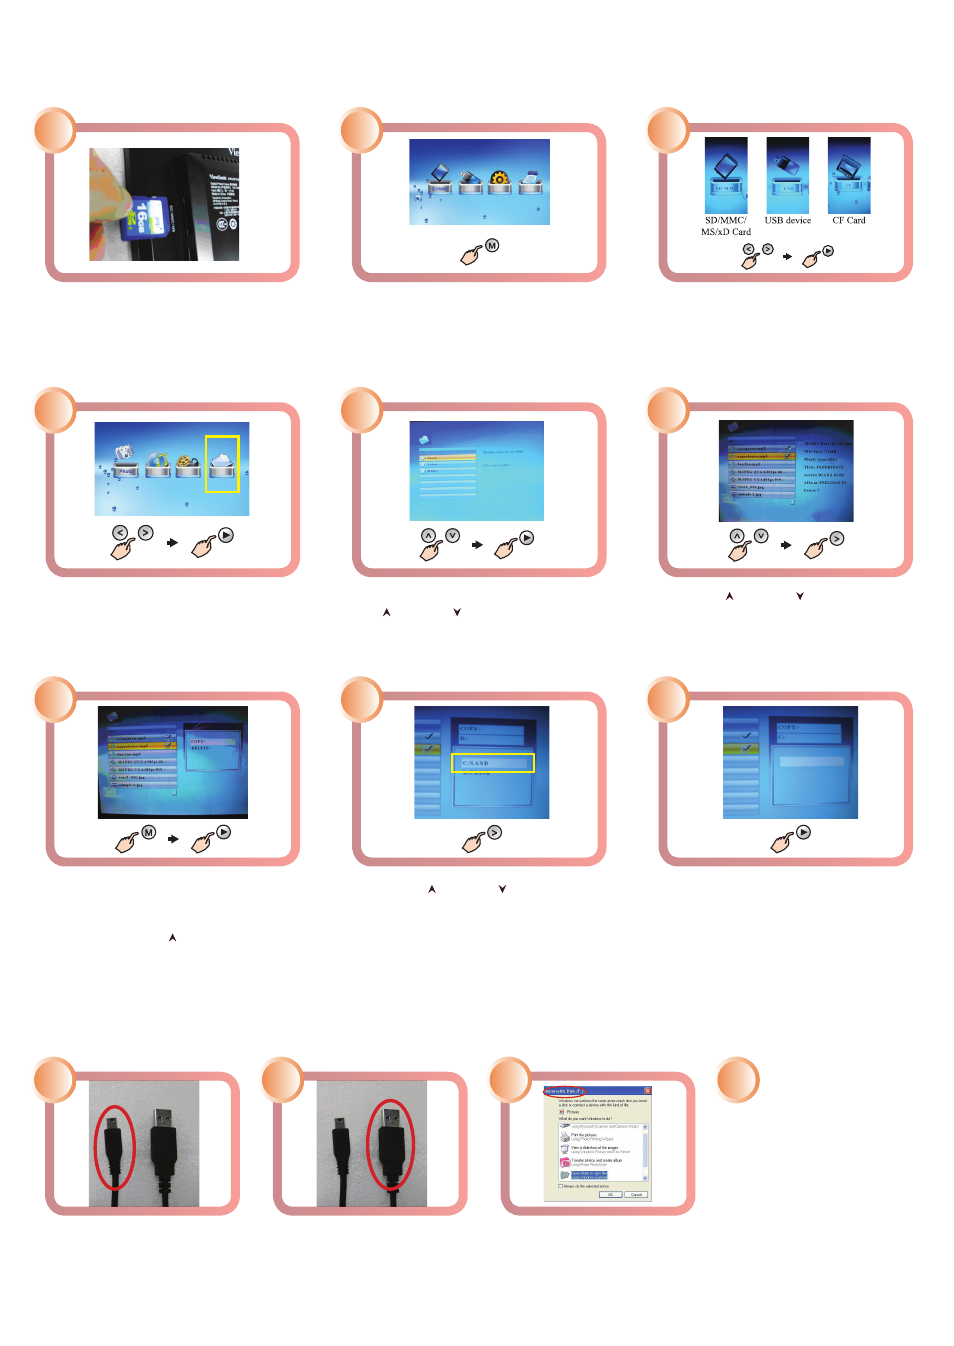
Transfer Files from PC to Photo Frame Internal Memory
Transfer Files from Memory Cards and USB Flash Drive to
Photo Frame Internal Memory
Use the supplied mini-USB
(small connector) to USB Type A
(large connector) cable. Connect
the small connector to the USB
port on the photo frame.
Connect the large connector to
your computer USB port.
Your computer detects and assigns
the appropriate drive letter for the
photo frame internal drive. In this
case, it is F Drive.
1
2
If your memory card or USB flash drive
is not already been inserted, please follow
procedures “Insert Memory Cards and USB
Flash Drive” above.
Tap the Menu [M] button to access the main
menu.
Use the Left [<] or Right [>] button to select
your media source. Tap the Play/Confirm
[►] button to select the highlighted media
source.
2
1
3
6
Use the Left [<] or Right [>] button to select
the “File” icon. Tap the Play/Confirm [►]
button to proceed.
If your file resides inside a folder, use the
Up [ ] or Down [ ] button to select a folder.
Tap the Play/Confirm [►] button to make
your selection.
Scroll Up [ ] or Down [ ] to highlight your
file and tap the Right [>] button to place a
check mark next to your selection. To select
more file, repeat this step.
4
Press and hold the Menu [M] button, a menu
with COPY and DELETE options is displayed
on the right. If “Copy” has not already been
selected, use the Up [ ] button to select COPY
and tap the Play/Confirm [►] button. All
available memory devices are shown.
Use the Up [ ] or Down [ ] button to
highlight NAND drive and tap the Right [>]
button. The destination directory screen is
shown.
To place your file in the root directory, tap
the Play/Confirm [►] button. File copy
is completed when the word “Finished” is
shown.
7
8
9
Some computers may not
recognize the photo frame
internal drive on the first at-
tempt. If this happens, unplug
the USB connector in step 2.
Turn the photo frame off and
then back on. Reconnect the
USB cable in step 2.
4
5
3