Maintaining your snow thrower – Troy-Bilt 31AH9Q77766 User Manual
Page 21
1
6
Maintaining
Your Snow
Thrower
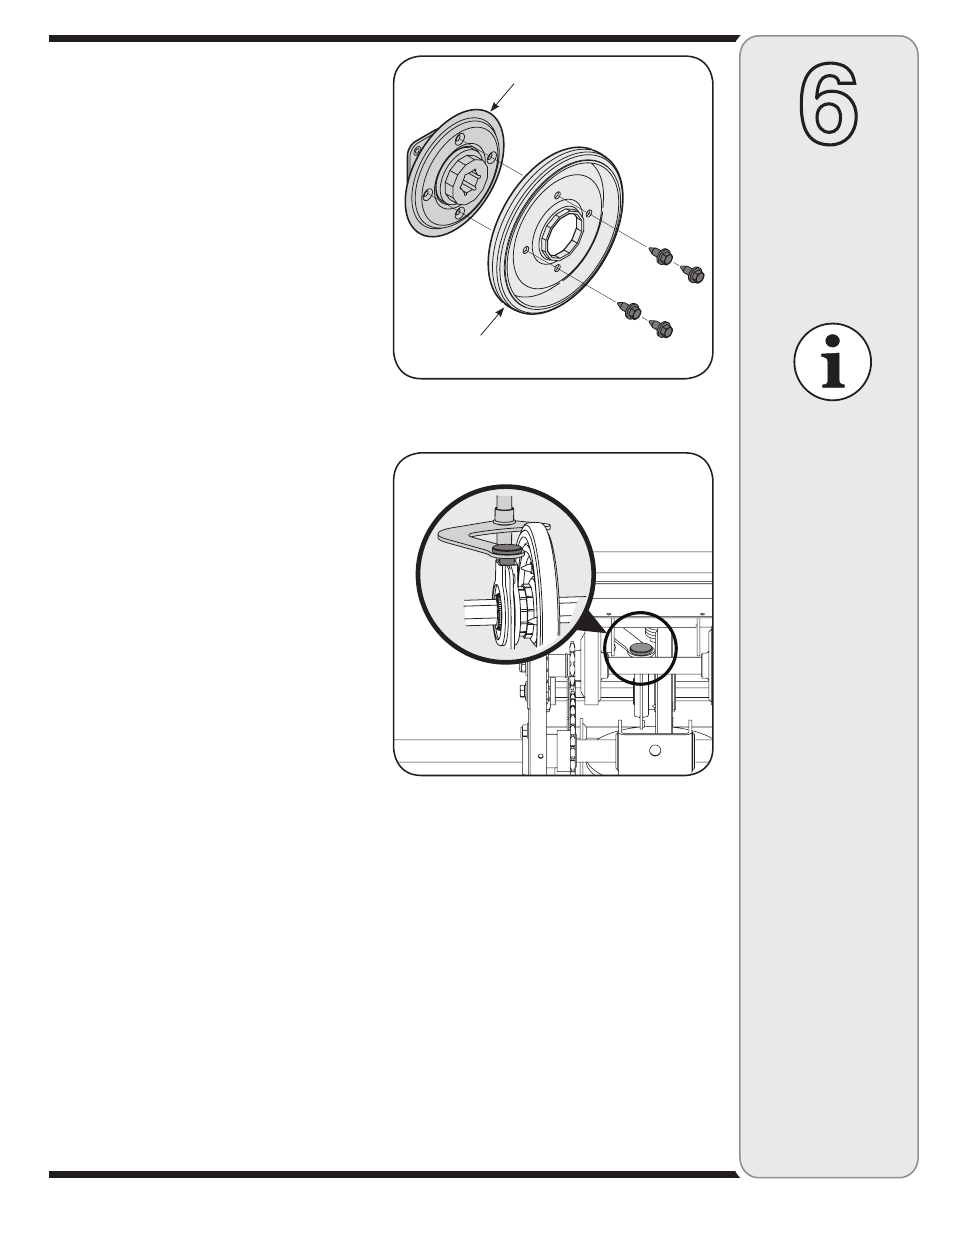
Figure 6-16
Friction Wheel
Hub Assembly
Figure 6-15
• Reassemble the new friction wheel to the hub
assembly, tightening the four screws in rotation and
with equal force. It is important to assemble the friction
wheel symmetrically for proper functioning.
• Insert the pin from the shift arm assembly into the
friction wheel assembly and hold assembly in position.
Refer to Figure 6-16.
• Slide the hex shaft through the left side of the housing
and through the friction wheel assembly.
• Insert the hex shaft through the sprocket and the
spacer. Make certain that the chain engages both the
large and the small sprocket.
NOTE: If the sprocket fell from the snow thrower while
removing the hex shaft, place the sprocket on the hex
shaft. Position the hex hub of the sprocket toward the fric-
tion wheel when sliding the sprocket on to the hex shaft.
• Secure with the cupped washer and hex bolt removed
earlier.
• Secure the frame cover with self-tapping screws. Put
the snow thrower down to its normal operating position.
NOTE: If you placed plastic film under the gas cap, be
certain to remove it.
Specifications are
subject to change
without notification
or obligation. Images
may not reflect your
exact model and
are for reference
purposes only.