Maintaining your snow thrower, Warning – Troy-Bilt 31AH9Q77766 User Manual
Page 18
18
6
Maintaining
Your Snow
Thrower
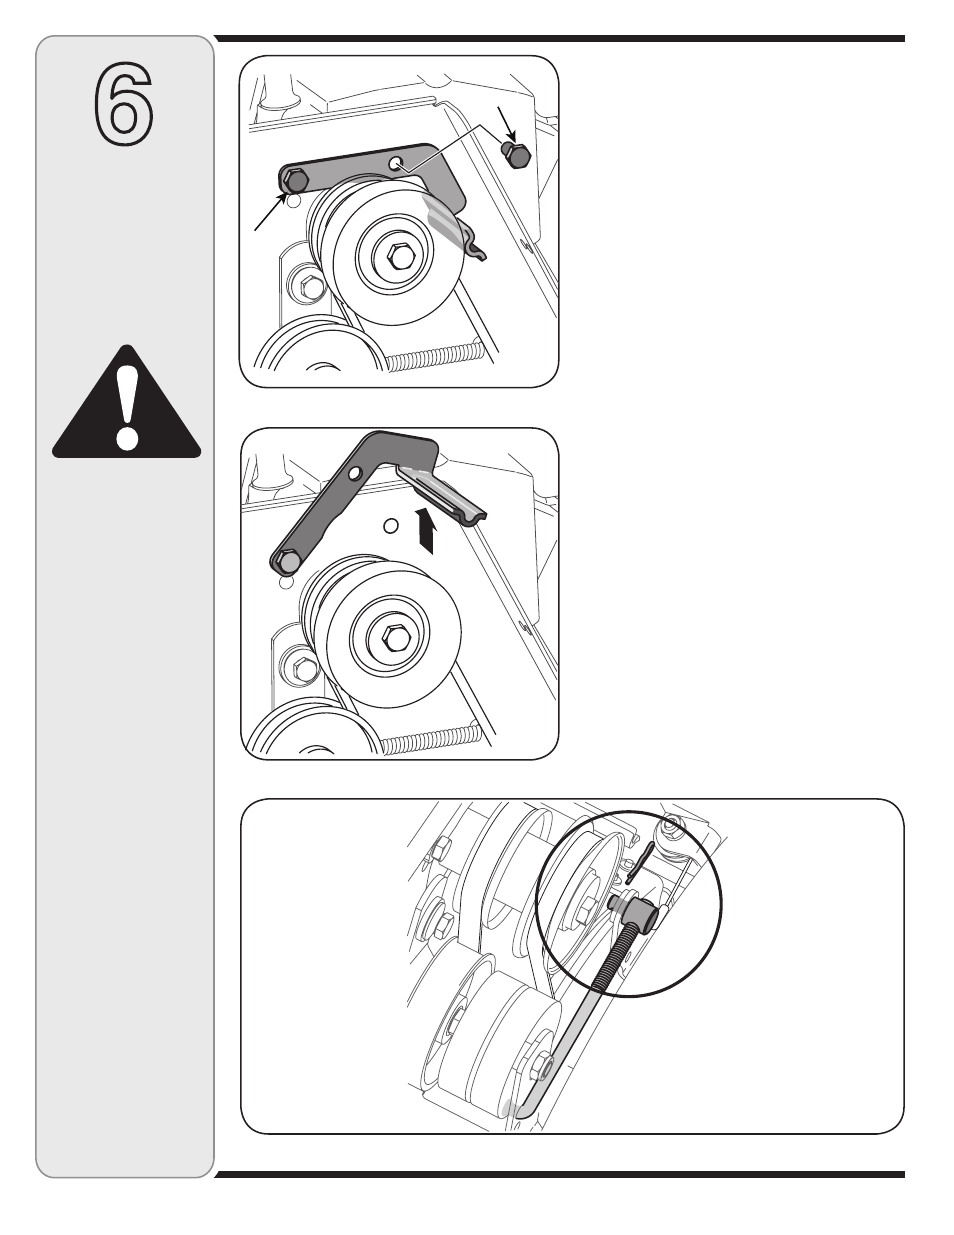
Figure 6-8
Figure 6-6
Figure 6-7
Loosen
Remove
6. Slip the auger control belt (the front belt) off the
engine pulley.
7. Pull the brake bracket assembly towards the cable
guide roller and unhook the auger cable “Z” fitting.
See Figure 6-9.
8. Remove the upper bolts which attach the auger housing
assembly to the frame assembly using a 9/16” wrench.
Refer to Figure 6-4 on previous page.
9. Place a block of wood underneath the auger housing as
shown in Figure 6-10 and
separate auger housing from
the frame by tilting the housing forward and pulling up
the handles.
10. a. Using a 1/2” wrench, remove the hex screw and
cupped washer from the center of the pulley on the
auger housing. See Figure 6-11.
b. Lift the brake bracket assembly out of the pulley
groove
c. Remove the pulley. Be careful not to lose the key.
11. Remove and replace auger belt inside belt keepers.
12. Apply Loctite 262 to the threads of the hex screw used
for mounting the auger pulley.
13. Reassemble pulley to auger housing with hex screw
and cupped washer (cupped side toward the pulley).
Torque hex screw 150-250 in. lbs.
NOTE: Make sure key is in place on shaft and brake puck
is seated in the pulley groove.
WARNING
Always stop engine,
disconnect spark
plug, and ground
against engine before
performing any type
of maintenance on
your machine.