Maintenance & adjustments, Lubrication, Maintenance – Troy-Bilt 4510 User Manual
Page 16
With the mounting holes toward the back, slide the new shave
4.
plate into position and secure with the fasteners removed
previously.
Lubrication
Gear Shaft
The gear (hex) shaft should be lubricated at least once a season
or after every twenty-five (25) hours of operation.
Carefully pivot the snow thrower up and forward so that it
1.
rests on the auger housing.
NOTE: Before pivoting snow thrower up and forward, be
sure to run the fuel tank dry to prevent leakage of fuel.
Remove the frame cover from the underside of the snow
2.
thrower by removing four self-tapping screws which secure
it.
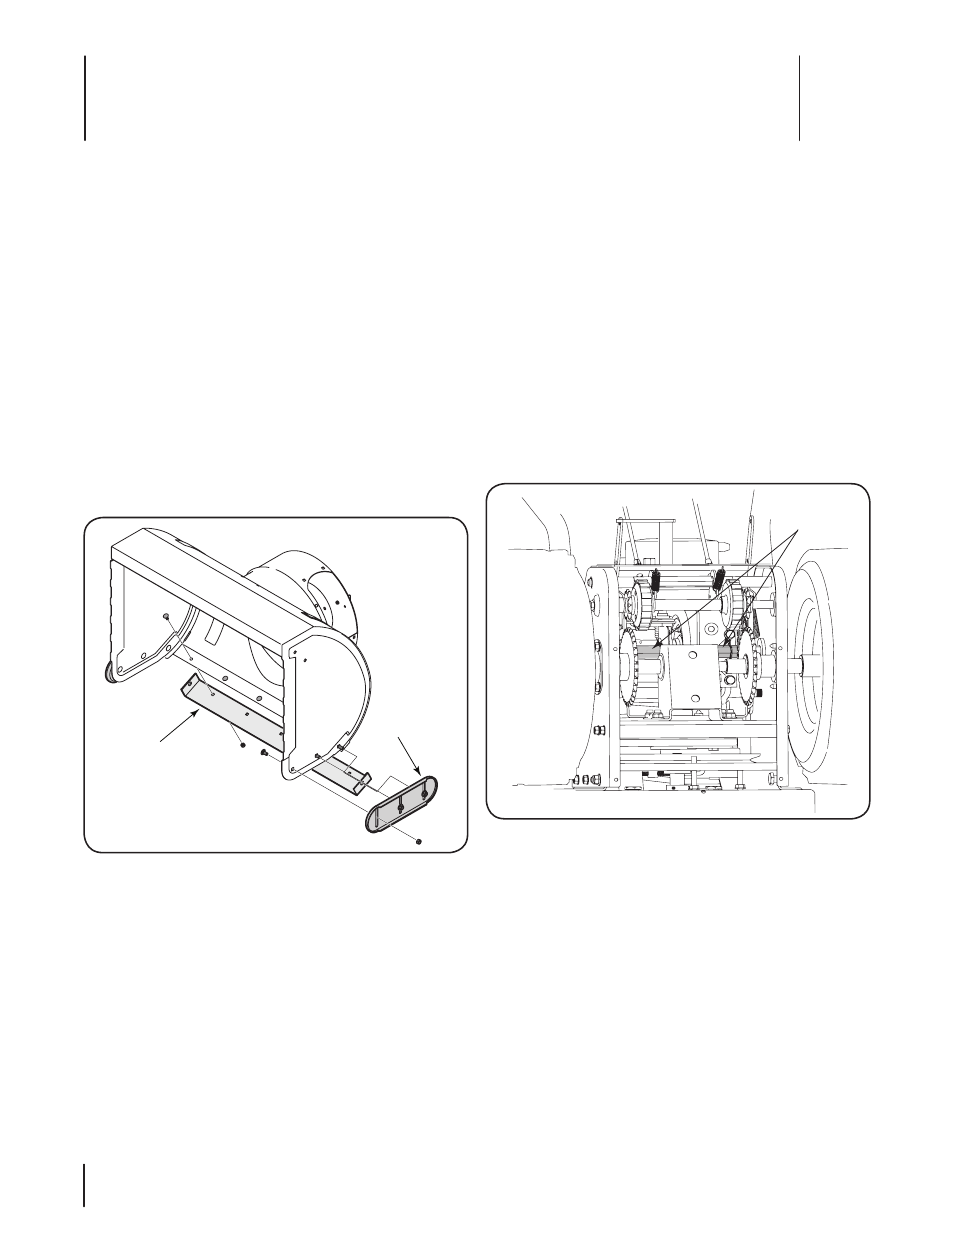
Apply a light coating of engine oil (or 3-in-1 oil) to the hex
3.
shaft. See Fig. 6-2.
NOTE: When lubricating the hex shaft, be careful not to get any
oil on the aluminum drive plate or the rubber friction wheel.
Doing so will hinder the snow thrower’s drive system. Wipe off
any excess or spilled oil.
Wheels
At least once a season, remove all four wheels. Clean and coat the
axles with a multipurpose automotive grease before reinstalling
wheels.
Chute Directional Control
Once a season, lubricate the chute crank bracket bushing and the
spiral with 3-in-1 oil.
Maintenance
Engine
Refer to the Briggs & Stratton Engine manual packed with your
machine for all engine maintenance.
Shave Plate and Skid Shoes
The shave plate and skid shoes on the bottom of the snow
thrower are subject to wear. They should be checked periodically
and replaced when necessary.
NOTE: The skid shoes on this machine have two wear edges.
When one side wears out, they can be rotated 180° to use the
other edge.
To Remove skid shoes:
Remove the six carriage bolts, hex nuts, and bell washers
1.
that secure the two skid shoes to the sides of the auger
housing. Refer to Figure 6-1.
Position the new skid shoes and secure with the carriage
2.
bolts, bell washers, and hex nuts. Make certain the skid
shoes are adjusted to be level. See Figure 6-1.
To replace shave plate:
Remove the hex nuts, bell washers, and carriage bolts that
1.
secure the shave plate to the bottom of the snow thrower
housing.
Remove the rear most hex nut, bell washer, and carriage bolt
2.
securing the back of each skid shoe to the sides of the
housing. Loosen the remaining hex nuts securing the skid
shoes.
Slide the shave plate out of the off-set slot at the bottom of the
3.
housing, and from between the skid shoes and side panels
of the housing.
Figure 6-1
Figure 6-2
Skid Shoe
Shave Plate
Hex
Shaft
Maintenance & Adjustments
6
16