8–recording, Recording environment, Volume balance adjustment – Tascam BB-1000CD User Manual
Page 38
38
TASCAM BB-1000CD
8–Recording
Recording environment
The two pairs of built-in stereo microphones on the front
and rear enable you to record 360° sound. You can also
record sound using external equipment connected to the
LINE IN
jack or the
EXT MIC A/B (L/R)
jacks.
Selecting the input
Follow these procedures to select the input.
NOTE
The signals from the selected input are recorded when recording.
1.
Press the
INPUT
key to open the
INPUT
screen.
2.
Press the
CURSOR [
§
/
¶
]
key to select the
SOURCE
.
3.
Turn the
DATA
wheel to select the input you want.
FRNT/REAR:
•
Select this when you want to record the sound all around
the unit.
FRNT/LINE:
•
Select this when you want to record the sound in front of
the unit or that through the
LINE IN
jack. You can also
mix them up.
EXT/REAR:
•
Select this when you want to record the sound from ex-
ternal microphones or that behind the unit. You can also
mix them up.
EXT/LINE:
•
Select this when you want to record the sound from the
external microphones or that through the
LINE IN
jack.
You can also mix them up.
CAUTION
You do not have to take care of howling as sound from micro-
phones does not come out of the built-in speakers. Use headphones
or output from the LINE OUT jack to monitor the sound.
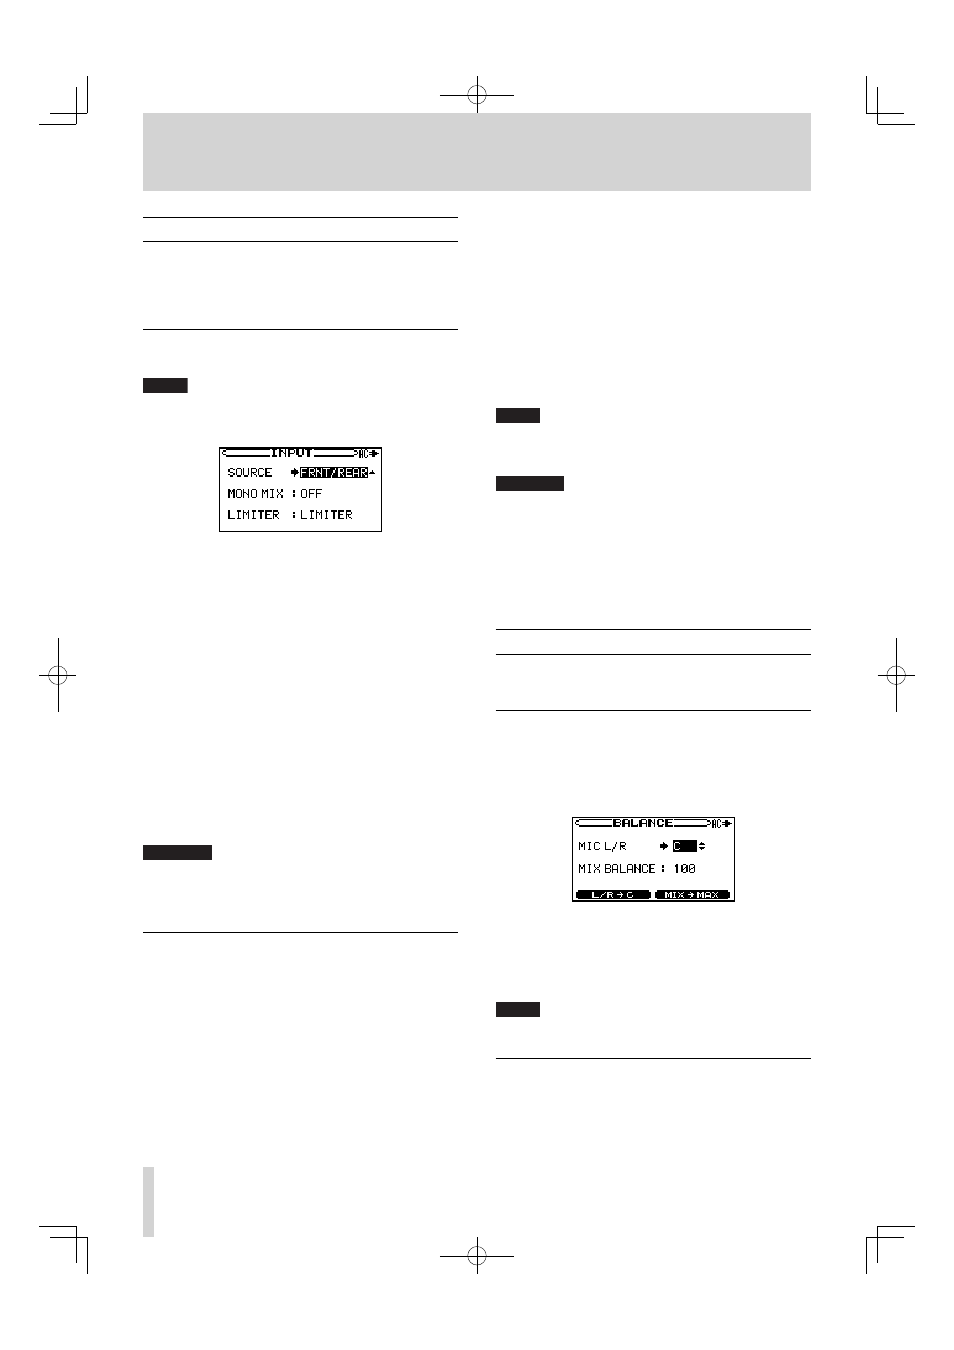
Adjusting the input settings
You can adjust the input settings on the
INPUT
screen.
Slide the
AUTO/LIMITER
switch on the left side to
ON
to
set the
LIMITER
setting effective.
MONO MIX
•
The signals of the left and right channels are mixed into
a monaural signal. Select “
ON
” when using one monau-
ral microphone only.
LIMITER
•
Use this to select the function activated when the
AUTO/
LIMITER
switch is “
ON
”.
LIMITER
•
The input gain changes automatically according to
the input signal level to prevent distortion caused by
excessively loud sound.
AGC HIGH/AGC LOW
•
The input gain changes automatically according to the
input signal level to keep the input signal in a certain
level. Useful when recording conversations such as in
meetings and conferences.
Select
AGC HIGH
when input level is weak, and
AGC
LOW
when strong.
NOTE
When recording live performances and in other situations where
unexpected loud sounds might occur, set this function to LIMITER to
prevent input clipping and allow recording without distortion.
CAUTION
The input signal level may largely diff er depending on the type
•
of the external microphone you use. Generally, the level is higher
when using a condenser microphone and lower when using a
dynamic microphone. Especially, you may not get enough signal
strength when using a low-sensitive dynamic microphone.
The input level adjustment using the FRONT MIC/EXT MIC and
•
REAR MIC/LINE knobs is ineff ective when using AGC.
Volume balance adjustment
You can adjust the volume levels of microphones and vol-
ume balance of playback signal on the
BALANCE
screen.
Adjusting the balance of microphones
You can adjust the
L/R
balance of the microphone input.
Use this to adjust the volume balance of the left and right
channels when using two external microphones.
1.
Press the
BALANCE
key to open the
BALANCE
screen.
2.
Press the
CURSOR [
§
/
¶
]
key to select the
MIC L/R
item.
3.
Turn the
DATA
wheel to adjust the balance.
The adjustable range is
L50
-
C
(center) -
R50
.
NOTE
Pressing the F1 key returns the balance to C immediately.
Adjusting the level of playback signal
You can adjust the balance between the playback volume
of media and that of input. Use this to adjust the balance
between the playback volume and instrument volume when
overdubbing.