Print information (continued) – Toshiba PDR-M71 User Manual
Page 105
- 103 -
Getting
Ready
Taking
Photographs
Playing
Back Images
Other
Applications
Additional
Information
Erasing
Images
Handy
Functions
Print Information (continued)
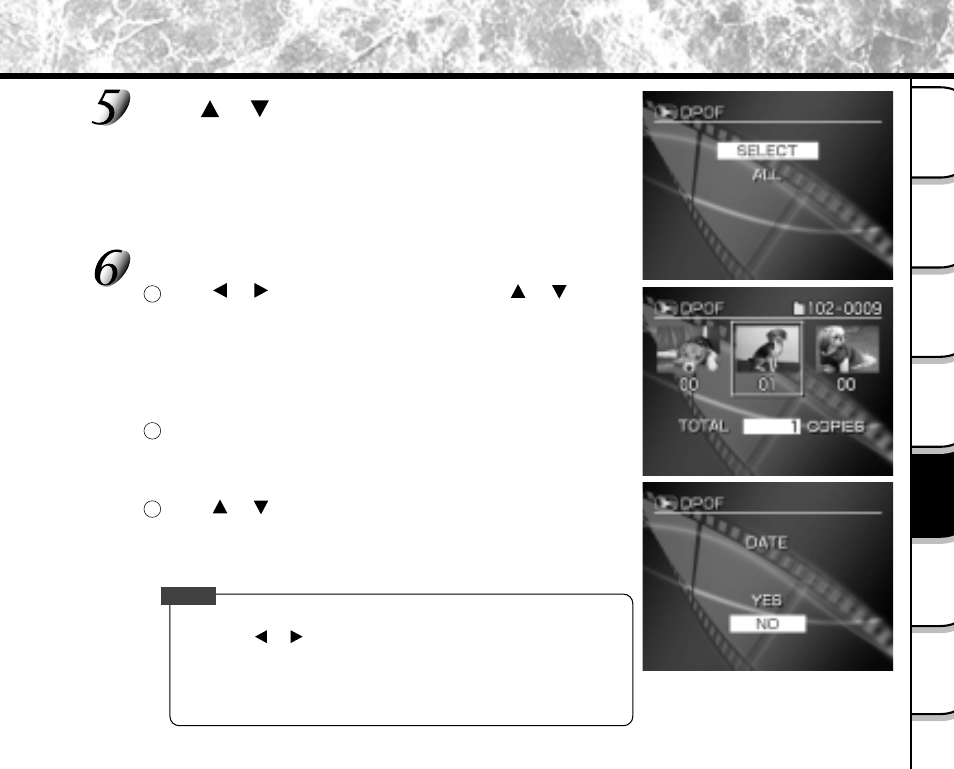
Press
or
to select [SELECT] or [ALL], and press
ENTER.
[SELECT]
: Sets one image at a time.
[ALL]
: Sets all images at once.
Set the number of prints and date.
1
Press
or
to select the image, and press
or
to set the number of copies.
Up to 99 copies can be set for a single image.
When the Zoom switch is pressed toward “T” during
image selection, the image is displayed to fit the entire
screen. To redisplay the original image, move the Zoom
switch towards the “W”. (Zoom switch
➲ Page 21)
2
When you have finished this setting, press ENTER.
The DATE screen is displayed.
The date of the image can be printed in the lower right corner of
the picture.
3
Press
or
to select [YES] or [NO], and press ENTER.
If you want to print the date, select [YES] and press ENTER.
If you do not want to print the date, select [NO] and press ENTER.
The message “CREATE DPOF FILE?” is displayed.
Memo
• It is possible to play back any images in any folders by
pressing or during playback.
☞
About Folders ➲ Page 92
• The date printed in the picture will depend on the date set into
the camera. For the correct date to be printed onto the picture,
please check the date set into your camera before the image is
photographed. (To correctly set the time and date ➲ Page111)