TP-Link TL-SL3452 User Manual
Page 86
– Unchecked — Maintains the list of recipients.
2. Click
. The Add SNMP Notification Receiver Page opens:
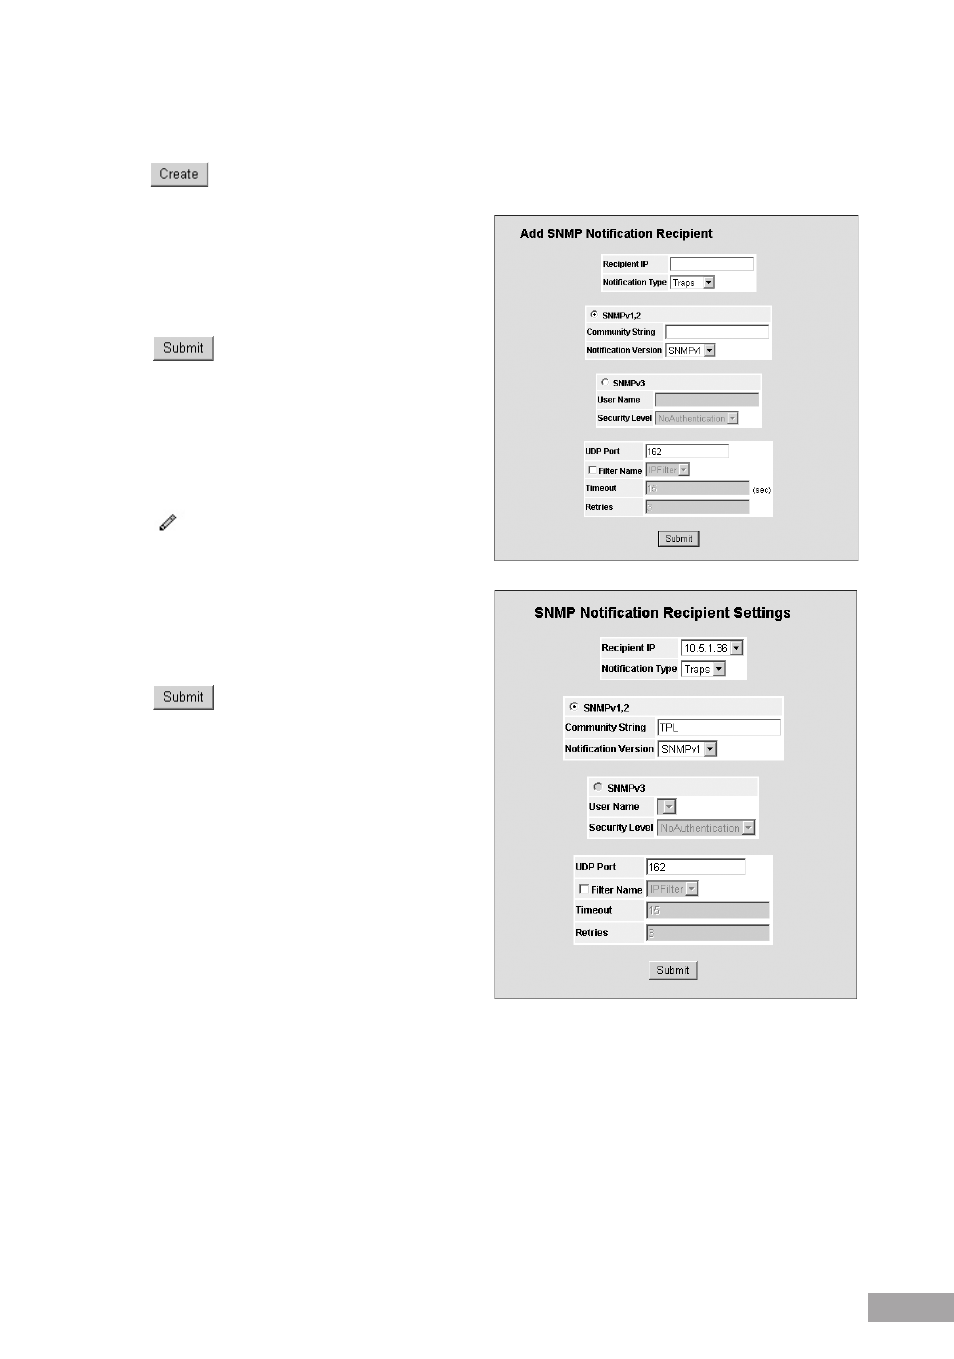
Figure 116: Add SNMP Notification Receiver Page
3. Define the Recipient IP, Notification Type, SNMPV1,v2c
or SNMPv3, UPD Port, Filter Name, Timeout, and
Retries fields.
4. Click
. The SNMP Notification recipients are
defined, and the device is updated.
To modify SNMP notification recipients:
1. Click
System > SNMP Management > Notification
> Notification Receiver. The SNMP Notification
Receiver Page opens:
2. Click
. The SNMP Notification Receiver Settings
Page opens:
Figure 117: SNMP Notification Receiver Settings Page
3. Modify the Notification Type, SNMPV1,v2c or SNMPv3,
UPD Port, Filter Name, TImeout, and Retries fields.
4. Click
. The SNMP notification recipients are
defined, and the device is updated.