3 panel layout, 1 the front panel, 2 the rear panel – TP-Link Cable/DSL Router TL-R860 User Manual
Page 8: Panel layout, The front panel, The rear panel
TL-R860
Cable/DSL Router User Guide
- 2 -
1.3 Panel Layout
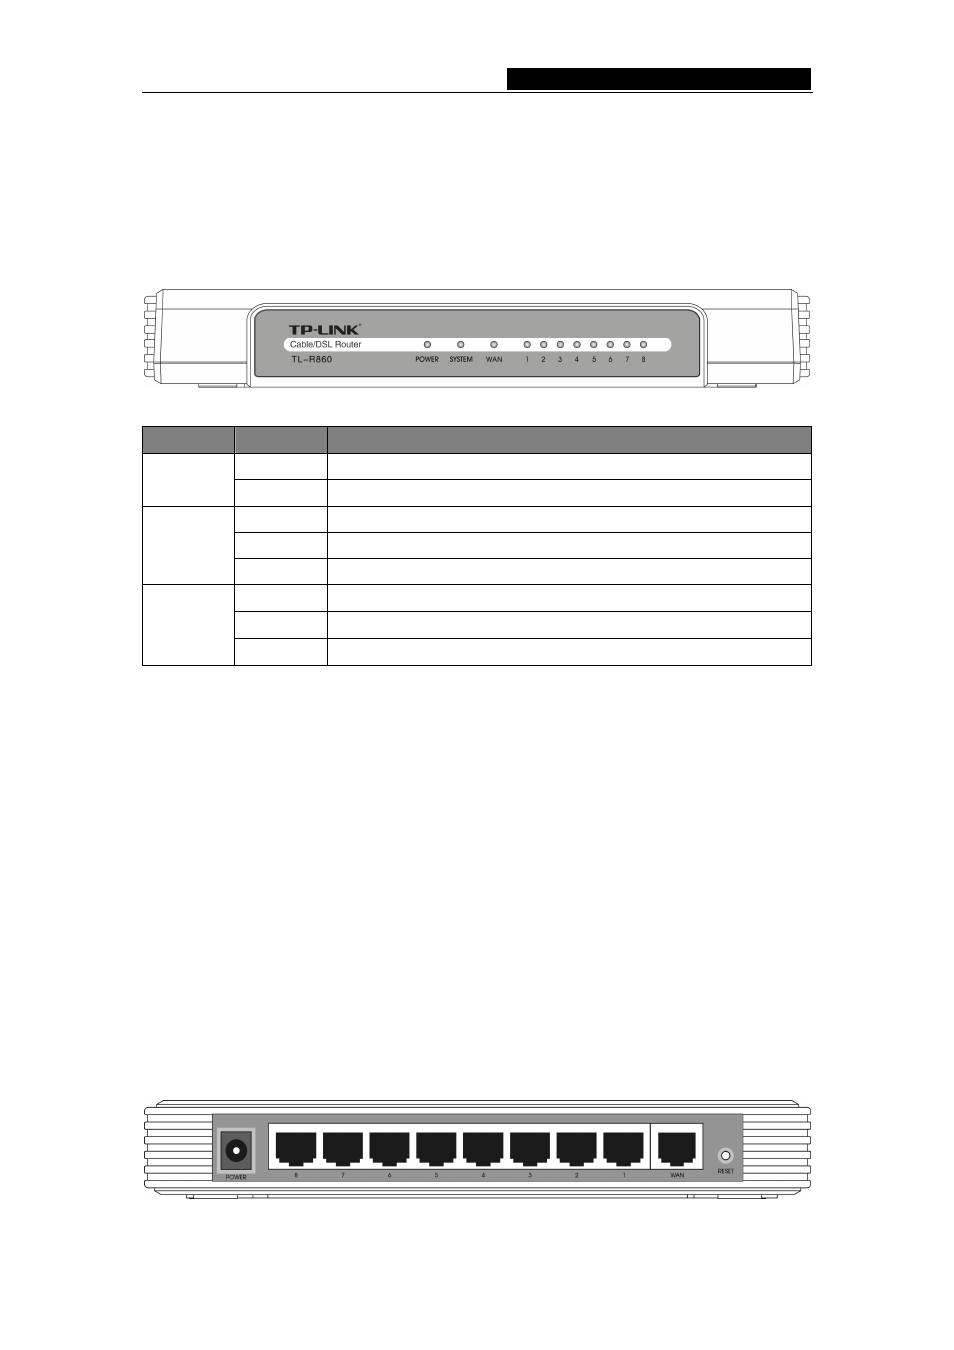
1.3.1 The Front Panel
The front panel of the TL-R860 consists of several LED indicators, which is designed to
indicate connections. Viewed from left to right. Table 1-1 describes the LEDs on the front
panel of the router.
Figure 1-1 Front Panel sketch
Name
Action
Description
Not lit
No power
Power
Lit up
Power on
Not lit
The Router has an error
Lit up
The Router has an error
System
Flashing The router works properly
Not lit
There is no device linked to the corresponding port
Lit up
There is a device linked to the corresponding port but no activity
Link/Act
Flashing There is an active device linked to the corresponding port
Table 1-1 The LEDs description
1.3.2 The Rear Panel
The rear panel contains the following features. (Viewed from left to right:)
¾
RESET: Factory Default Reset button
There are two ways to reset the router's factory defaults:
1. Use
the
Factory Defaults function on System Tools -> Factory Defaults page
in the router's Web-based Utility.
2. Use the Factory Default Reset button: Press the Reset button for five seconds
and then wait for the router to reboot.
)
Note:
Ensure the router is powered on before it restarts completely.
¾
WAN: WAN RJ45 port for connecting the router to a cable, DSL modem or Ethernet
¾
1-8: Eight LAN 10/100Mbps RJ45 ports for connecting the router to the local PCs
¾
POWER: AC power socket: only use the power adapter supplied with the TL-R860
Cable/DSL Router, use of a different adapter may result in product damage.
Figure 1-2 Rear Panel sketch