Installing the batteries – Targus Wireless Optical Stow-N-GoTM Notebook Mouse 30 User Manual
Page 3
Wireless Optical Stow-N-Go
TM
Notebook Mouse
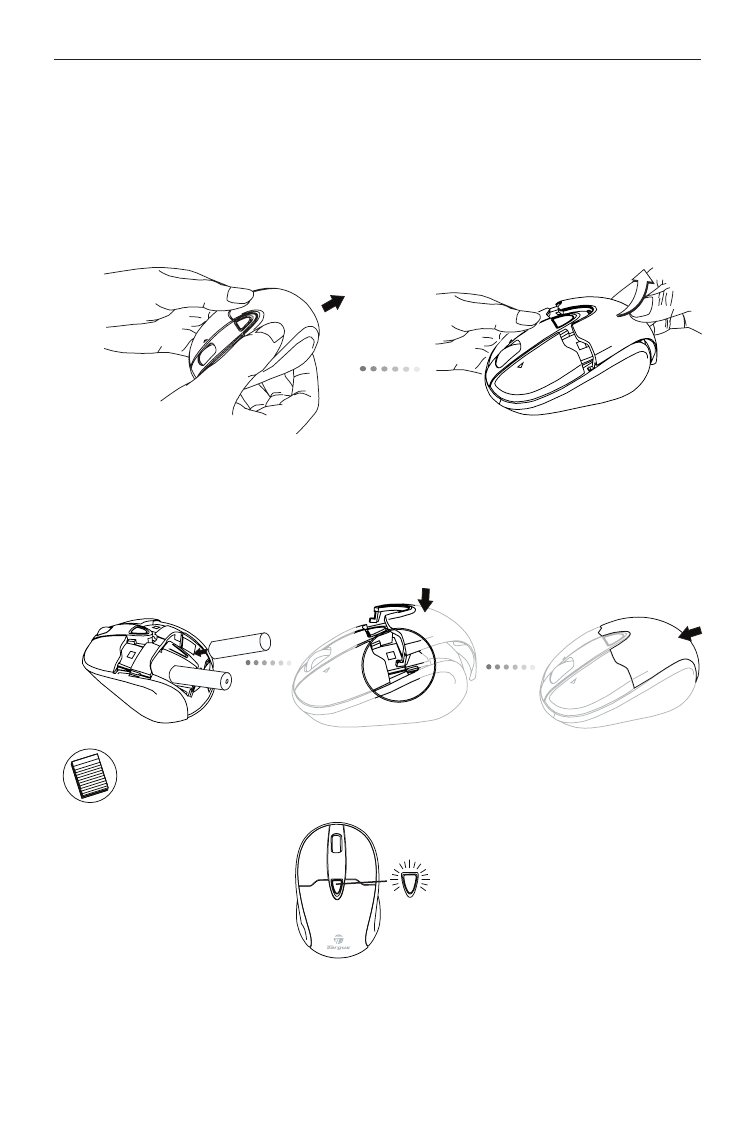
Installing the Batteries
1. Remove the battery cover from the back of the mouse by sliding
off the cover of the mouse. Hold the mouse in your hands and with
the back of the mouse away from you. Press down on the corners
of the battery cover and slide towards the back of the mouse. Lift
the cover off from the back of the mouse.
2. Insert two AA-size batteries, making sure that the positive (+)
and negative (-) ends of each battery match the polarity indicators
inside the battery compartment. To replace the battery cover,
place the cover on top of the mouse and slide forward until it clicks
into place.
NOTE: WHEN THE BATTERY IS LOW, THE LOW POWER INDICATOR LIGHT LOCATED IN
THE DPI SWITCHING BUTTON WILL FLASH RED. PLEASE REPLACE WITH TWO NEW
AA-SIZE BATTERIES.
DPI switching
button
When power is on, the mouse goes into “sleep mode” after 8
minutes of inactivity. To activate the mouse, press any mouse
key.
2