Off-season storage, Drive control, Chute directional control – Troy-Bilt 2690 User Manual
Page 19
Drive Control
When the drive control is released and in the disengaged “up”
position, the cable should have very little slack. It should NOT be
tight.
NOTE: If excessive slack is present in the drive cable or if the snow
thrower’s drive is disengaging intermittently during operation,
the cable may be in need of adjustment.
Check the adjustment of the drive control as follows:
With the drive control released, push the snow thrower
1.
gently forward. The snow thrower should roll freely.
Engage the drive control and gently attempt to push the
2.
snow thrower forward. The track should not turn. The snow
thrower should not roll freely.
With the drive control released, move the shift lever back
3.
and forth between the R2 position and the F6 position
several times. There should be no resistance in the shift
lever.
If any of the above tests failed, the drive cable is in need of
4.
adjustment. Proceed as follows:
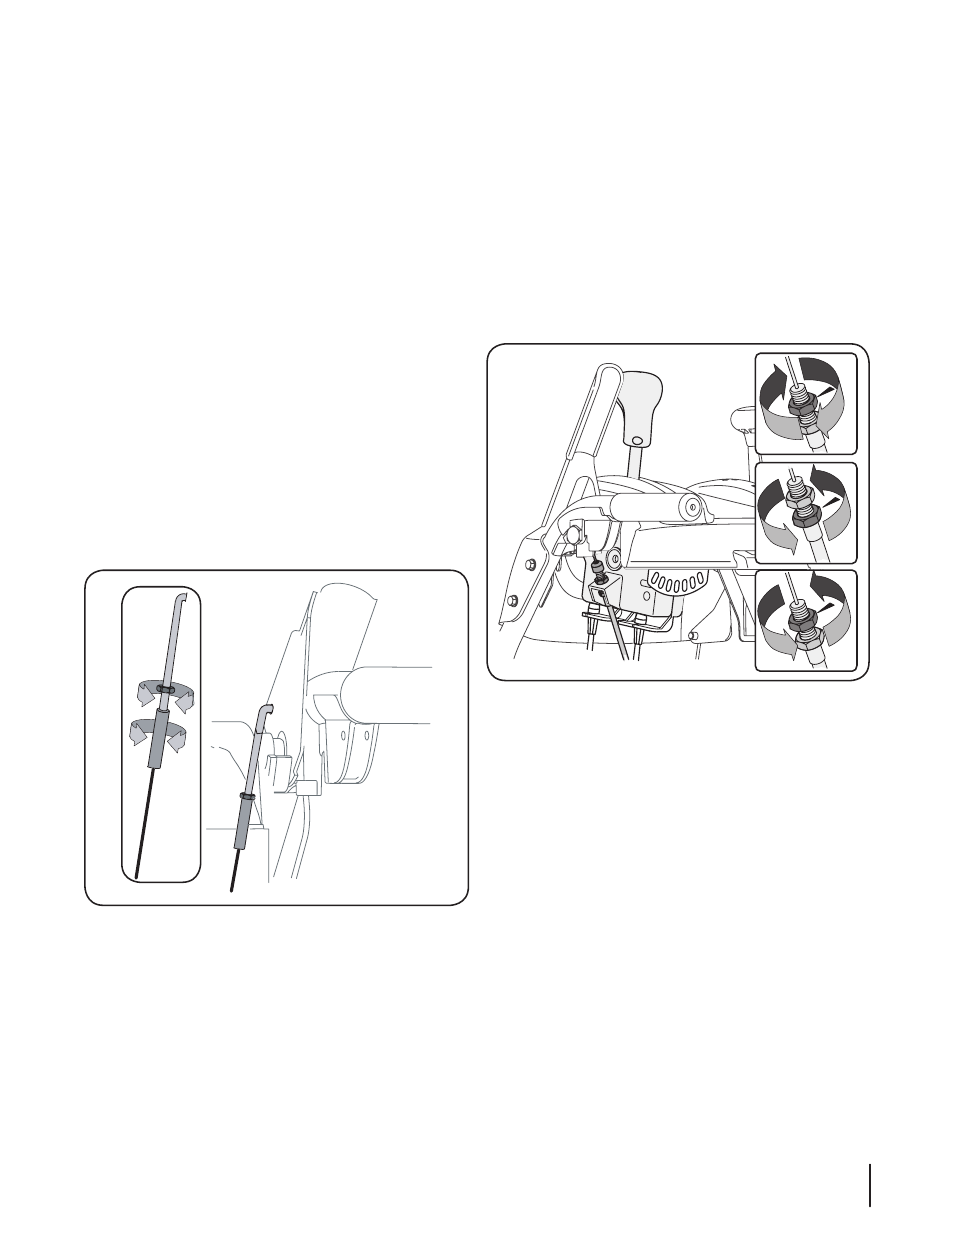
To readjust the drive, loosen the hex jam nut on the auger
5.
control cable “Z” fitting.
Thread the ferrule without turning the cable onto the “Z”
6.
fitting until there is no slack in the cable. See Fig. 6-6. Do
not overtighten the cable. Hold the flats on the ferrule with
pliers and tighten the jam nut against the ferrule.
Rotate the coupling end of the cable counterclockwise to
7.
provide more slack.
Retighten the hex jam nut. See Fig. 6-6.
8.
Repeat Auger Control Test to verify proper adjustment has
9.
been achieved.
Chute Directional Control
If the chute assembly does not have full range from left-to-right,
the chute control cables can be adjusted to take up slack:
NOTE: When making any adjustments to the chute directional
control cables be sure that the handle is in the center positon to
ensure proper adjustment.
Using a ½” wrench, loosen the upper and lower hex nuts
1.
found on one cable adjuster.
Grasp the metal cable housing and gently pull downward
2.
to take up slack (usually no more than 1⁄4-inch) in the cable
before retightening both hex nuts.
Repeat on the other cable adjuster until the chute
3.
assembly has full range from left-to-right. See Fig. 6-7.
Off-Season Storage
If the snow thrower will not be used for 30 days or longer, follow
the storage instructions below.
Lubricate the machine as instructed earlier in this section.
1.
Store in a clean, dry area.
2.
If storing the snow thrower in an unventilated area,
3.
rustproof the machine using a light oil or silicone to coat
the snow thrower.
Clean the exterior of the engine and the snow thrower.
4.
NOTE: Refer to the Engine Maintenance section for information
on storing your engine.
Figure 6-6
Figure 6-7
19
s
ectiOn
6 — M
aintenance
& a
djustMents