Thermador KBUDT4865E User Manual
Page 21
21
5. Replace the top grille in the cabinet side trims and pull the
panel down slightly to lock it into place.
L eve l R e f r i g e ra t o r
NOTE: Custom or full-overlay door panels must be installed
before leveling the refrigerator.
1. Open the doors and place the level on top of the refrigerator
frame as shown. Check to see whether the refrigerator is level
from left to right.
2. Use the leveling bolts to adjust the leveling legs until the
refrigerator is level from left to right.
3. Place the level(s) on shelf or shelves. Check to see whether
the refrigerator is level from front to back.
4. Use the leveling bolts to adjust the leveling legs until the
refrigerator is level from front to back.
5. Be sure that all four leveling legs contact the floor and
support the full weight of the refrigerator.
6. Make final check to ensure the refrigerator is level.
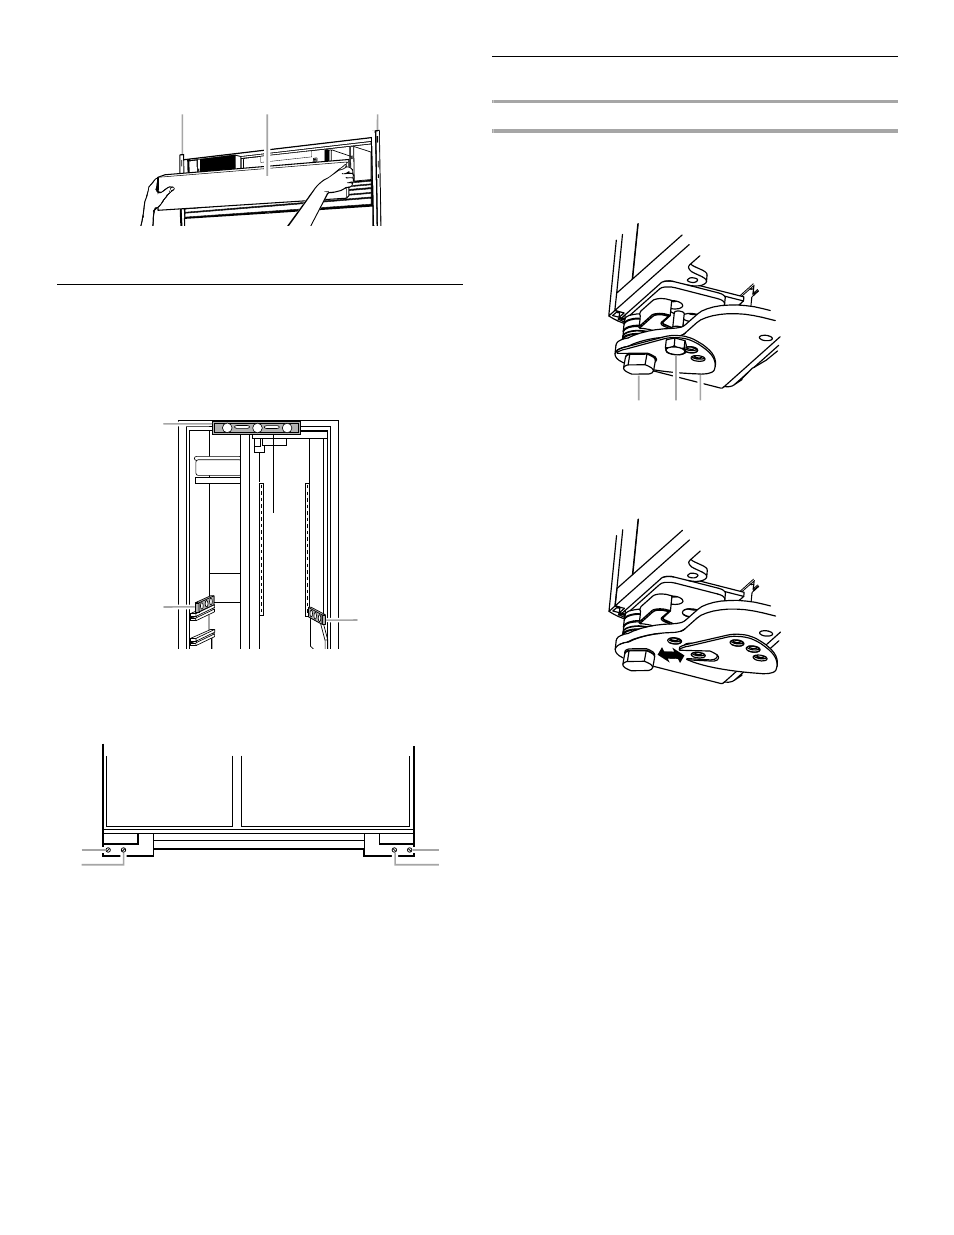
A d j u s t D o o r s
Door Height Adjustment
Use the following steps to adjust the door height, up or down,
after the doors have been leveled.
1. Open the freezer or refrigerator door. Remove the door stop
screw from the bottom side of the bottom hinge.
2. Remove the locking plate as shown.
3. Turn the bushing located underneath the bottom of the hinge
using the open-end wrench. Turning the bushing to the left
(counterclockwise) will raise the door. Turning the bushing
right (clockwise) will lower the door.
4. After adjusting, check the doors to make sure they are even
at the top and bottom. If the doors are not even, continue to
turn the bushing to adjust the door height.
5. Replace the locking plate.
6. Turn the bushing slightly to align the hinge and locking plate
screw holes.
7. Replace the door stop screw or screws and tighten.
8. Recheck to make sure the doors are aligned and even.
A. Top grille
B. Cabinet side trim
A. Level to check left to right leveling
B. Level to check front to back leveling
A. Rear leveling bolt
B. Front level bolt
B
B
A
A
B
B
A
B
A
B
A. Bushing
B. Door stop screw
C. Locking plate
A
B
C