Maintenance – Trane RTUB 207-224 User Manual
Page 26
26
For units without discharge valve
option
1. Shut off the compressor and
disconnect all electrical service to
the compressor.
2. Vacuum the refrigerant out of the
circuit.
3. Remove the seven bolts on the oil
filter cover. A pan may be
necessary to catch any oil that is
released after the cover is
loosened.
4. Remove the cover and the oil filter
element.
5. Install the new filter element.
6. Coat the new cover gasket with
refrigerant oil.
7. Install the cover plate and cover
plate gasket.
8. Install a new copper gasket under
the bolt head that had one at time
of removal. Replace all other bolts
and tighten to 89.5 Nm.
9. Vacuum the refrigerant circuit at
500 micron and isolate the
vacuum pump.
10. Confirm that no moisture or leaks
are present by letting the vacuum
stand for 2 hours. The pressure
should not raise more than
250 microns.
11. Charge the unit with oil, in a
quantity equal to what has been
removed, by using the charging
valve placed on the oil filter.
Note: the oil is very sensitive to
moisture. Use the oil immediately
after the oil can has been opened.
12. Charge the unit with refrigerant
R134a refer to charging
procedure).
For units with the discharge valve
option:
1. Close the angle valve placed on
the refrigerant liquid line to store
the refrigerant in the condenser.
2. After the compressor stops, close
the compressor discharge valve
and disconnect the unit.
Note: Do not make successive
vacuums by using the compressor.
Irreversible compressor damage
could occur.
3. Vacuum the remaining refrigerant
in the evaporator.
4. Remove the seven bolts on the oil
filter cover. A pan may be
necessary to catch any oil that is
released after the cover is
loosened.
5. Remove the cover and the oil filter
element.
6. Install the new filter element.
7. Coat the new cover gasket with
refrigerant oil.
8. Install the cover plate and cover
plate gasket.
9. Install a new copper gasket under
the bolt head that had one at time
of removal. Replace all other bolts
and tighten to 89.5 Nm.
10. Vacuum the refrigerant circuit at
500 micron and isolate the
vacuum pump.
11. Confirm that no moisture or leaks
are present by letting the vacuum
stand for 2 hours. The pressure
should not raise more than
250 microns.
12. Charge the unit with oil, in a
quantity equal to what has been
removed, by using the charging
valve placed on the oil filter.
Note: the oil is very sensitive to
moisture. Use the oil immediately
after the oil can has been opened.
13. Open all the valves before
restarting the chiller.
Maintenance
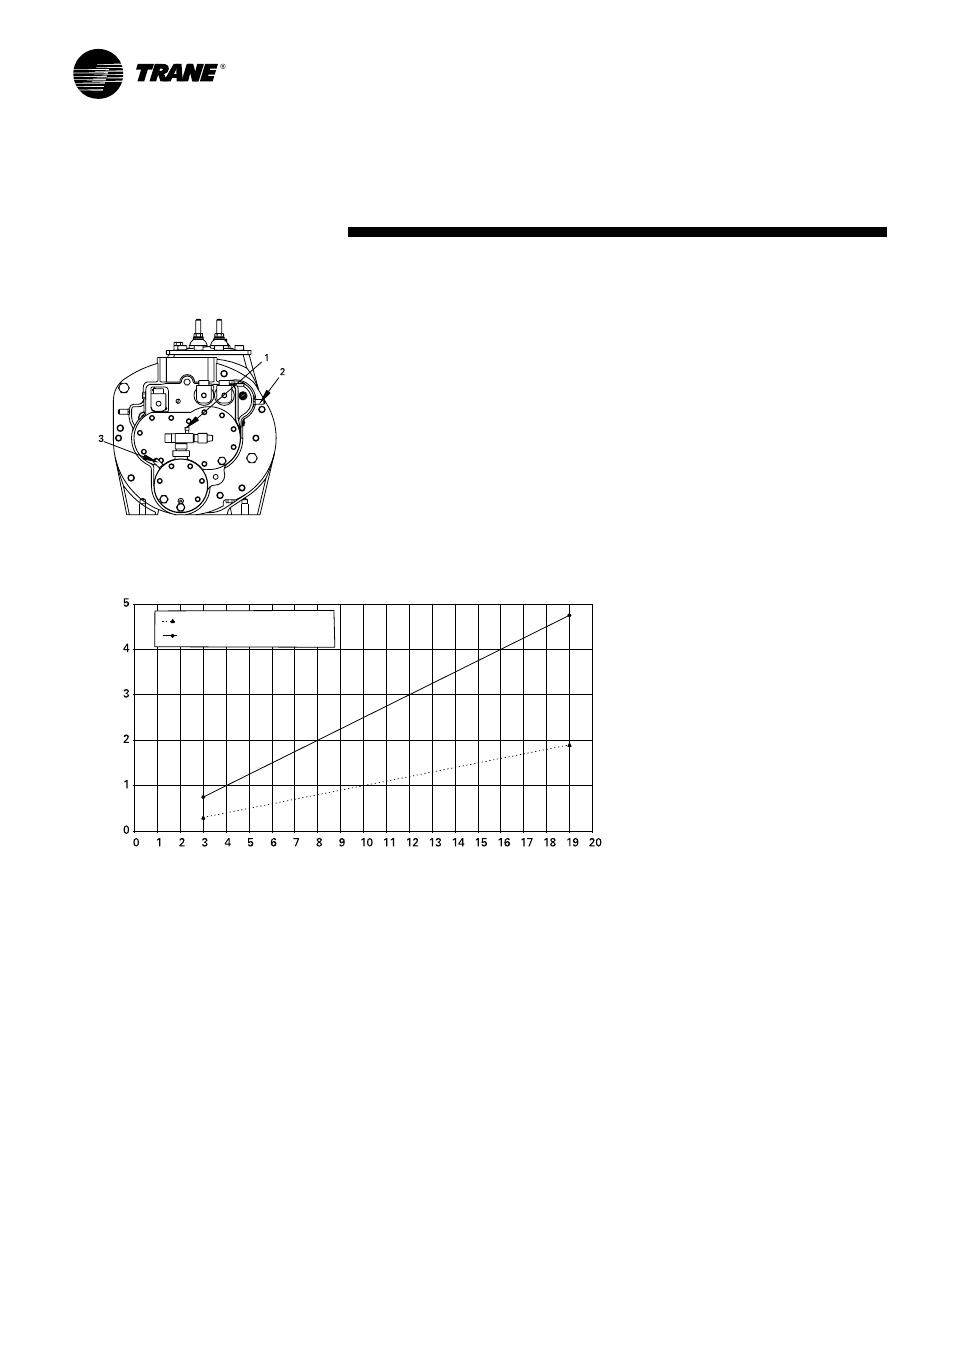
Figure 15 - Oil filter change
1. Oil charging valve
2. Oil pressure control port
3. Oil pressure control port
Figure 16 - Oil filter pressure drop
Condensing Pressure - Suction Pressure (bar)
Oil filter pressure drop (bar)
Normal pressure drop
Maximum pressure drop
RLC-SVX03A-E4