Cleaning the engine and deck, Adjustments, Battery – Troy-Bilt HYDROSTATIC LAWN TRACTOR - HORSE 769-06304 User Manual
Page 20: Cleaning battery, Battery failures, Deck wash system, Leveling the deck
Battery
The battery is sealed and is maintenance-free. Acid levels cannot
be checked.
Always keep the battery cables and terminals clean and
•
free of corrosive build-up.
After cleaning the battery and terminals, apply a light coat
•
of petroleum jelly or grease to both terminals.
Always keep the rubber boot positioned over the positive
•
terminal to prevent shorting.
IMPORTANT:
If removing the battery for any reason,
disconnect the NEGATIVE (Black) wire from it’s terminal first,
followed by the POSITIVE (Red) wire. When re-installing the
battery, always connect the POSITIVE (Red) wire its terminal
first, followed by the NEGATIVE (Black) wire. Be certain that the
wires are connected to the correct terminals; reversing them
could change the polarity and result in damage to your engine’s
alternating system.
Cleaning Battery
Clean the battery by removing it from the tractor and washing
with a baking soda and water solution. If necessary, scrape the
battery terminals with a wire brush to remove deposits. Coat
terminals and exposed wiring with grease or petroleum jelly to
prevent corrosion.
Battery Failures
Some common causes for battery failure are:
Incorrect initial activation
•
Overcharging
•
Freezing
•
Undercharging
•
Corroded connections
•
These failures are NOT covered by your tractor’s warranty.
Cleaning the Engine And Deck
Any fuel or oil spilled on the machine should be wiped off
promptly. Do NOT allow debris to accumulate around the cooling
fins of the engine or on any other part of the machine.
IMPORTANT:
The use of a pressure washer to clean your
tractor is NOT recommended. It may cause damage to electrical
components, spindles, pulleys, bearings or the engine.
Deck Wash System™
Your tractor’s deck is equipped with a water port on its surface as
part of its Deck Wash System™, follow these instructions to utilize
this feature.
Use the Deck Wash System™ to rinse grass clippings from the
deck’s underside and prevent the buildup of corrosive chemicals.
Complete the following steps AFTER EACH MOWING:
Drive the tractor to a level, clear spot on your lawn, near
1.
enough for your garden hose to reach.
CAUTION:
Make certain the tractor’s discharge
chute is directed AWAY from your house, garage,
parked cars, etc.
Disengage the PTO
2.
(Blade Engage), set the parking brake
and stop the engine.
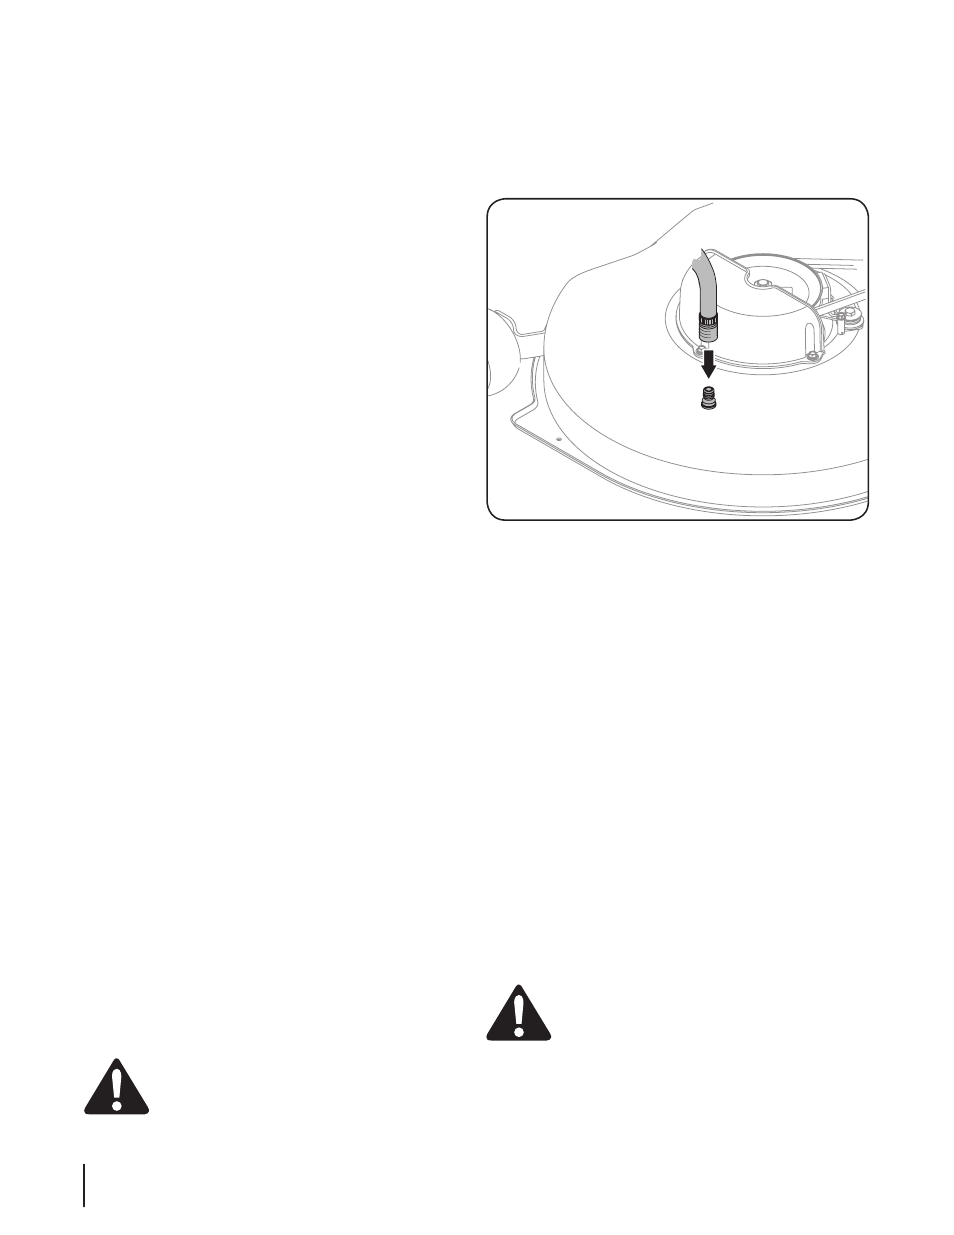
Thread the hose coupler
3.
(packaged with your tractor’s
Operator’s Manual) onto the end of your garden hose.
Attach the hose coupler to the water port on the deck’s
4.
surface. See Fig. 6-2.
Turn the water on.
5.
While sitting in the operator’s position on the tractor, start
6.
the engine and place the throttle lever in the FAST (rabbit)
position.
Move the tractor’s PTO
7.
(Blade Engage) into the ON position.
Remain in the operator’s position with the cutting deck
8.
engaged for a minimum of two minutes, allowing the
underside of the cutting deck to thoroughly rinse.
Move the tractor’s PTO
9.
(Blade Engage) into the OFF
position.
Turn the ignition key to the STOP position to turn the
10.
tractor’s engine off.
Turn the water off and detach the hose coupler from the
11.
water port on your deck’s surface.
Repeat steps 4 through 11 on the opposite side of the
12.
cutting deck.
IMPORTANT:
After cleaning your deck with the Deck Wash
System™ , return to the operator’s position and engage the PTO.
Keep the cutting deck running for a minimum of two minutes,
allowing the underside of the cutting deck to thoroughly dry.
Adjustments
WARNING!
Never attempt to make any
adjustments while the engine is running, except
where specified in the operator’s manual.
Leveling the Deck
NOTE: Check the tractor’s tire pressure before performing any
deck leveling adjustments. Refer to Tires in the Service section of
this manual for more information regarding tire pressure.
Figure 6-2
20
s
ectiOn
6— M
aintenance
& a
djustMents