Logging into the b064-series kvm switch, Ap java client login ap windows client login, The connection screen – Tripp Lite NETDIRECTORTM B064-016-02-IPG User Manual
Page 7: The file menu
7
Logging Into the B064-Series KVM Switch
continued
AP Java Client Login
AP Windows Client Login
continued
In those cases in which the Administrator does not want the B064-Series KVM Switch to be available via browser and the remote user is
not running Windows, the AP Java Client provides access to the KVM switch.
After downloading the AP Java Client, go to the location on your hard disk where you downloaded the program and double-click on it
to bring up the connection screen. The AP Java Client connection screen is the same as the Windows version, except that it does not
contain a menu bar with File and Help menus. Note: When accessing the AP Java Client for the first time, you will be prompted to
provide a serial number. This serial number can be found on the CD that came with your KVM.
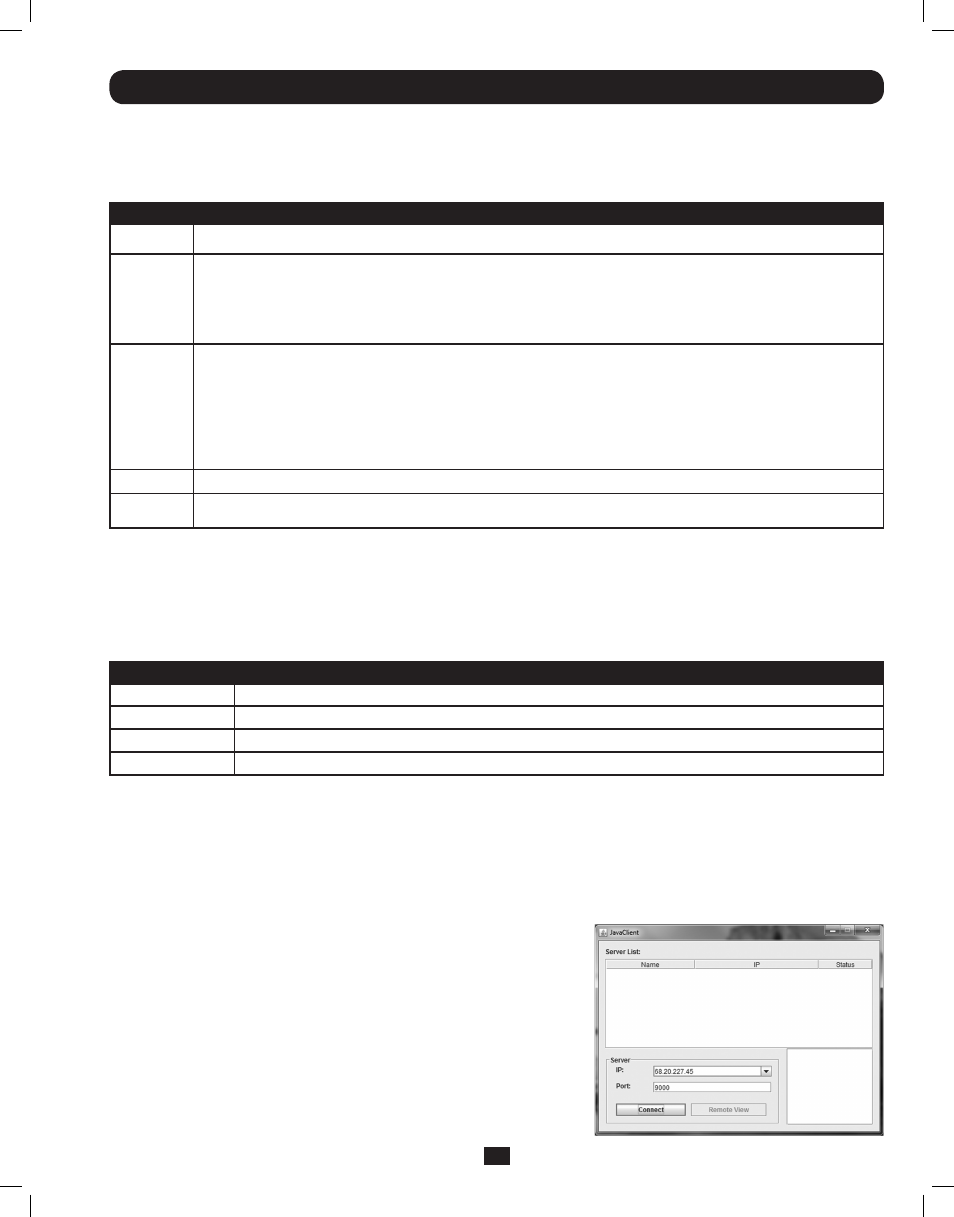
The Connection Screen
A description of the contents of the Connection Screen is given in the following table:
Item
Description
Menu Bar
The Menu Bar contains two menus; File and Help. The File Menu allows the operator to Create, Save, and Open Work files.
Server List
Each time the WinClient.exe file is run, it searches the User’s LAN segment for B064-Series KVM Switches, and lists the ones it finds in
this box. Double-click on any of the units in this list to connect to it.
Note: For a switch to show up in the Server List, the Enable Device List check box in the Operating Mode page (see Operating Mode
section under Device Management in OSD Operation for details) must be checked and the Program service port in the Network page
(see Network section under Device Management in OSD Operation for details) must be set to the same number as in the AP Windows
Client Port field.
Server
This area is used when you want to connect to a B064-Series KVM Switch at a remote location.
• Click on the IP drop-down and select an address from the list. If the address you want is not listed, key in the target IP
address in the IP field, and its port number in the Port field.
• When the IP address and port number have been specified, click Connect to bring up a login dialog box. Provide a
Username and Password as provided by your system administrator and click OK to establish a connection with the B064-
Series KVM Switch.
• When you have finished with your session, click Disconnect to end the connection.
Message List
Lists status messages regarding the connection to the B064-Series KVM Switch.
Switch to
Remote View
Once a remote connection with a B064-Series KVM Switch has been established, this button becomes active. Click it to switch to the
KVM Switch’s Main OSD Page.
The File Menu
The File Menu allows the operator to Create, Save, and Open Work Files. A Work File consists of all the information specified in a Client
session. This includes the items in the Server List and Server IP List.
Whenever a user runs the Client program, it opens with the values contained in the current Work File, i.e. the values that were in effect
when the program was last closed.
The File menu consists of three items:
Item
Description
New
Allows the user to create a named work file so that its values will not be lost and will be available for future use
Open
Allows the user to open a previously saved work file and use the values contained in it
Save
Allows the user to save the values presently in effect as the current work file
Exit
Exits the AP Windows Client
1. If your KVM is displayed in the Server List, connect to it by highlighting it
and clicking on the Connect button. Note: For a switch to show up in the
Server List, the Enable Device List checkbox in the Operating Mode page (see
Operating Mode section under Device Management in OSD Operation for details
for details) must be checked and the Program server port must match what is
set in the Network page (See Network section under Device Management in
OSD Operation for details.)
2. If your KVM does not display in the Server List, enter in its IP address in the IP
server field and click the Connect button.
3. Upon clicking the connect button, you will be prompted to enter your username
and password. Enter in your username and password and press OK.
4. When connected, the Remote View button will be activated. Click on it to access
the KVM remotely. Click on the Disconnect button to log out of the KVM switch.
201107009 93-2913.indd 7
7/18/2011 2:58:02 PM