Super administrator setup, 4 changing the super administrator login, 3 nic settings – Tripp Lite NETDIRECTORTM B064-016-02-IPG User Manual
Page 5
5
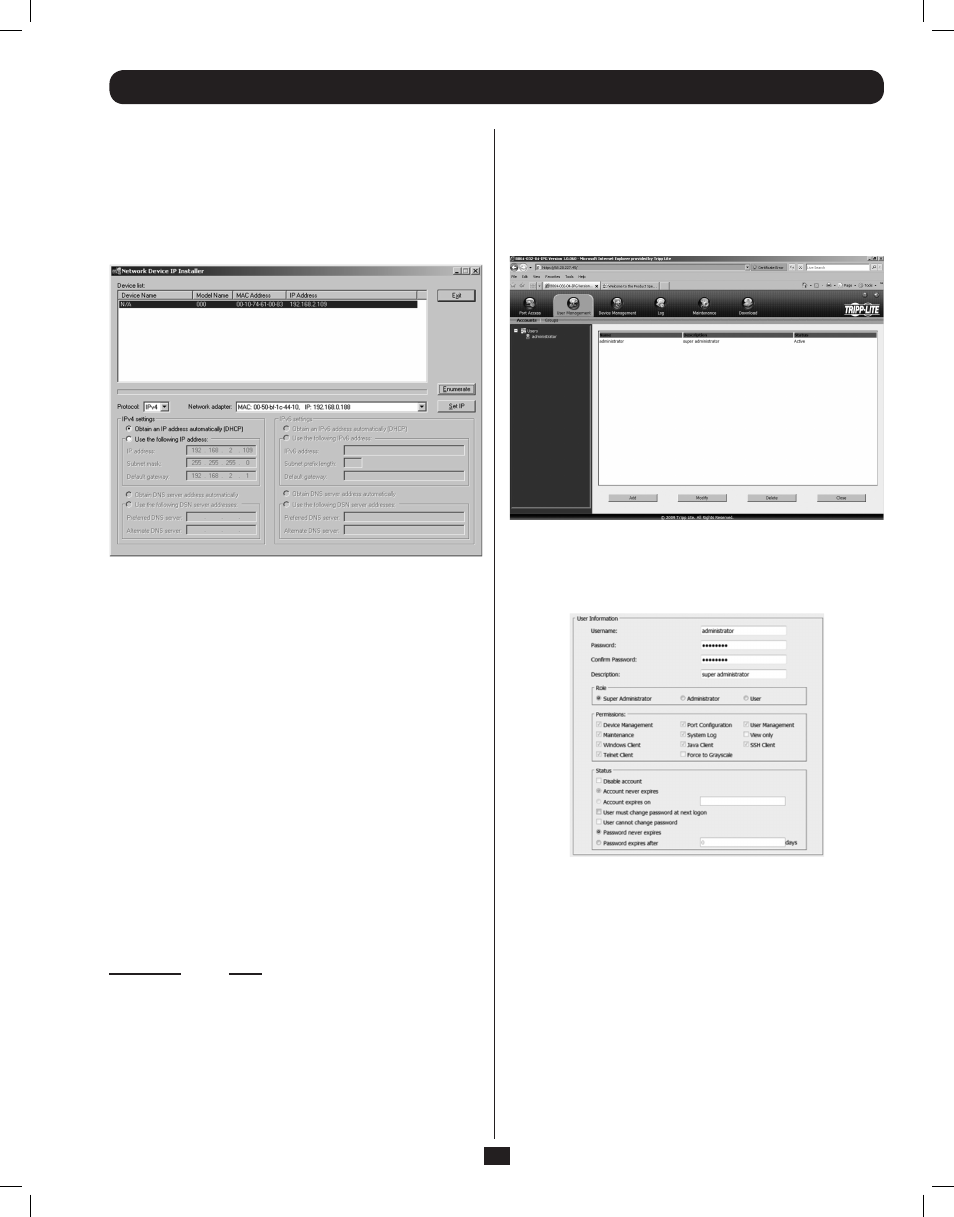
1. Obtain the IP Installer file from the CD that came with the
B064-Series KVM Switch and save it to a desired location on
a computer that is on the same network as your B064-Series
KVM Switch.
2. Go to the IP Installer file that you just saved and run the
IPInstaller.exe file.
3. In the dialog box that appears, select the B064-Series KVM
Switch in the Device List.
Note: If the list is empty, or your device doesn’t appear, click
Enumerate to refresh the Device List. If there is more than one
device in the list, use the MAC address to pick the one you want.
The B064-Series KVM Switches MAC address is located on its
bottom panel.
4. From here you can choose to Obtain an IP address
automatically (DHCP), or Specify an IP address. If you choose
to assign your own address, fill in the IP Address, Subnet
Mask, and Gateway fields with information appropriate to your
network.
5. Click Set IP.
6. After the IP address shows up in the Device List, click Exit.
3. Browser
By default, the KVM switch is set to have its IP address assigned
automatically via DHCP server. If the KVM is connected to
a network without a DHCP server, it boots with a default IP
address. On IPv4 networks, the default IP is 192.168.0.60.
If the KVM is on an IPv6 network, the default IP address is
determined by the KVMs MAC address. For example, if the KVM
has a MAC address of 00-10-74-13-81-01, the IPv6 address is
FE80:0:0:0:0010:74FF:FE13:8101. The parts of the IP address
that are bolded and underlined are fixed.
1. Access the B064-Series KVM switch by using the default URL
mentioned above.
2. Assign a fixed IP address for the KVM using the same
instructions as described in the Local Console section of this
chapter.
2.4 Changing the Super Administrator Login
To change the default Super Administrator Username and
Password, do the following:
1. At the top of the Web page, click User Management.
Since this is the first time the page is being accessed, only the
Super Administrator appears:
2. Click Administrator in the left panel; or, select Administrator in
the central panel and click the Modify button at the bottom of
the page.
The User Information page appears:
3. Change the Username and Password to something unique.
4. Re-enter the password to confirm it is correct.
5. Click Save.
6. When the dialog box informing you that the change completed
successfully appears, click OK.
2. Super Administrator Setup
continued
2.3 NIC Settings
continued
201107009 93-2913.indd 5
7/18/2011 2:58:01 PM