Telular SX6P-200C User Manual
Page 12
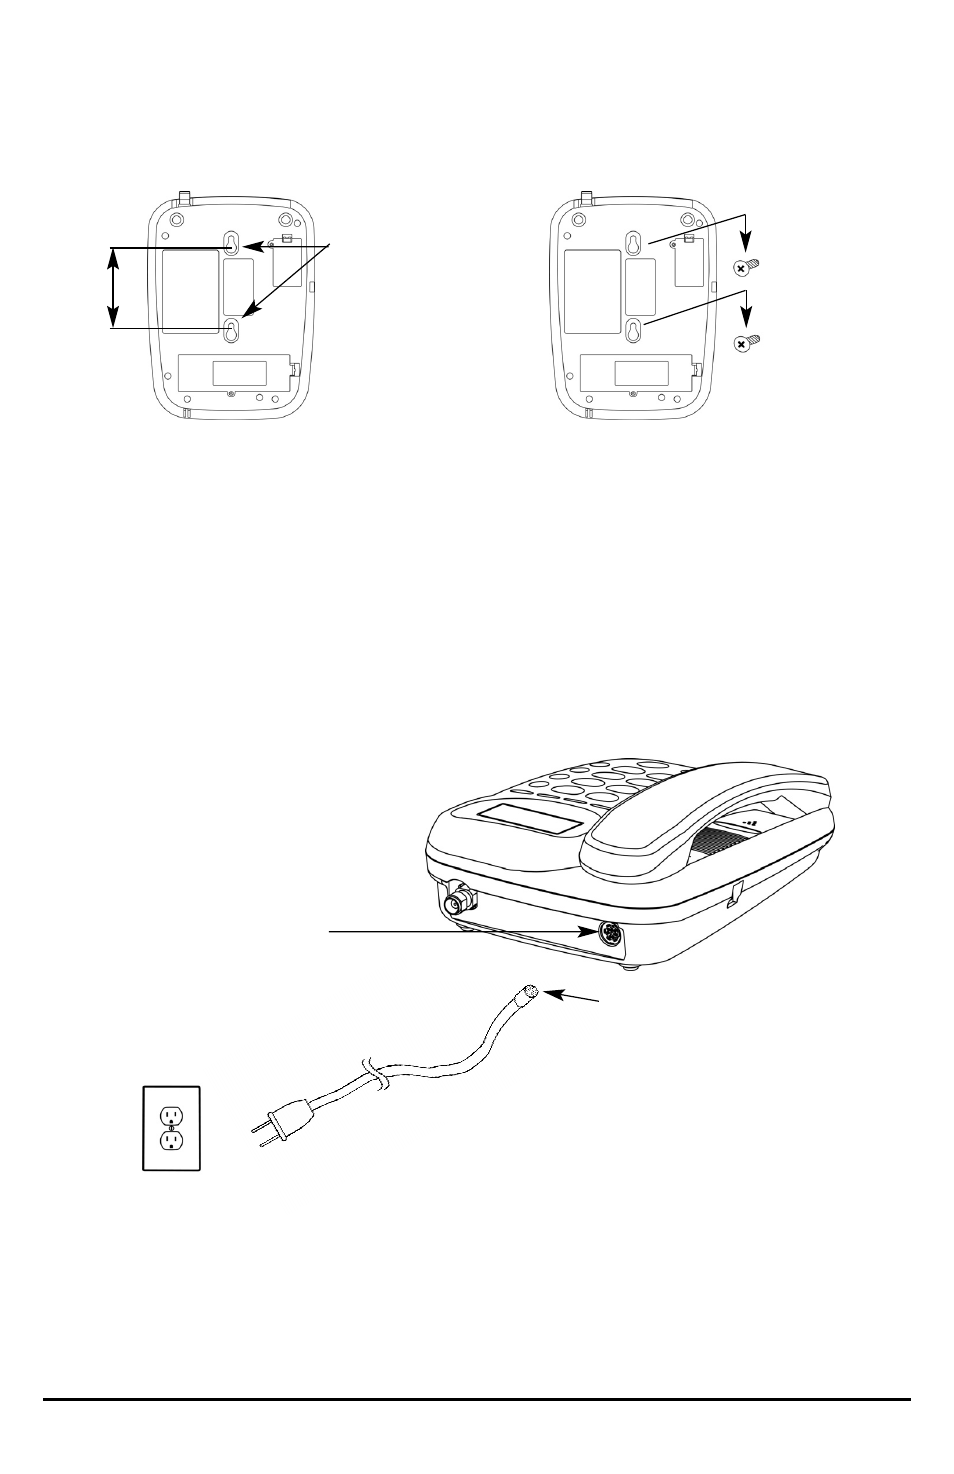
3.
Install the screws (not supplied) into the wall, leaving a gap of approximately 3 mm (1/8 inches)
between the screw head and the wall.
4.
Align the mounting holes with the screws and mount the SX6P onto the screws -
see Figures 10
and 11.
Connecting the SX6P to AC Power
1.
Connect the DIN connector of the AC power cord into the AC power input on the rear panel of
the SX6P -
see Figure 12.
2.
Plug the AC power cord into the wall socket.
3.
Check the cellular signal strength and move the unit until the best signal possible is
achieved - see the
Service Indication section of this manual on page 7.
AC Power Cord
Wall Socket
AC Power
Input
DIN
Connector
Figure 12 – SX6P AC power connection.
Figure 11 – Mount the SX6P onto the screws.
83 mm (3-1/4 inches)
Figure 10 – SX6P mounting hooks.
Mounting
Holes
Phonecell
®
SX6P CDMA
4
User Manual