Oregon Scientific Advanced Weather Station WMR100 User Manual
Unpack, Quick start guide
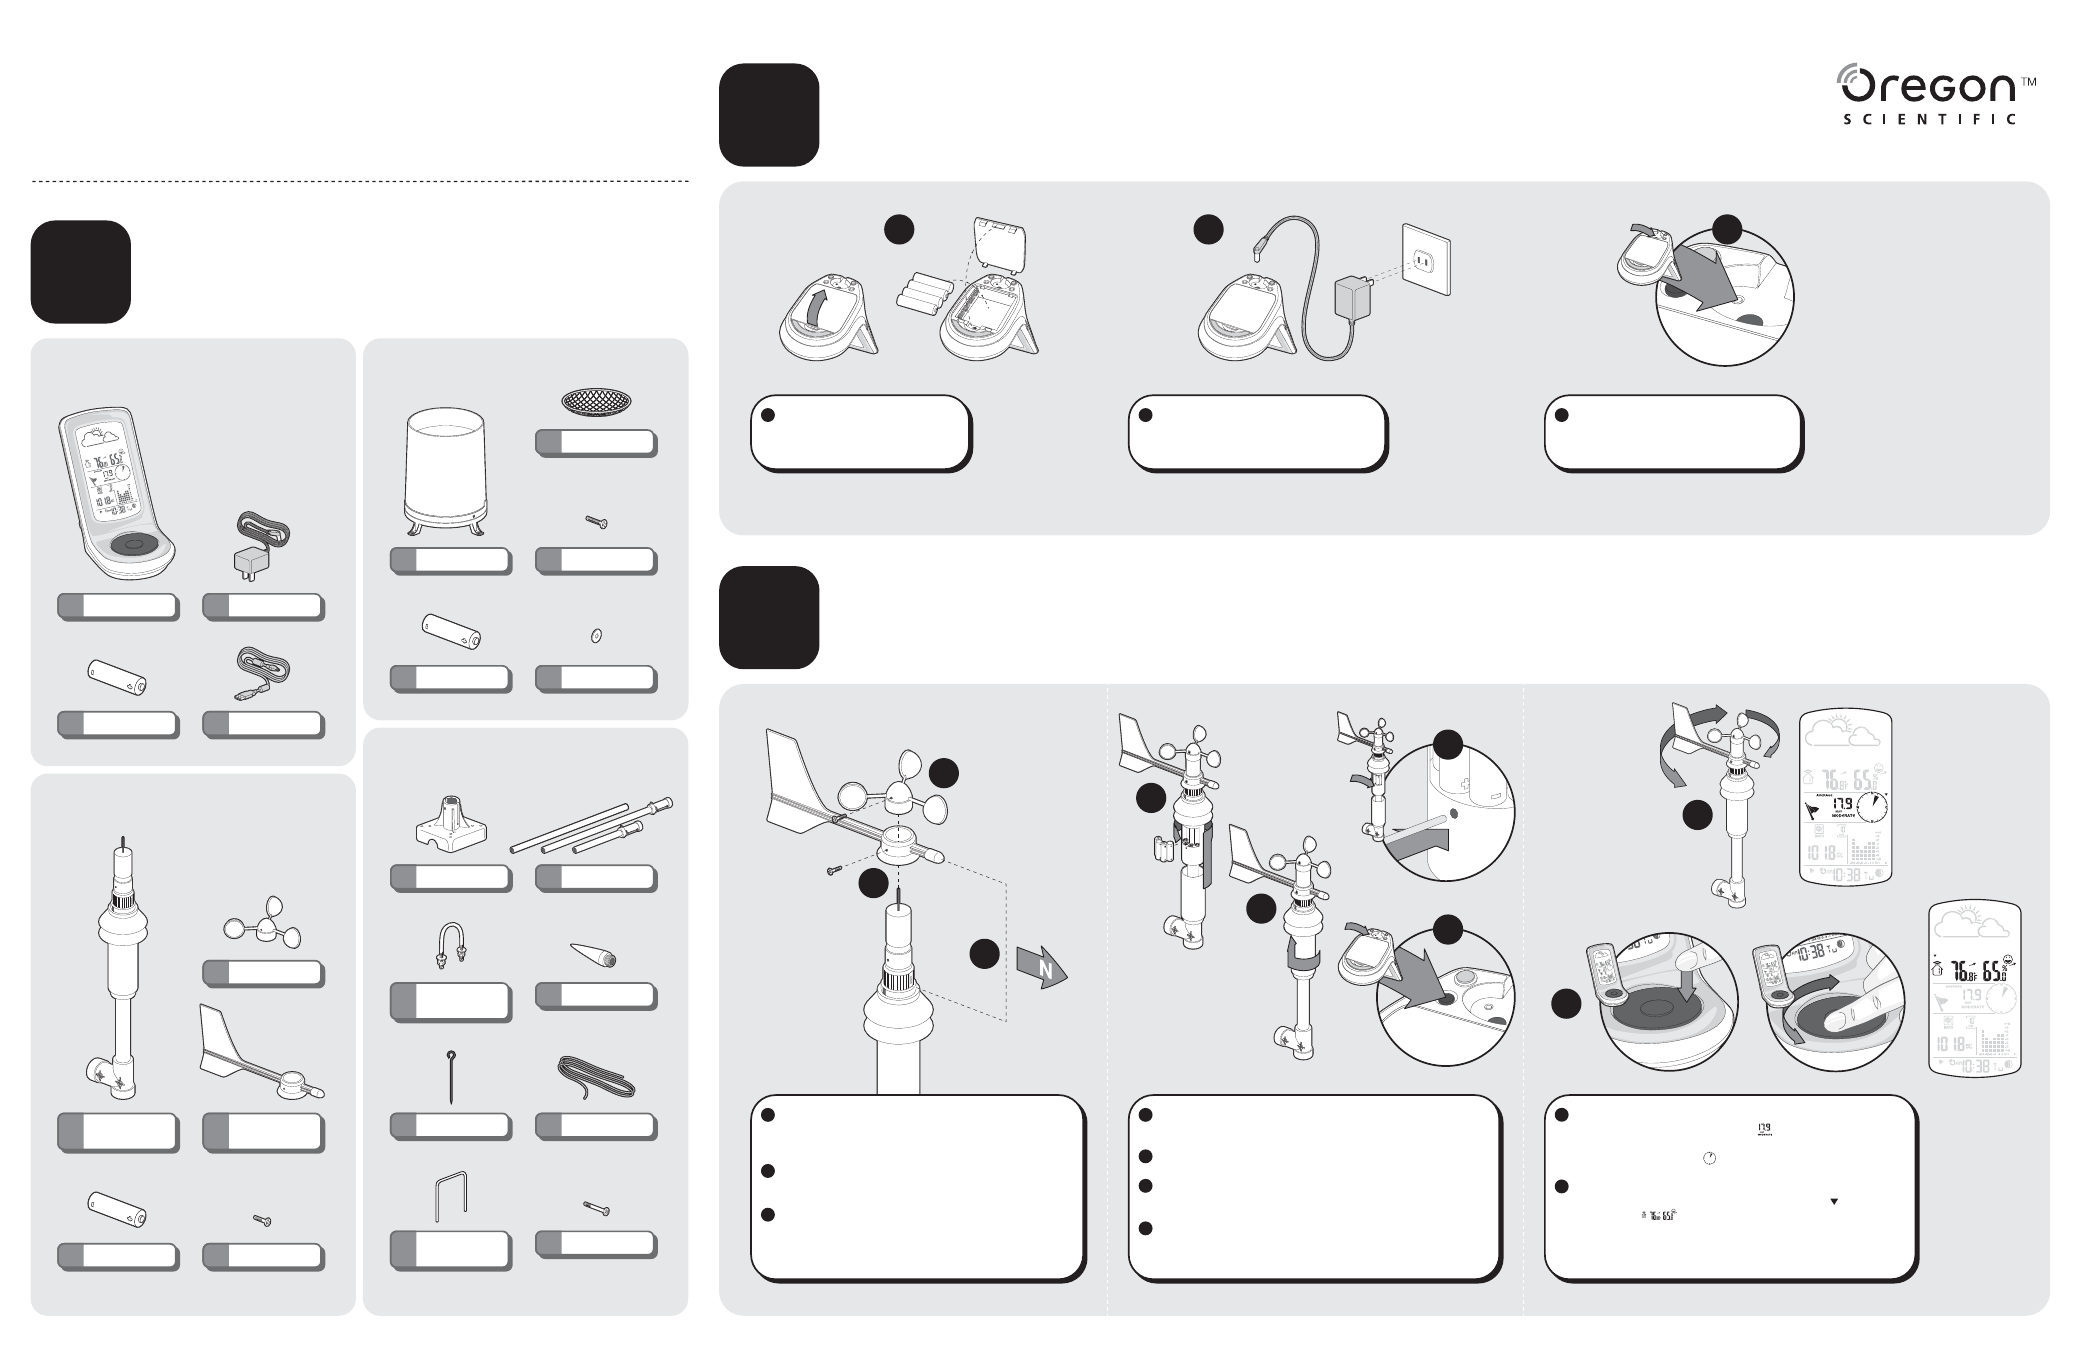
UNPACK
Make sure that you have all of the parts shown here before
the installation of the Advanced Weather Station.
A
SET-UP MAIN UNIT
B
SET-UP INTEGRATED WIND SENSOR
C
MAIN UNIT
INTEGRATED WIND GAUGE
RAIN GAUGE
USB Cable
1×
Wind Vane
1×
Support Base
1×
Rectangular
Base Legs
2×
Round
U-Shaped Bolts
2×
Wind Direction
Indicator
1×
Wind Sensor
Stem
1×
Screws (Type B)
2×
Pole Sections
3×
Metal Pins
3×
Tension Strings
3×
Rain Collector
1×
Filter
1×
6V Adapter
1×
Screws (Type A)
4×
Washers
6×
1.5V AA Batteries
2×
Screws (Type C)
3×
WMR100 Base
1×
POLE MOUNT
1.5V AA Batteries
4×
1.5V AA Batteries
4×
Cone-Shaped End
1×
2
1
3
4
6
8
9
Slide wind direction indicator onto wind sensor and align
the screw holes. After aligning the holes, use a Type B
screw to secure.
Attach the wind speed vane on the top of the wind sensor,
align the holes, and use a Type B screw to secure.
When installing outside, rotate the NORTH Indicator
reference line to the “north” and align the wind indicator
in the same direction.
1
2
3
1
Install 4 AA batteries located
underneath the base unit.
3
Press the RESET button.
2
Install power plug into the base station
and insert the AV adapter into the wall
outlet.
Rotate the battery cover counter-clockwise and slide cover off
to expose the battery compartment. Insert 4 AA batteries.
Press the RESET button.
Rotate the battery cover clockwise and slide cover on to close
the battery compartment.
On the base station, press the SEARCH button to initiate a
wireless sensor search.
4
5
6
7
QUICK START GUIDE
WMR100 ADVANCED WEATHER STATION
with Wireless Sensor Set and Mounting Package
2
1
3
7
5
Wind Speed: Gently rotate the wind vane and confirm a
numerical reading on the base unit ( ). Wind Direction
Indicator: Move the direction of the wind indicator and verify the
icon moves in the same ( ).
To test the temperature reading, press the SELECT button on
the black rotating dial until the selected area icon ( ) is on the
second level ( ) of the LCD display. Rotate the dial clockwise
to channel 1 and verify a numeric reading.
8
9