Learning about your oster 4 slice waffle maker, How to, Using your oster® 4 slice waffle maker – Oster CKSTWF40 User Manual
Page 3
www.oster.com
www.oster.com
learning abOut yOur
Oster 4 slice Waffle Maker
4
5
a
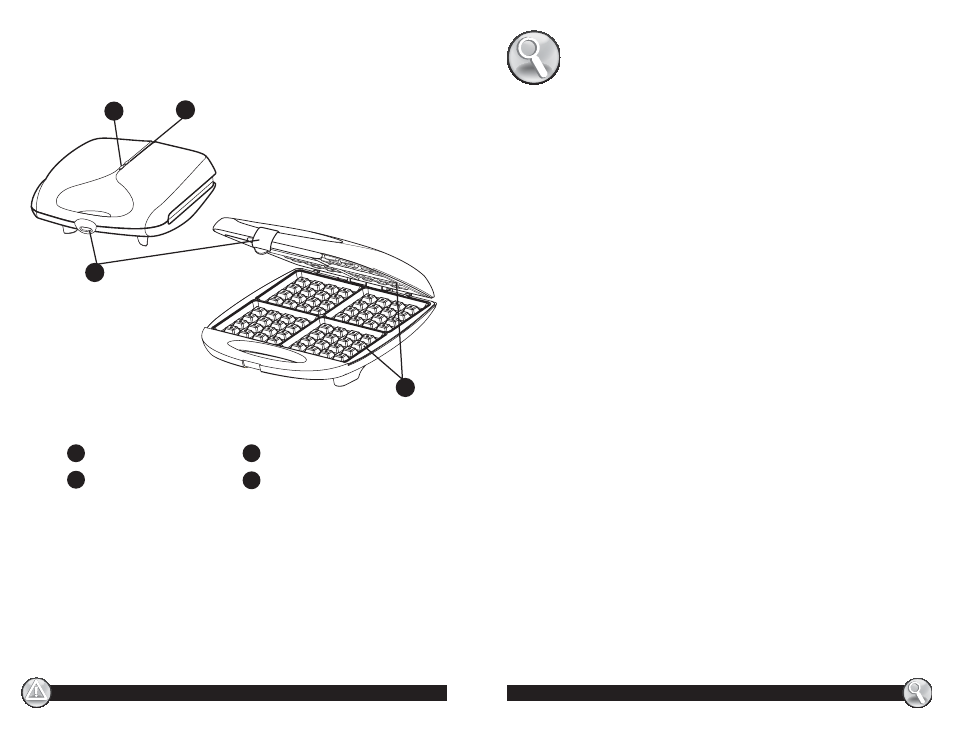
Non-Stick Cooking Grids
Closure Latch
Power Indicator Light
Ready Light
b
c
d
HOW tO:
using yOur Oster® 4 slice Waffle Maker
Preparing Your 4 Slice Waffle Maker
1 Close the waffle maker and plug it into the wall outlet, you
will notice that the red power indicator light will turn on. It
will take approximately 5 to 8 minutes to reach baking
temperature. When the Green Ready Light goes ON, the
waffle maker is ready for use.
2 Before baking the first waffles of the day, use a pastry
brush to lightly coat the top and bottom waffle grids with
vegetable oil. A light coating of non-stick cooking spray also
works well.
Baking
1 When the green “Ready” indicator light goes ON, the unit has
reached the correct baking temperature and is ready for use.
2 Pour batter onto bottom grid of waffle maker. Ladle just
enough batter to fill each plate in the lower grid so that the
peak area of the grid is covered, being careful not to overfill.
If necessary, use a spatula to spread the batter in to the
corners of the grid.
3 Lower the top part without closing the latch. This will allow
more room for the waffles to expand.
Note: During cooking, the ready light may cycle ON and OFF as
the unit maintains the correct baking temperature. The cooking
time is about 4 to 6 minutes and varies depending on the type
of batter being used and desired cooking consistency of waffle.
The unit may start to emit steam during cooking. Once the unit
stops emitting any steam, this may be an indicator that the
waffles are done.
Before The First Use
1 Remove all packaging materials before using
2 Before using, wipe down the 4 slice waffle maker with a
clean, damp cloth and dry. Be sure to read the Care and
Cleaning section of this manual to learn the correct methods
for cleaning the unit.
a
c
d
b