Battery installation/replacement, How to apply the arm cuff – Omron Healthcare HEM-712C User Manual
Page 3
5
4
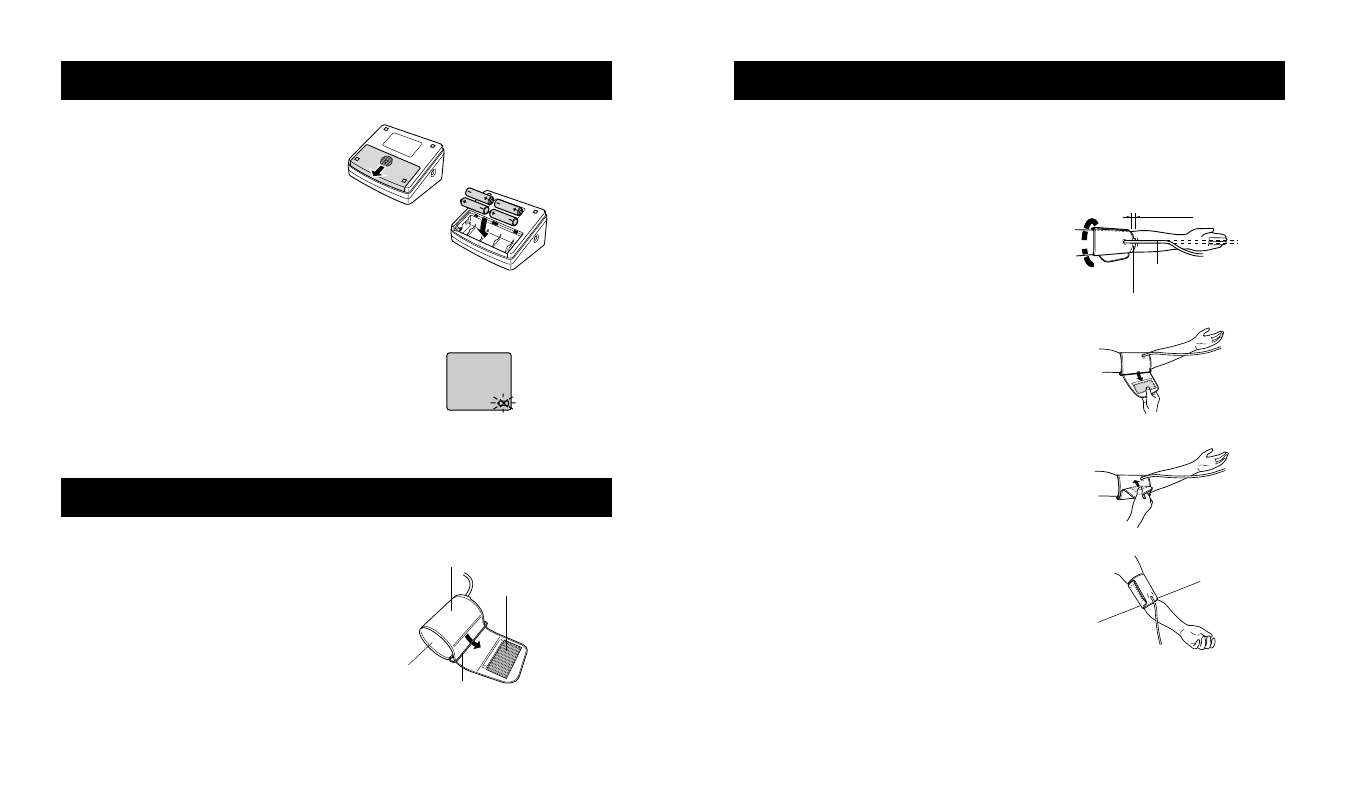
1. Slide the battery cover off in
the direction of the arrow.
2. Install or replace four "AA" size batteies
so + (positive) and - (negative) polarities
match the polarities of the battery
compartment as indicated.
3. Replace the battery cover
Note:
• If the Low Battery Indicator appears on the display,
replace all four batteries. Long-life alkaline batteries
are recommended.
• Remove the batteries if the monitor will not be used
for an extended period of time.
BATTERY INSTALLATION/REPLACEMENT
Low Battery
Indicator
Smooth Cloth
D-Ring
Pile Side Material
Sewn Hook Material
Bottom Edge
1/2 Inch
Green Marker
Cuff Tube
3. Sit in a chair with your feet flat on the floor and
place your arm on a table so that the cuff is at
the same level as your heart.
4. Put your arm through the cuff loop. The bottom
of the cuff should be approximately 1/2'' above the
elbow. The Green Marker on the cuff should lie
over the brachial artery on the inside of the arm.
Tube should run down center of arm approximately
even with the middle finger.
5. Pull the cuff so that the top and bottom edges
are tightened evenly round your arm.
6. When he cuff is positioned correctly, press the
sewn hook material FIRMLY against the pile
side of the cuff.
7. Make certain the cuff fits snugly around your arm.
The cuff should make good contact with your skin.
You should be able to fit one finger between the
cuff and your arm.
8. Relax your arm and turn your palm upward.
9. Be sure there are no kinks in the air tubing.
HOW TO APPLY THE ARM CUFF
1. If the cuff is assembled correctly, the hook material
will be on the outside of the cuff loop and the metal
D-ring will not touch your skin.
2. If the cuff is not assembled, pass the end of the
cuff furthest from the tubing through the metal
D-ring to form a loop. The smooth cloth should
be on the inside of the cuff loop.
HOW TO APPLY THE ARM CUFF