Gas pressure setting – Rinnai 16e User Manual
Page 27
27
GAS PRESSURE SETTING
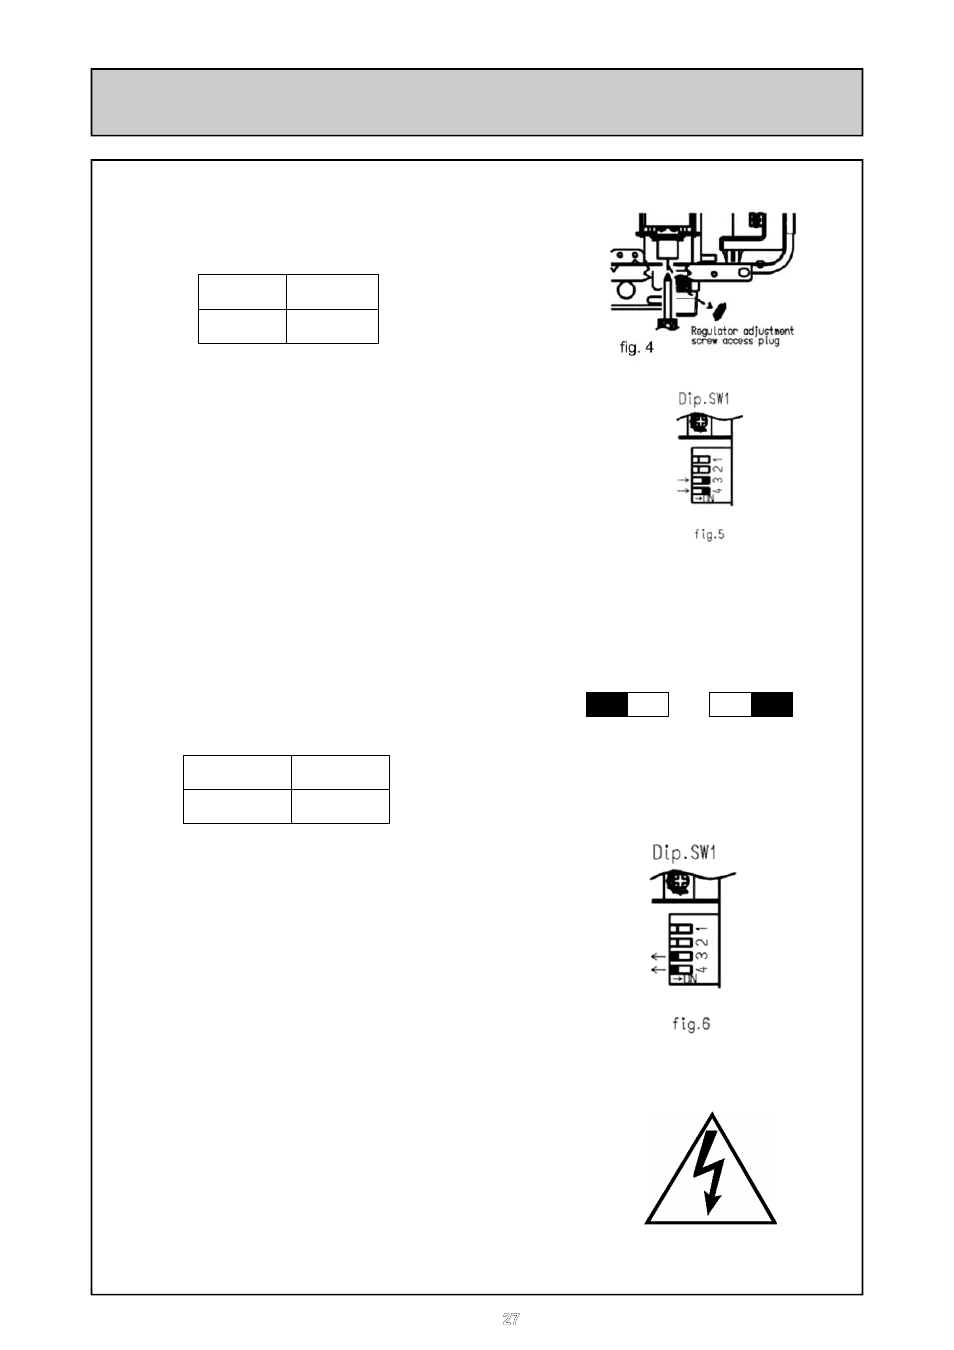
11.Remove rubber access plug and adjust the
regulator screw on the modulating valve (fig.
4) as required to the pressure below.
12.Lock the regulating screw on the modulating
valve.
13.Set the appliance to 'Forced High' combustion
by setting both no. 3 and no. 4 dipswitches of
the bottom set of switches (SW1) to 'ON'.
(fig.5) Ensure maximum water flow.
14.Check the burner test point pressure.
15.Adjust the high pressure potentiometer on the
Printed Circuit Board between SW1 and SW2
to the pressure shown below. The potentiome-
ter is very sensitive, turn no more than a few
degrees at a time; then let the pressure settle
down before turning it more.
16.IMPORTANT: Set dip switch no. 3 and no. 4
on the bottom set of switches (SW1) to 'OFF'
to return the appliance to 'Normal' combustion.
(fig. 6)
17.Close hot water tap.
18.Turn OFF the gas supply and 230V power
supply.
19.Remove pressure gauge, and replace sealing
screw.
20.Turn 'ON' the gas supply and 230V power
supply.
21.Operate unit and check for gas leaks at test
point.
22. Replace the front cover of the appliance.
N.G
1.8 mbar
Propane 1.8 mbar
N.G
8.8 mbar
Propane
8.1 mbar
CAUTION
LEGEND:
Black Section indicates
position of dip switch.
OFF ON
OFF ON
OFF ON