Mounting the router – Ryobi RT401W User Manual
Page 13
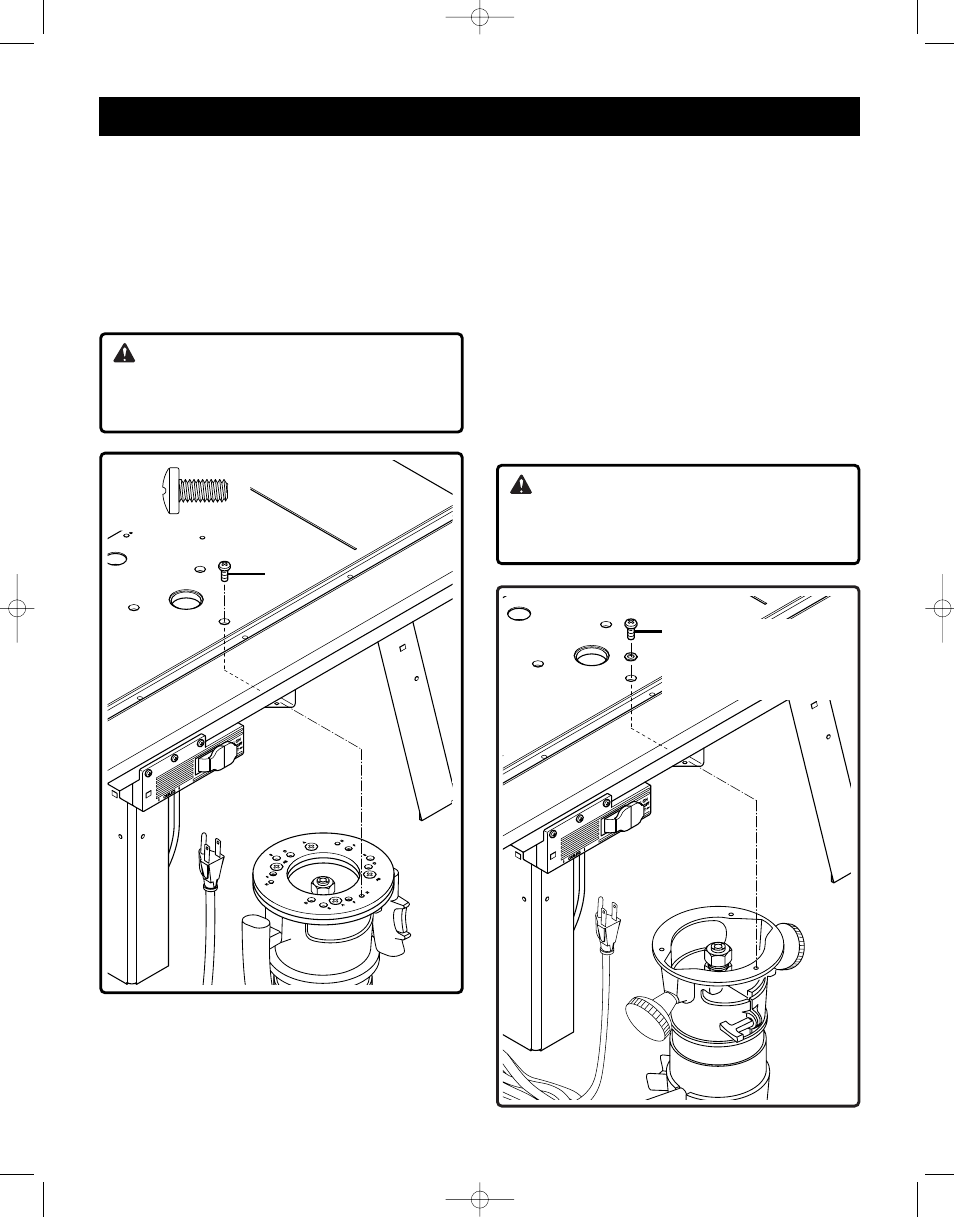
Fig. 10
Fig. 11
MOUNTING THE ROUTER
13
See Figure 10
6. Mount the router with adapter base plate using the
through holes in the tabletop. Assemble with 3 screws
(T)
through tabletop and into the adapter base plate at
position H. (The adapter base plate comes from the
factory with the nuts pressed into it.) Tighten securely.
7. Mount the router with adapter base plate by putting the
pan head screws (T) through the holes in the tabletop
and router base. Tighten securely.
CAUTION:
Make sure the screws from router base plate are long
enough to mount router securely. Replace if neces-
sary.
T (3)
T
CAUTION:
Make sure the screws from router base plate are long
enough to mount router securely. Replace if neces-
sary.
2. Loosen knobs and slide fences so that notches in fence
line up to clear mounting holes.
3. While holding router upside down, position it to the
underside within the center ring of the table top.
4. Rotate router until the three mounting holes in router
base line up with the three larger holes in the table top.
5. Insert three machine screws from router base plate
through holes in tabletop and into router mounting
holes. Tighten securely.
6. To securely mount Craftsman routers that use the
E-hole pattern to the table top without using adapter
plate (K), three 10 - 32 x 1/2" pan head screws and
three SAE #10 washers are required (not provided).
NOTE: For ease of use, position the router so the
ON-OFF switch is accessible from the front of the
table.
II. Mounting Routers with Three-Hole
Base Plate (Hole Pattern "E")
See Figure 11
1. Remove router base plate from router by removing
screws.
NOTE: Screw from router
base plate or 10 - 32 x 1/2"
pan head screw and washer
SAE #10 washer
Bdal 6144.461 3Sprachen 04.06.2005 11:56 Uhr Seite 13