Renesas R8C/25 User Manual
Page 4
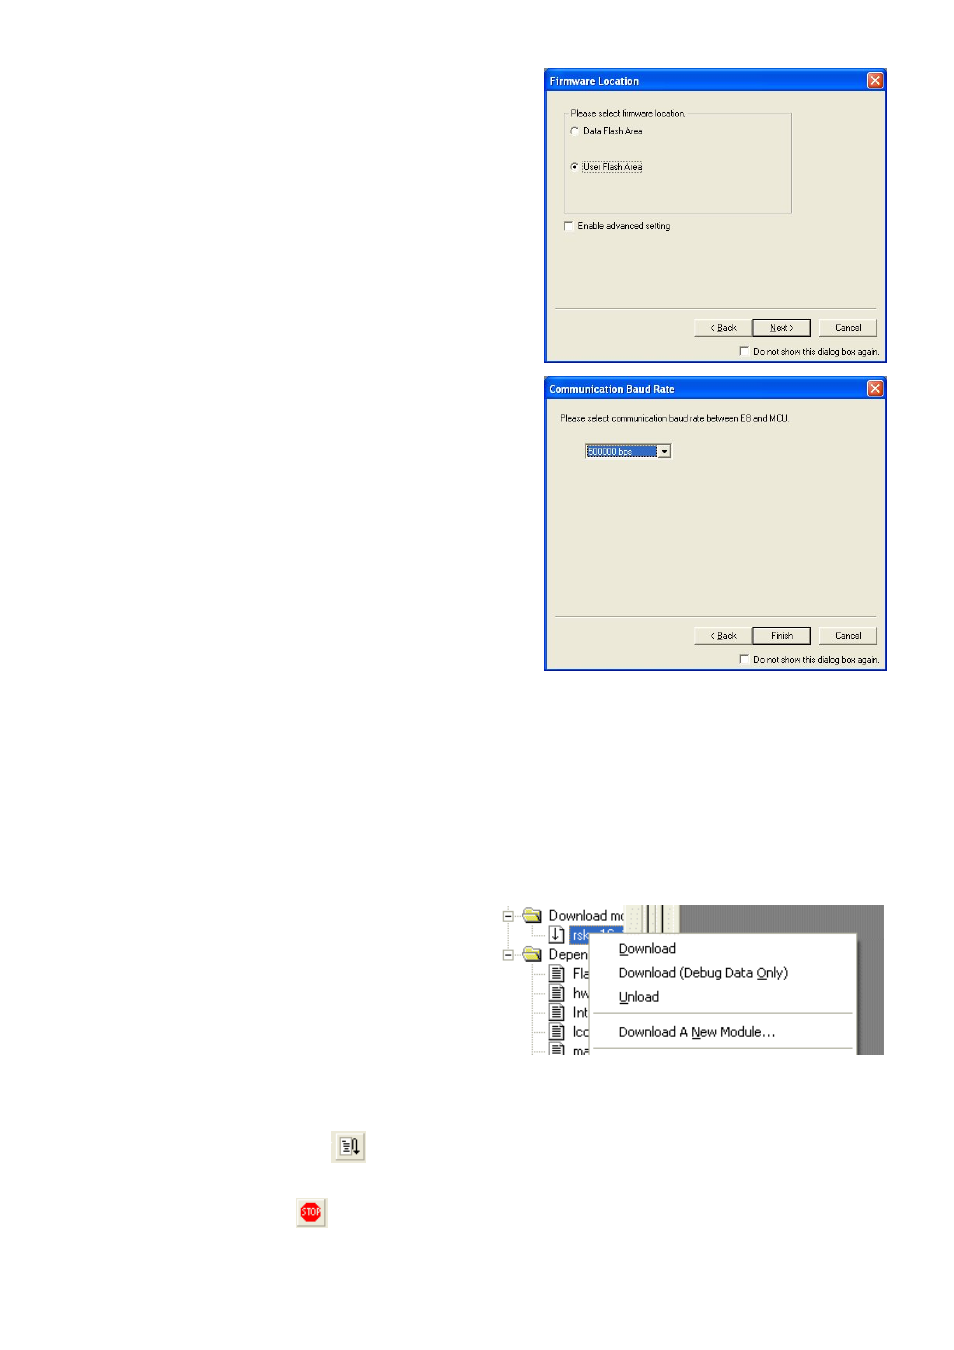
31. Set the firmware location to “User Flash Area”. Clear the
“Enable advanced setting” checkbox.
32. Click
33. The “Communication Baud Rate” options will be shown.
Leave the default options as shown.
34. Click
Note: The first time the E8a is connected, you may be asked to choose a driver, select “Renesas
Communications”, after a few seconds the “Interface” and “Channel” numbers will be automatically
displayed, click
Otherwise skip to the next step.
35. Accept any dialogue warning that an older or newer version of E8a firmware is necessary to work with the
application. Allow download of firmware to complete, this may take several seconds.
36. The connection to the Renesas Starter Kit will be
completed and will activate the debugger buttons on
the High-performance Embedded Workshop toolbar.
37. Right click on the download module listed in the left
hand pane and select “Download”.
The code will be downloaded to the microcontroller.
This may take several seconds.
When the message “Flash memory write end” appears in the Debug view at the bottom of the screen then the
process is complete.
38. Click the
The code will run and you will see the LEDs flash on the board.
39. Click the
D007074_11_S01_V04