Panel descriptions, 1 front panel, 2 rear panel – Roland HP-1 User Manual
Page 6
Panel descriptions
6
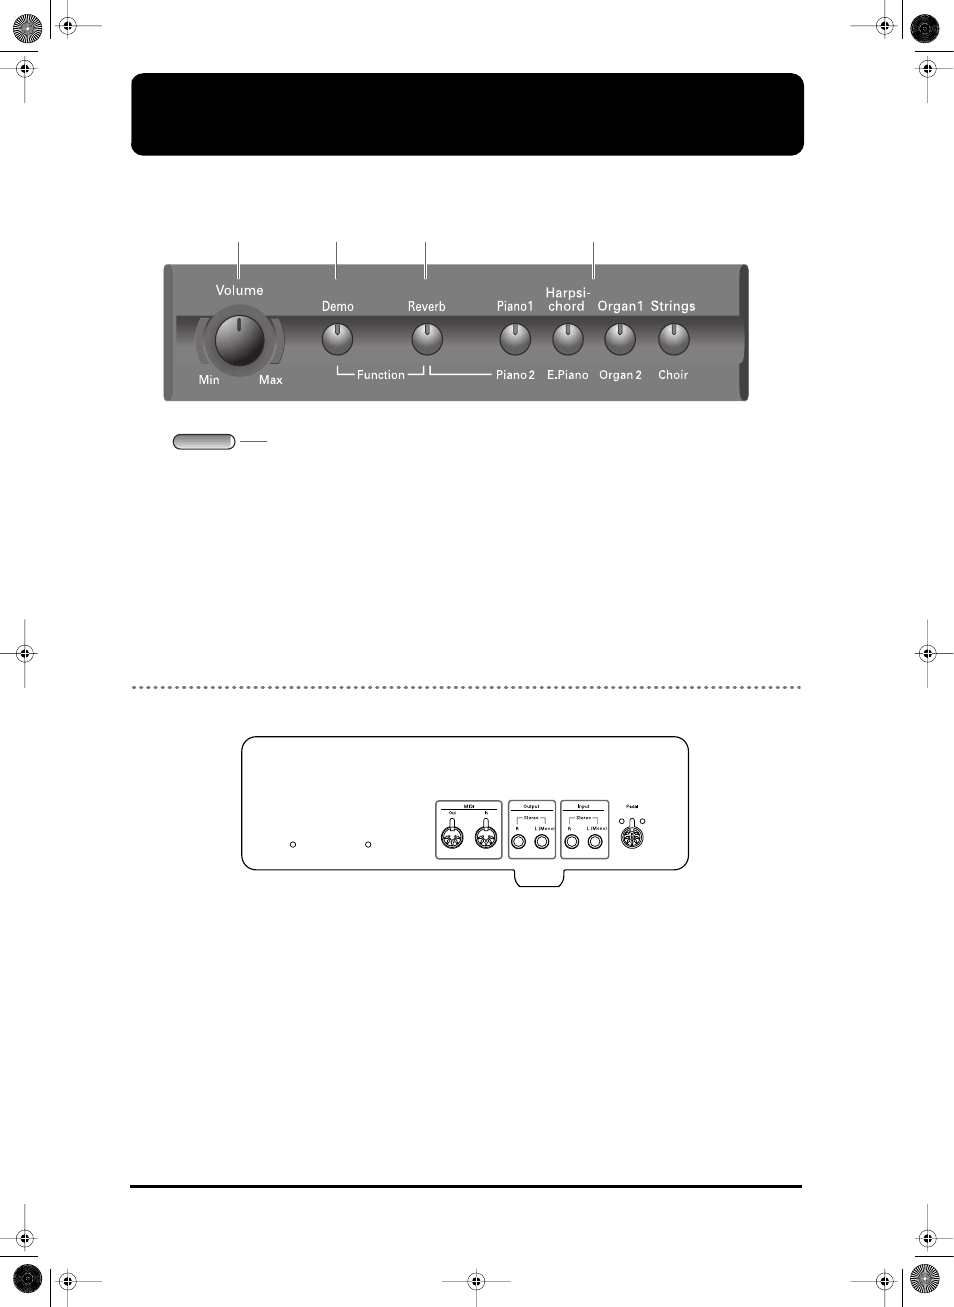
2.1 Front panel
A
[Power] switch
Turns the power on/off.
B
[Volume] knob
Adjusts the overall volume level.
C
[Demo] button
Allows you to play back the 65 pieces the HP-1 con-
tains. By pressing it simultaneously with the [Reverb]
button, you access the HP-1’s Function mode (p. 12).
D
[Reverb] button
This button has three functions. By pressing it, you
switch the Reverb effect on and off.
By holding it down while pressing a Tone button
([Piano 1]~[Strings]), you select the alternative for
the currently active Tone.
If you press it together with the [Demo] button, you
access the HP-1’s Function mode.
E
Tone select buttons
These buttons are used to assign the desired sound (or
“Tone”) to the keyboard.
2.2 Rear panel
A
MIDI Out/In connectors
Connect to external MIDI devices to exchange perfor-
mance data.
B
Output jacks
Allows you to connect the HP-1 to sound reinforce-
ment equipment to obtain a more powerful sound.
They can also be connected to a tape recorder or other
recording device to record a performance.
C
Input jacks
These jacks can be connected to another sound gener-
ating device, or an audio device, so that the sound of
that device will be output via the HP-1’s speakers.
D
Pedal connector
Connect the pedal cable of the special stand to this
socket.
2. Panel descriptions
A
B
C
D
E
Power
A
C
B
D
HP-1_GB Page 6 Friday, March 29, 2002 12:37 AM