Contrast, 2. typical pluge pattern for adjusting brightness, 3. typical gray bar pattern for adjusting contrast – Runco CRYSTAL CX-OPAL47 User Manual
Page 44: Pre l iminar y
30
CX-47HD/CX-OPAL47/CX-65HD Installation/Operation Manual
PRE
L
IMINAR
Y
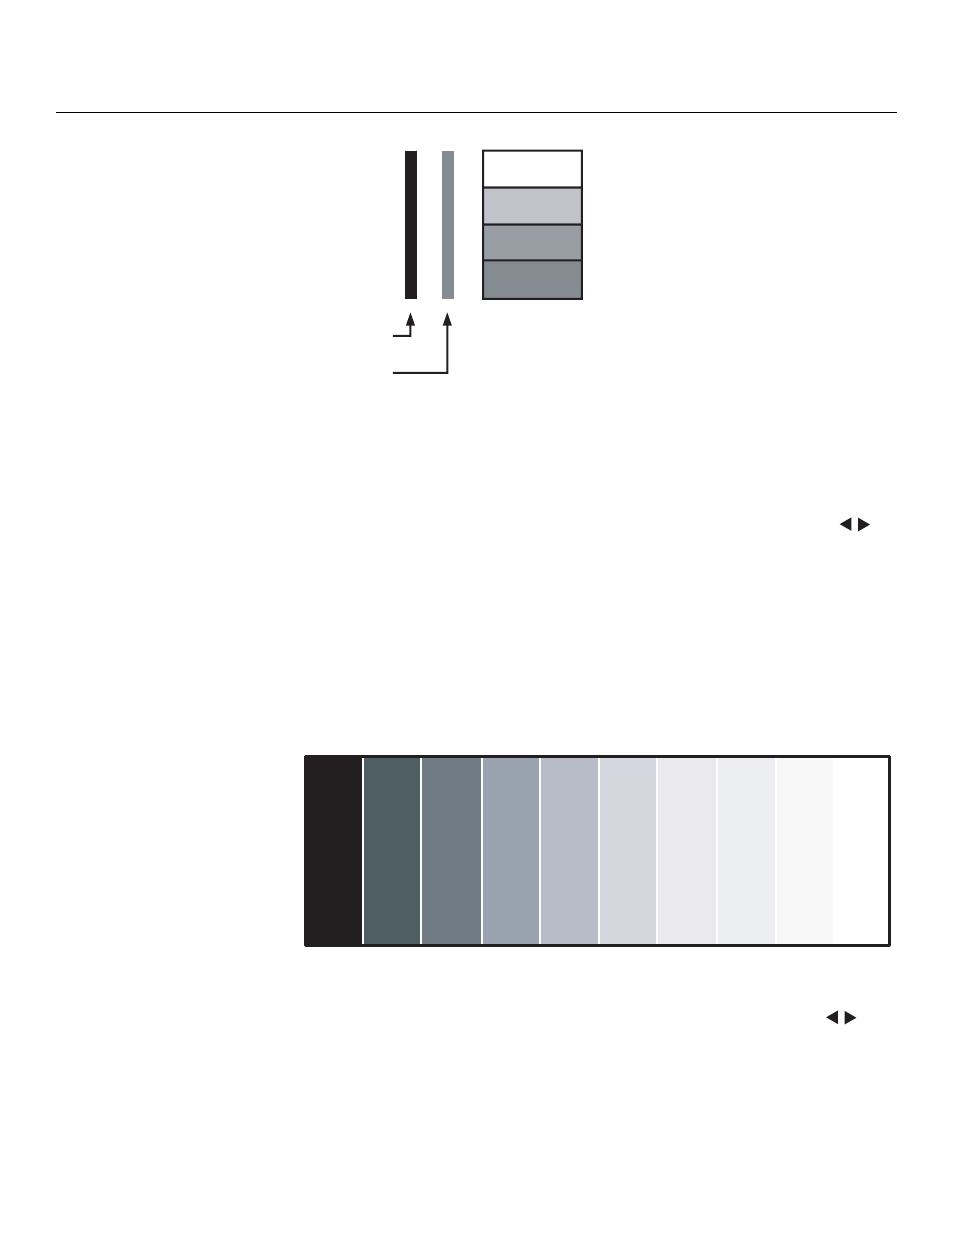
Figure 4-2. Typical PLUGE Pattern for Adjusting Brightness
PLUGE patterns vary but generally consist of some combination of black, white and gray
areas against a black background. The example above includes two vertical bars and four
shaded boxes.
Select Brightness from the Picture Adjust menu. Using the left- and right-arrow (
)
buttons, adjust the brightness so that:
• The darkest black bars disappear into the background.
• The dark gray areas are barely visible.
• The lighter gray areas are clearly visible.
• The white areas are a comfortable level of true white.
• The image contains only black, gray and white (no color).
Contrast: On your external test pattern source, select a stepped, gray-bar pattern like the
one shown in Figure 4-3.
Figure 4-3. Typical Gray Bar Pattern for Adjusting Contrast
Select Contrast from the Picture Adjust menu. Using the left- and right-arrow (
)
buttons, adjust the contrast to a point just below which the white rectangle starts to
increase in size.
Below Black
Above Black