Programming and debug – Renesas Renasas Single-Chip Microcomputer SH7086 User Manual
Page 5
4. Programming and Debug
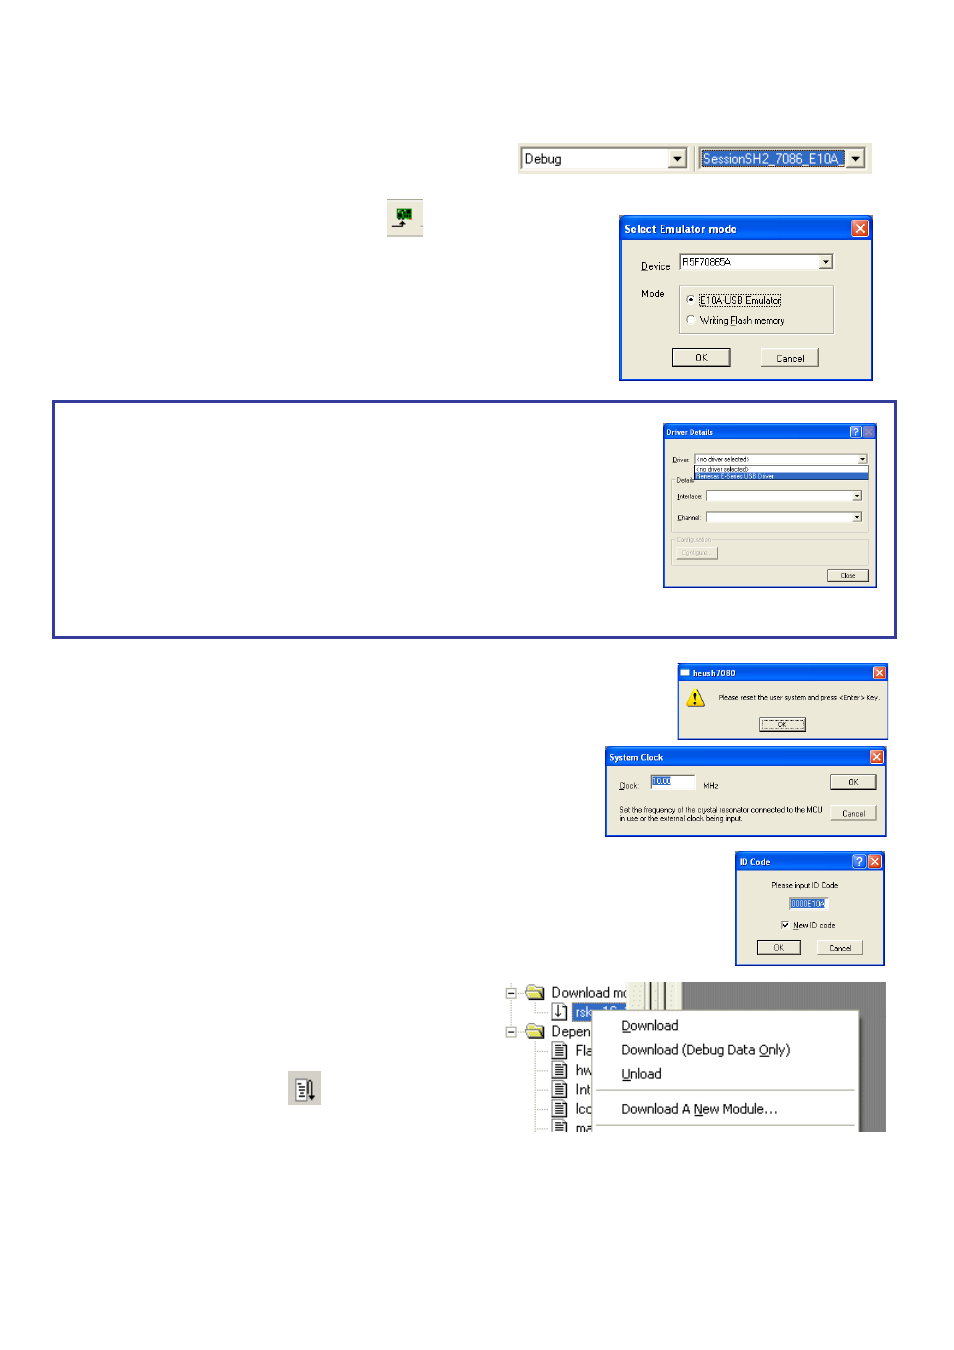
28. Select the “SessionSH2_7086_E10A_USB_SYSTEM” session in the right
hand drop down list on the tool bar.
29. Click the
30. The ‘Select Emulator mode’ dialog will appear. Select the device “R5F70865A” and the
“E10A-USB Emulator” radio button and click
If this isn’t the first time you have used the E10A module with this RSK, please skip to step 35.
First use of the E10A module
31. The ‘Please choose driver’ dialog will be shown. Click
32. The ‘Driver Details’ dialog will be shown, please select “Renesas E-Series USB Driver” as illustrated. The
‘Interface’ and ‘Channel’ items will be automatically populated. Click
33. The Firmware setup dialog will be shown warning you not to disconnect the USB cable until the firmware
download is complete. Click
34. The firmware will be downloaded to the E10A module; this will take a few moments.
Please do not disconnect the E10A from the host during download, doing so is likely to damage
the E10A module.
35. A dialog will be shown asking you to reset the user system and press
36. The ‘System Clock’ dialog will be shown, enter ‘10.00’ MHz and click
37. The ‘ID code’ dialog will appear, enter “0000E10A” for the ID code and check the “New ID code” tick-box and click
38. HEW will connect to the target and show “Connected” in the ‘Output’ view.
39. Right click on the download module listed in the left hand pane and select
‘Download’.
The code will not yet be downloaded to the microcontroller.
40. Click the ‘Reset – Go’ button.
41. The code will now be downloaded (this will take a moment or two) and
will then run. You will see the LEDs flash on the board, the rate of flashing can be adjusted using the Analog Adjust control.
D007274_11_S01_V02