Maintenance and repair instructions – Ryobi 105r User Manual
Page 12
12
MAINTENANCE AND REPAIR INSTRUCTIONS
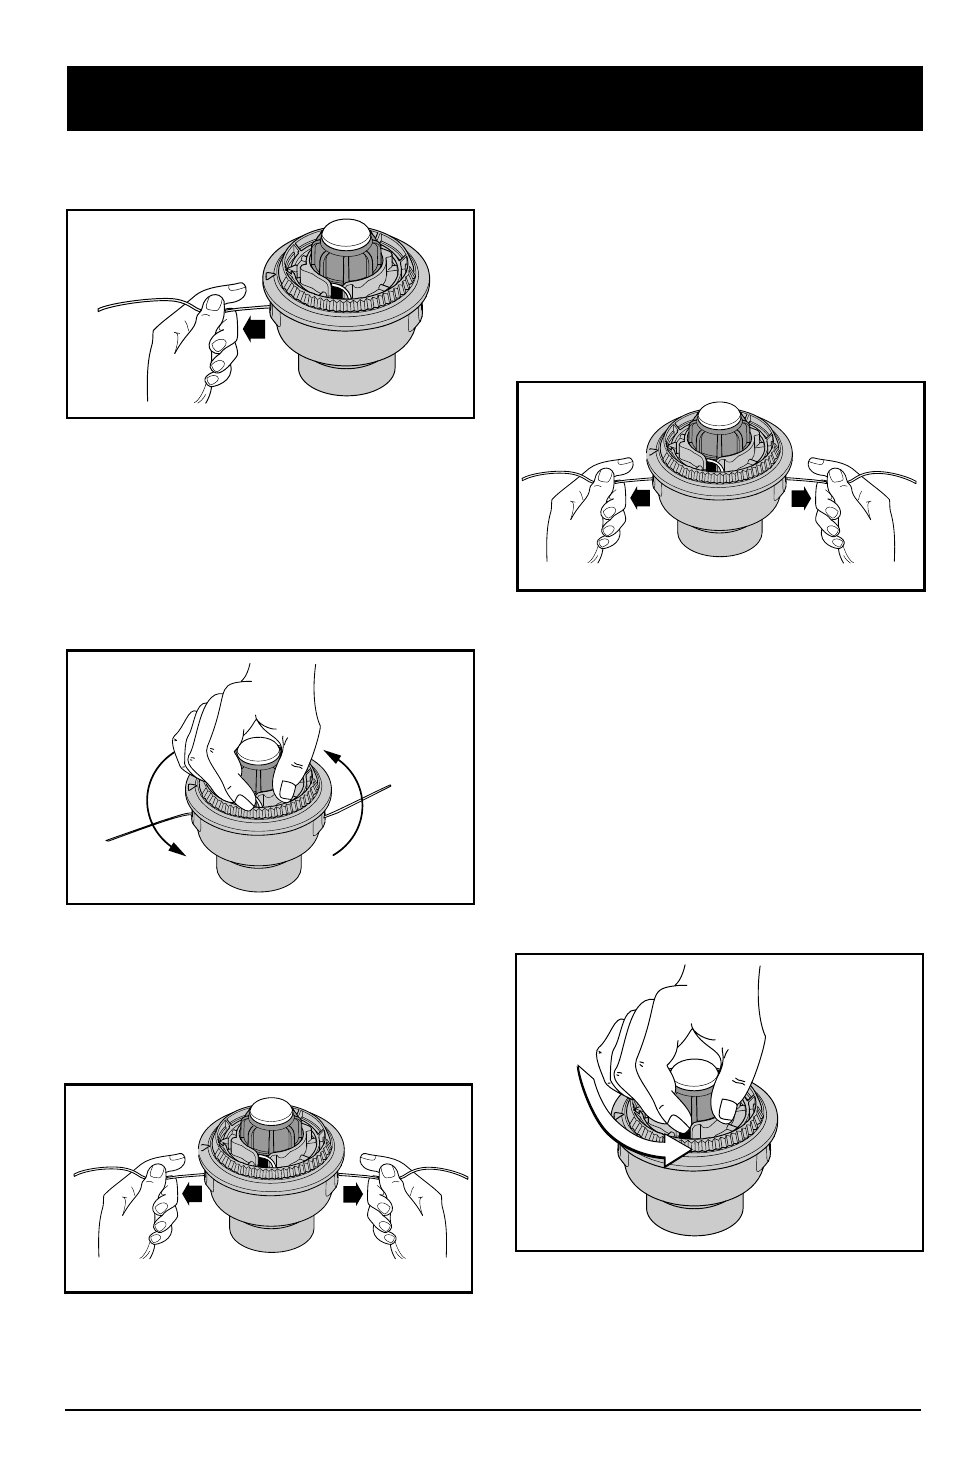
4. Pull the line away from the spool until the line
is tight against the inner reel (Fig. 20).
Fig. 20
Fig. 22
Fig. 24
Fig. 23
Fig. 21
5. Repeat the procedure with the second eyelet
and use the same amount of line as specified
in Step 2.
6. Wind the inner reel counterclockwise until
approximately four (4) inches of line remains
outside of the eyelets in the outer spool
(Fig. 21).
7. If winding the line becomes difficult or the line
jams, pull the ends of the line away from the
spool and continue winding the inner reel
counterclockwise (Fig. 22).
RELEASING THE INNER REEL
If the speed spool does not operate correctly
when bumping the head on the ground, use the
following instructions.
1. Pull the ends of the line firmly away from the
spool to release the inner reel (Fig. 23). If this
procedure does not release the inner reel,
follow the “Cleaning the SpeedSpool”
instructions below.
CLEANING THE SPEEDSPOOL
If the SpeedSpool becomes difficult to wind or
does not operate correctly when bumping the
head on the ground, use the following
instructions.
1. If you need to remove the Bump Knob to
clean the spool or remove jammed, excess
line, hold the outer spool, and unscrew the
Bump Knob counterclockwise (Fig. 24).
TO INSTALL NEW TRIMMING LINE, IT IS NOT
NECESSARY TO REMOVE THE BUMP KNOB.