Renesas R8C/13 User Manual
Page 5
3. High-performance Embedded Workshop Workspace
High-performance Embedded Workshop integrates various tools such as compiler, assembler, debugger and editor into a common graphical
user interface. To learn more on how to user High-performance Embedded Workshop, open the High-performance Embedded Workshop
manual installed on your computer (Start Menu > All Programs > Renesas > High-performance Embedded Workshop > Manual Navigator).
17. Launch High-performance Embedded Workshop from the Start Menu. (Start Menu > All Programs > Renesas > High-performance
Embedded Workshop > High-performance Embedded Workshop)
18. In the “Welcome” dialog box: Verify “Create New Workspace” is selected. Click
19. In the “New Project Workspace” dialog box: Set the “CPU Family” to “M16C”, and verify the “Tool chain” is set to “Renesas M16C
Standard”. Select “RSKR8C13” from the left hand pane.
20. Enter a name for the workspace. The project name will be automatically completed with the Workspace name. You can change this
name to “Tutorial” if required. Click
21. On the “RSKR8C13- Step 1” window: Select “Tutorial” and click
22. On the “RSKR8C13- Step 2” window: Click
23. On the Project Generator Information window: Click
The project that is created has two configurations. The Release configuration can be used for the final release code version. The
Debug configuration allows modifications to the configuration for debugging.
24. Select the Debug build configuration in the left hand drop down list on the toolbar.
D007054_11_S01_V04
25. Click on the “Build” icon to compile, assemble and link the project.
4. Programming and Debug
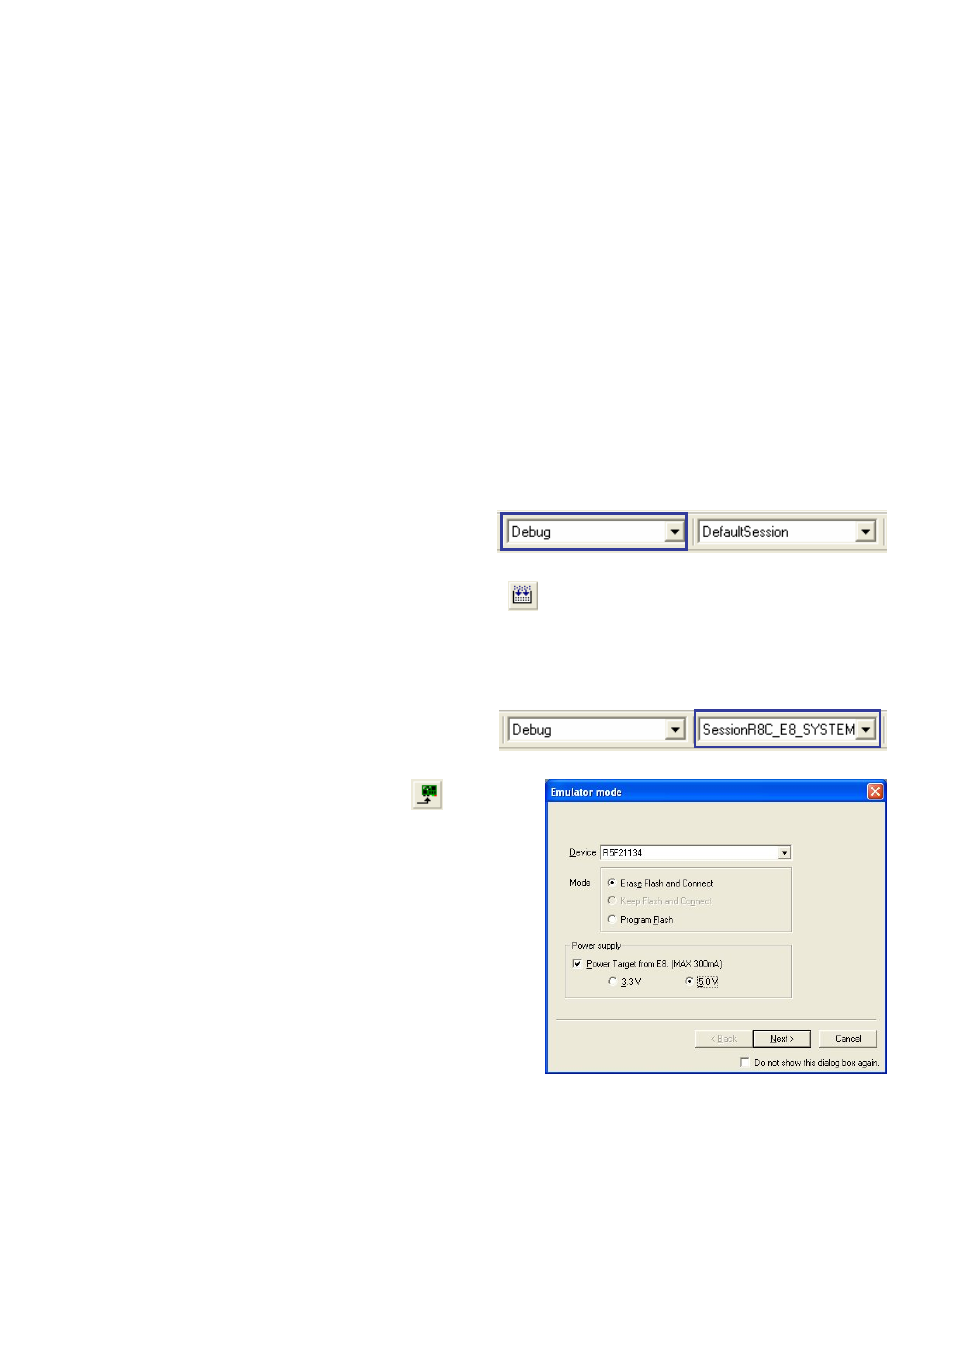
26. Ensure the “SessionR8C_E8_SYSTEM” session in the right hand drop down list on the toolbar is selected.
27. Click the
28. The “Emulator mode” dialog will be shown. Select the correct device type
(e.g. R5F21134 for RSKR8C13).
Please note that the “Emulator mode” wizard shown here will only
appear the FIRST time you connect to the target within a project. On
subsequent connections the “Emulator setting” dialog will appear,
please choose the same options to connect.
29. Select “Erase Flash and Connect”.
30. If the E8 is to provide power to the CPU board, select “Power Target from
E8” and choose the “5.0V” option.
Otherwise connect a 5V centre positive supply.
31. Click
32. Ensure the “Enable advanced setting” checkbox is cleared.
33. Click