2 quick setup, Table 3-1 . installation overview, Quick setup – Runco Vision 85 User Manual
Page 29: Pre l iminar y
Vidikron Vision 85 Owner’s Operating Manual
17
PRE
L
Y
3.2
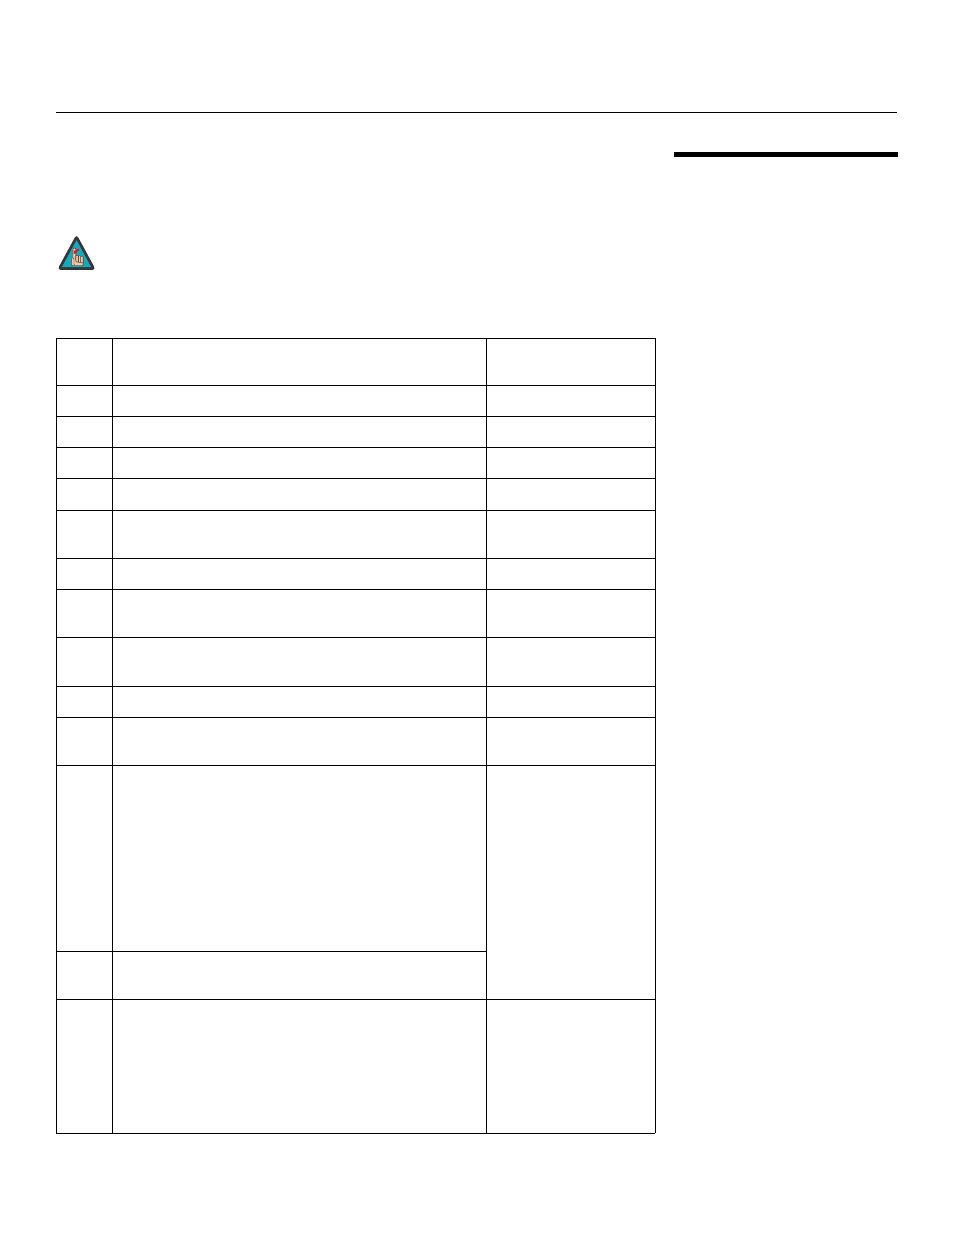
Quick Setup
Table 3-1 gives a quick overview of the Vision 85 installation process. The sections following
this one provide detailed instructions.
Installation should be performed by a qualified custom video installation
specialist.
Table 3-1. Installation Overview
Step
Procedure
For Details, Refer to
page...
1
Choose a location for the projector
2
Connect the VHD Controller to the projector
3
Connect signal sources to the VHD Controller
4
Connect external controller to RS-232 port (optional)
5
Connect other home theater components to 12-volt trigger
outputs (optional)
6
Apply power to the projector
7
For rear-screen and/or ceiling-mount installations, select the
proper picture orientation
8
Primary lens adjustments: projected image size (zoom),
position (shift) and focus
9
Install CineWide anamorphic lens (optional)
10
CineWide lens adjustments: position, pitch (angle), geometry
and focus
11
Projector calibration – Analog 1080i and lower-resolution
signals:
Adjust the following for Component SD input; save settings
when finished:
• Aspect ratio
• Brightness
• Contrast
• Color level
• Tint
• Input position
39 through 52
12
Repeat Step 11 for S-Video 1, S-Video 2, Composite Video,
HD1 and HD2 inputs
13
Projector Calibration – Digital 1080i or 1080p signals:
Adjust the following for HDMI 1 and HDMI 2 inputs:
• Brightness
• Contrast
• Color level
• Tint
• Input position
52 through 61
Note