Spare parts, Maintenance – Redring AE115 User Manual
Page 11
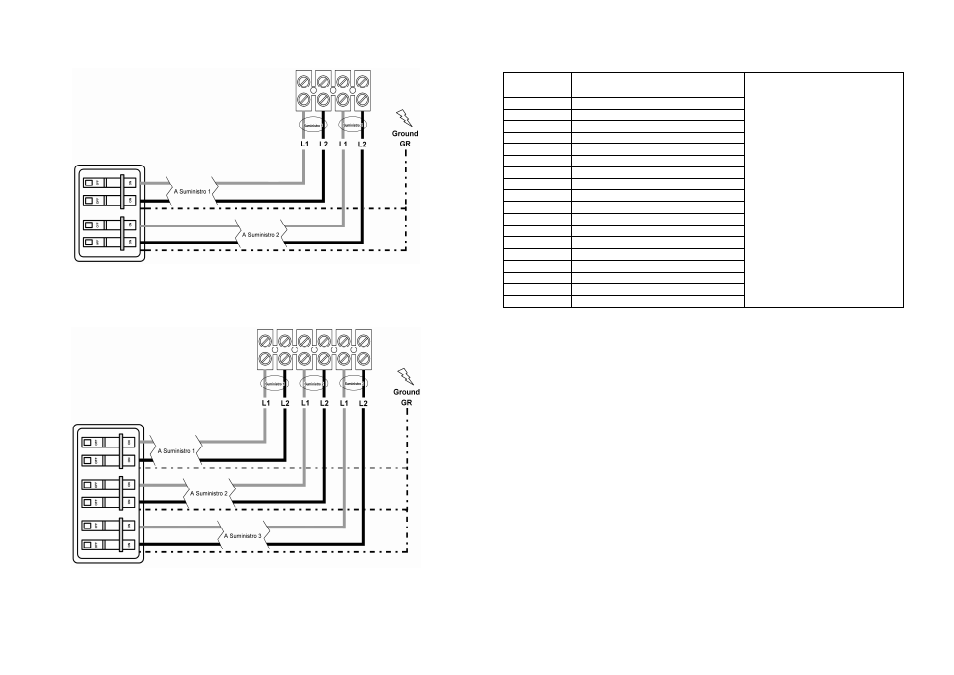
Diagrama 2
AE115 Conexión del bloque de terminales
El AE115 requiere dos circuitos independientes de CA de 240V protegidos por dos conmutadores bipolares
separados e independientes (según se muestra) con un régimen de 40 A cada uno.
Diagrama 3
AE125 Conexión del bloque de terminales
El AE125 requiere tres circuitos de CA de 240V protegidos por tres conmutadores bipolares separados e
independientes con un régimen de 40 A cada uno.
6
Spare Parts
Part
Number
Description
(Refer to Diagram 1, Page 4)
93 793770
4 way term. block (for AE115)
93 793771
6 way term. block (for AE125)
93 793772
Front cover (white)
93 793773
Thermal cut-out (AE115)
93 793842
Double pole cut-out (AE125)
93 793774
Flow transducer
93 793775
PCB enclosure (lid)
93 793776
PCB enclosure (base)
93 793843
Control PCB (for AE115)
93 793844
Control PCB (for AE125)
93 793779
Adjustment knob
93 793845
O Ring set
93 793846
Fixing screws for heater flange
93 793784
¾” Inlet filter screen
93 793847
Heater element assembly 1 (AE115)
93 793848
Heater element assembly 2 (AE115)
93 793849
Heater element assembly 1 (AE125)
93 793850
Heater element assembly 2 (AE125)
For further information ask your
local dealer.
FOR SERVICE AND INSTALLATION
QUESTIONS CALL TOLL FREE:
866-330-2729 (Toll Free)
Fax: 802-496-6924
BBT NORTH AMERICA
Bosch Group
Bosch Water Heating
340 Mad River Park
Waitsfield, VT 05673
Phone 866-330-2729
Fax 802-496-6924
www.boschhotwater.com
[email protected]
Maintenance
Check inlet water filter screen once a year
•
Shut off the installer supplied cold water isolation valve to the heater. If one is not installed, install
before proceeding.
•
Open nearest hot water tap to relieve pressure in the plumbing lines.
•
Position a bucket under the cold water inlet connection of the heater to catch any water that may
drain.
•
Loosen cold water plumbing connection (bottom right of heater) to access filter screen (See Diagram
1, Page 4).
•
Remove filter, clean with water and inspect for damage. If the filter is at all damaged, it should be
replaced.
11