Assembly – Ryobi RT501W User Manual
Page 13
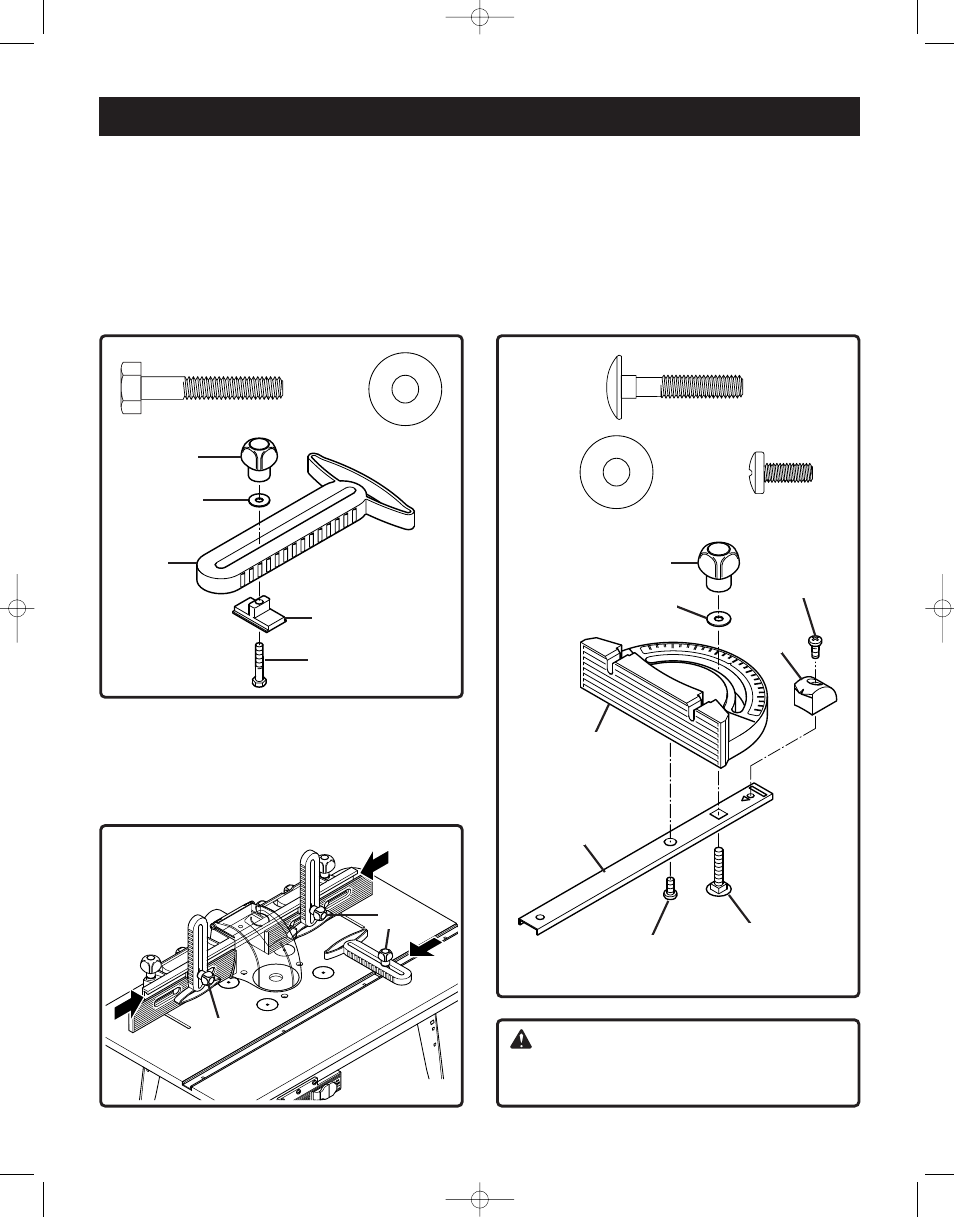
ASSEMBLE THE MITER GUIDE
See Figure 11
15. Place the miter guide head (E) on top of the miter bar
(X)
. Now fasten together by screwing the self tapping
screw (AF) into the miter guide head. Assemble miter
guide by threading carriage bolt (AA) through miter bar
(X)
. Place washer (AE) and knob (S) on end of carriage
bolt. Tighten knob and then attach miter pointer (W) to
rear of miter bar (X) with self tapping screw (AF).
ASSEMBLY
13
TO ATTACH THE FEATHERBOARDS
See Figure 9
13. Insert the hex head screw (AJ) into the sliding block
(J)
. Place the sliding block into the slot of the feather-
board (H). Secure by placing washer (AE) over the hex
head screw (AJ). Screw together by turning the knob
(S)
clockwise. NOTE: Do not completely tighten at this
stage. Repeat the above for the remaining 2 feather-
boards.
Fig. 9
WARNING:
Before mounting the router make sure you have read
and understood pages 10-13 of your owner’s manual.
Fig. 10
AJ (3)
See Figure 10
14. Position 2 of the featherboards on the fence and
secure by turning the knobs (S) clockwise. Place the
third featherboard into the slot provided on the table-
top and tighten in the same way.
AE (3)
S
AE
H
J
AJ
S
S
Fig. 11
AA (1)
AE (1)
AF (2)
S
AE
E
W
AF
X
AF
AA
Bdal 6146.461 3Sprachen 04.06.2005 11:58 Uhr Seite 13