Analog out mode, Display device, Figure 4-6 . keystone correction – Runco Video Xtreme VX-55d User Manual
Page 87: Pre l iminar y
Runco VX-44d/-55d Owner’s Operating Manual
75
PRE
L
Y
When you change a remote code on the DHD Controller, you must re-program your
remote control to send that same code. To do this:
1. Using a straightened paper clip or similar object, press and hold the
CODE button on the remote control for approximately three seconds,
or until the red LED on the remote lights solid red.
2. Enter a new two-digit code between 00 and 31 inclusive. Include a
leading zero for single-digit codes; for example, enter 9 as “09.”
3. The LED turns off to confirm the code change. If you enter an invalid code, the LED
flashes for three or four seconds. Try again, entering a valid code.
Analog Out Mode: Select Analog Out Mode from the Service menu to change the
characteristics of the analog output signal from the DHD Controller. The choices are
RGB-- (separate sync with negative polarity), RGB++ (separate sync with positive polarity)
or RGBS (composite sync).
Display Device: The options in the Display Device menu allow you to perform various
adjustments at the projector.
• Configure: Select Configure from the Display Device menu to change the picture
orientation, correct a “keystoned” (trapezoidal) image, access the lamp timer, perform
lens adjustments and quickly optimize various display settings.
• Installation - Orientation: Refer to Adjusting the Picture Orientation on
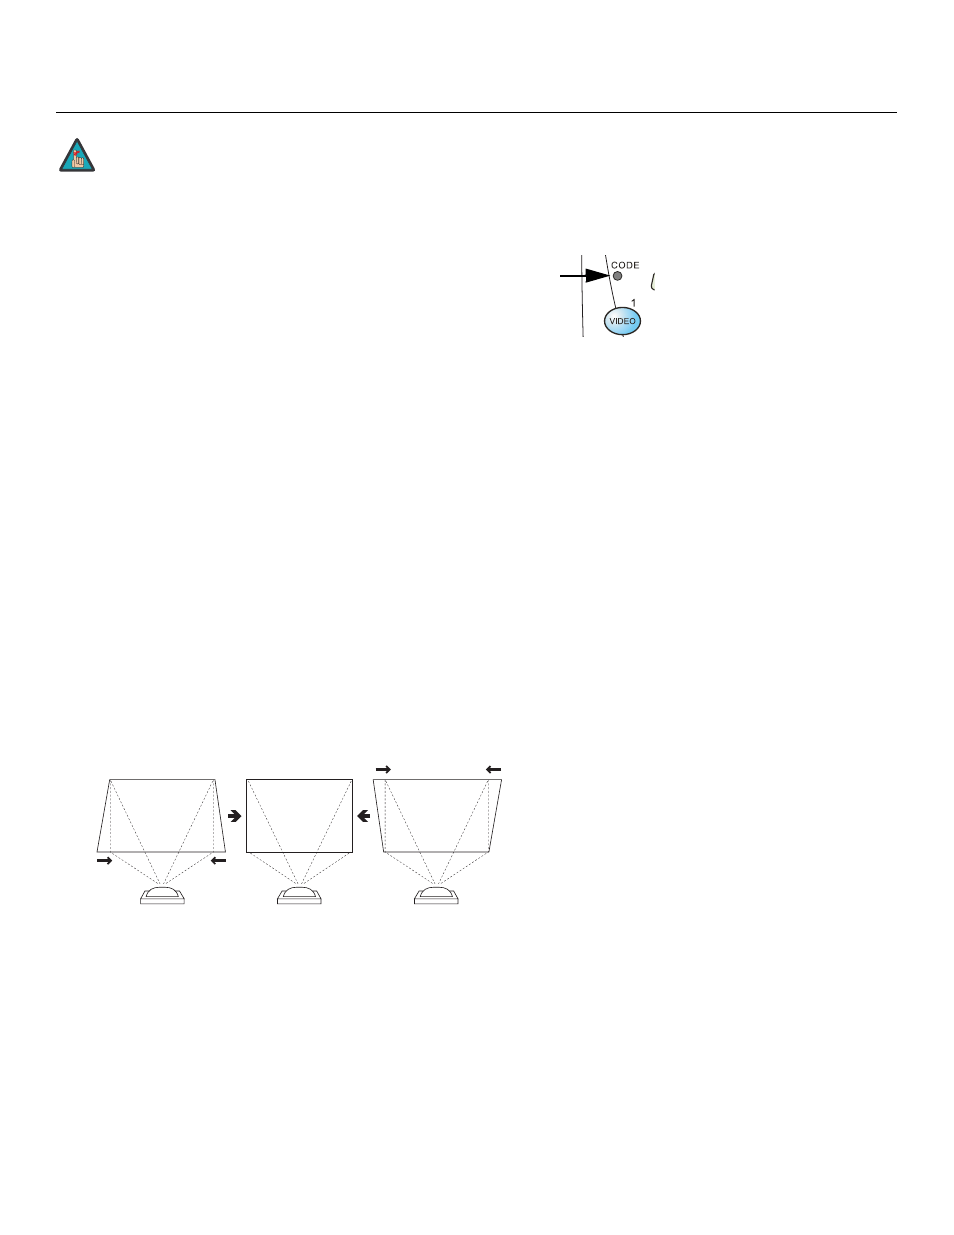
• Installation - Keystone: If the projector and screen are not installed perpendicular
to each other, the image may become distorted in a trapezoidal shape, as shown in
Figure 4-6. Select Keystone from the Configure menu to compensate for this.
Figure 4-6. Keystone Correction
• Installation - Lamp Hours: This menu page also displays the number of hours that
the lamp has been in service. To reset the counter (which is recommended after you
replace the lamp), refer to Lamp and Filter Replacement on page 79.
• Lens: Select Lens from the Display Device menu to access the motorized lens
controls. Refer to Primary Lens Adjustments on page 38.
• Auto Setup: Refer to Auto Setup on page 49.
Do not change the “Type” setting in this menu.
Note
Vertical Keystone Correction
Positive values
compress top.
Negative values
compress bottom.
-
+