Radio Shack XMODS 60-440 User Manual
Page 2
www.xmodsRC.com
16
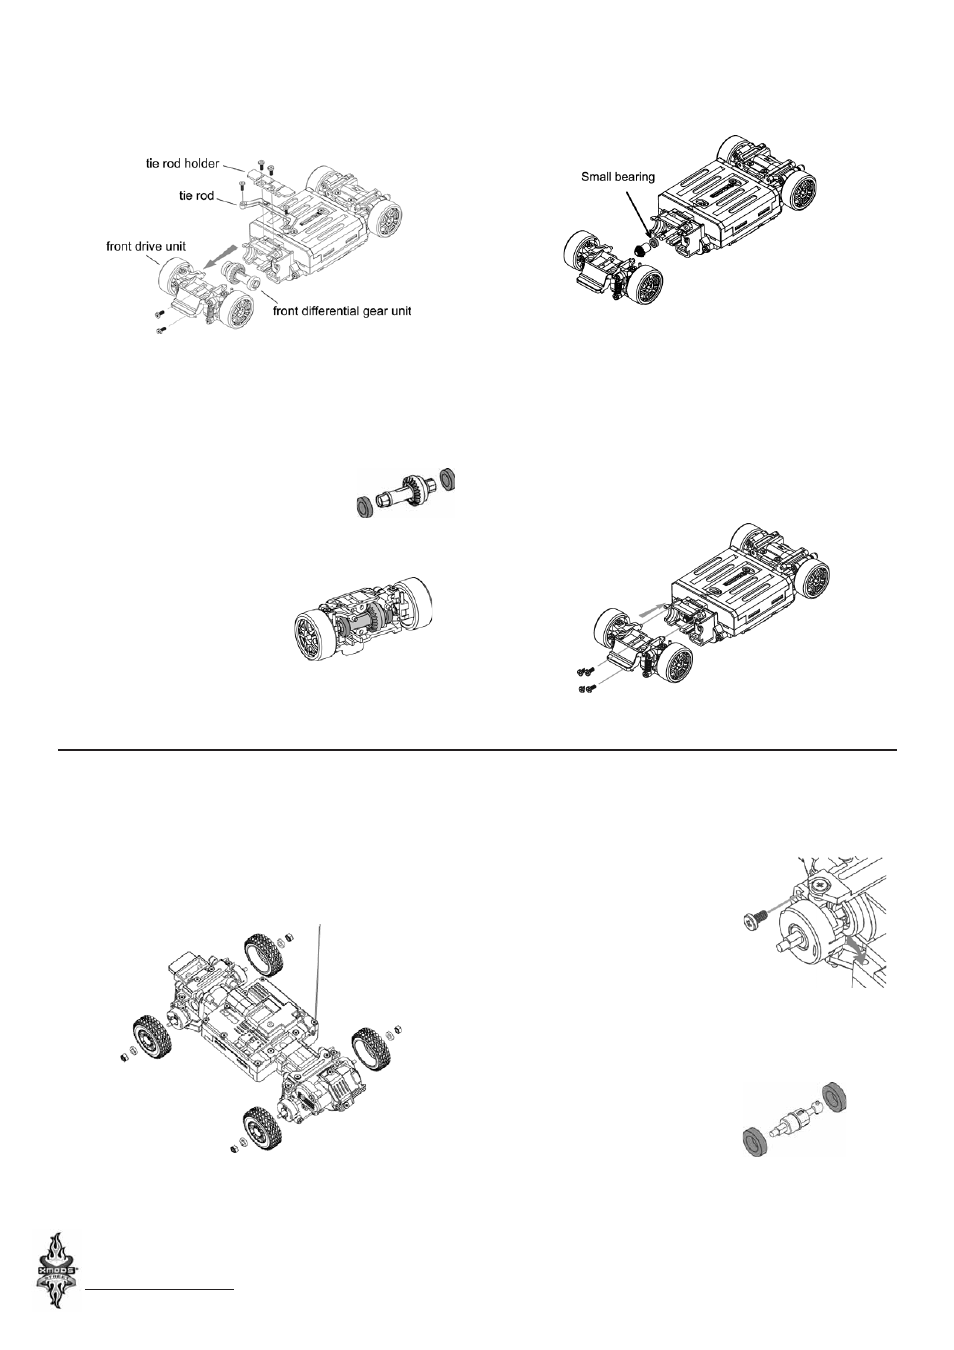
Detach the center gear
and the center shaft and
replace the small bearing
on the center shaft with
the new metal one.
Tweezers may be helpful
for this step.
17
Place the center gear back onto the center shaft.
Lightly press and rotate the center gear so the flat
side of the center shaft and the center gear mesh.
19
Align the front arm shafts with the proper holes,
then attach the front drive unit—with differential
gear installed—to the chassis. Replace the tie rod
and tie rod holder.
18
Restore the center gear and shaft into their original
positions and rotate center gear so the rear center
gear meshes with the shaft.
1
Use the lug wrench supplied in your Starter Kit to
detach the lug nuts and wheels.
2
Loosen and remove the
screw on the knuckle cap
(or disk brake if you have
changed it). Carefully
unlatch the claw on the
knuckle cap and pull out the
wheel shaft along with the
knuckle cap.
3
Remove the bearings on
both ends of the wheel
shaft. Wipe the grease off
the wheel shaft and install
the metal bearings. The
grease ensures smooth
operation with the original
bearings. When you use the metal bearings, grease
is not necessary.
14
Replace the bearing on both sides of the differential
gear.
15
Attach the front drive shafts, as
shown in the illustration.
13
Loosen the two screws from the tie rod holder and
the screws on the tie rod to remove the tie rod
holder and tie rod. Loosen the two screws from the
front gear case to release the front drive unit and
detach the front gear case cover.
2
Upgrading with Older XMODS
®
Truck Models