Operation – RIDGID R350PNA User Manual
Page 11
LEFT
HAND
LATCH
OPERATION
DRIVE DEPTH
ADJUSTMENT
TO INCREASE
DEPTH
TO DECREASE
DEPTH
Fig. 7
HOOK-AND-LOOP AND
LOOP TOP
RIGHT
HAND
LATCH
Fig. 5
Fig. 6
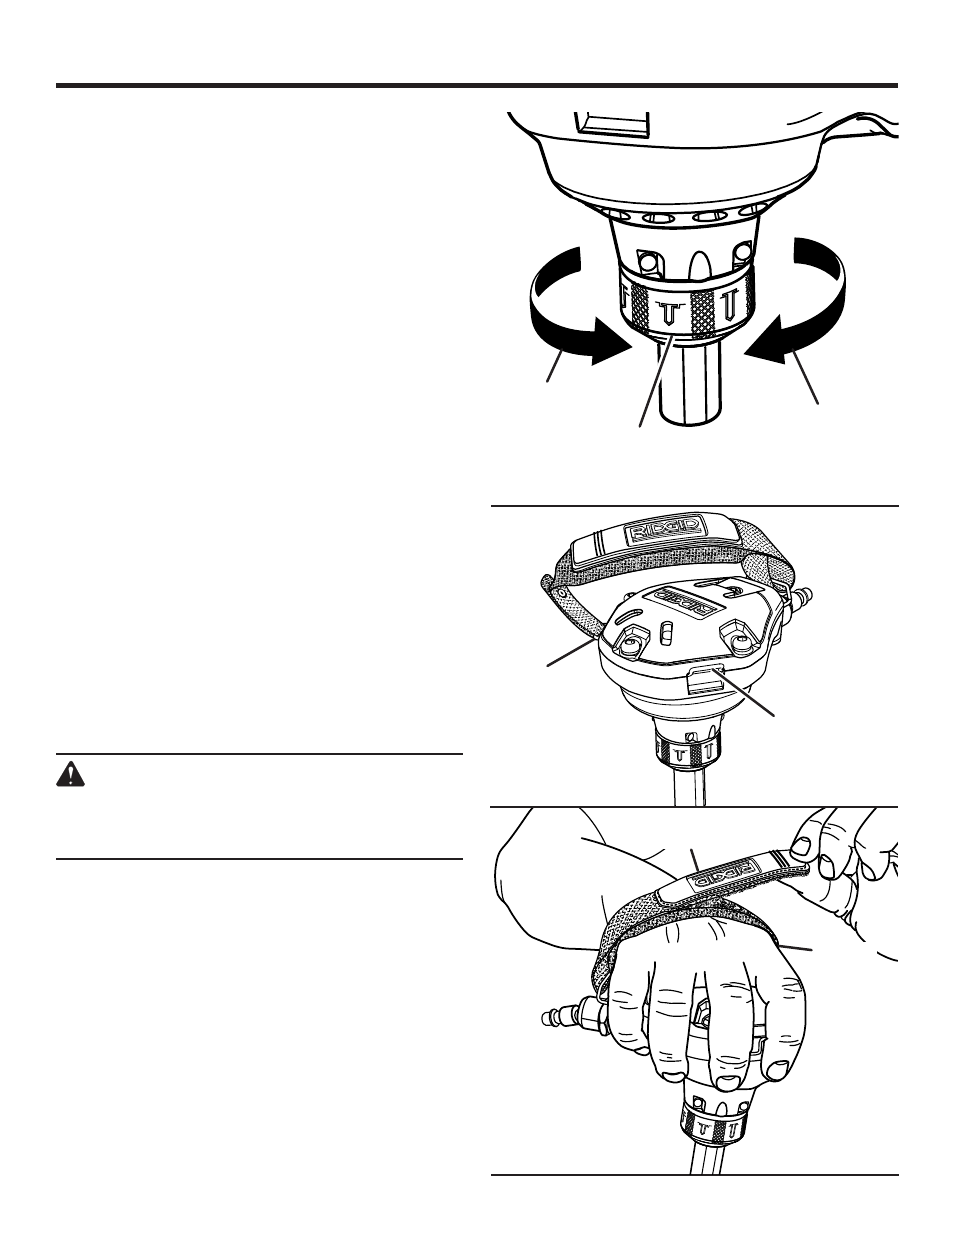
DRIVE DEPTH ADJUSTMENT
See Figure 5.
The driving depth of the nail may be adjusted. It is advisable
to test the depth on a scrap workpiece to determine the
required depth for the application.
To determine depth of drive, first adjust the air pressure and
drive a test nail. To achieve the desired depth, use the drive
depth adjustment on the tool.
Disconnect the tool from the air supply.
Turn the depth selector left or right to change the driving
depth.
Reconnect the tool to the air supply.
Drive a test nail after each adjustment until the desired
depth is set.
ADJUSTING THE HAND STRAP
See Figure 6 - 7.
Disconnect the tool from the air supply.
Determine which hand the palm nailer will be used with and
attach the hand strap to the latch according to figure 6.
Pull the hand strap hook-and-loop top apart from the
bottom.
Insert hand and tighten to fit.
Reattach hand strap hook-and-loop top to bottom.
DRIVING NAILS
Place tip of the nail against the workpiece.
Push the tool firmly with your palm. Keep the nail in line
with the nosepiece as the nail is driven.
Remove the tool from the nail when complete.
WARNING:
Never hold the nail with your hand or fingers while
driving the nail. Doing so could result in possible
serious personal injury.
BOTTOM