NEC MT830 User Manual
Page 13
E-12
OFF
ON
PC CARD
VIDEO
RGB 1
MENU
R-CLICK/CANCEL
LASER
SLIDE VOLUME
S-VIDEO
POINTER
MAGNIFY
PIC-MUTE FREEZE
RGB 2
+
–
+
–
+
–
+
–
FOCUS KEYSTONE
ZOOM
+
–
+
–
+
–
POWER
14
15
16
17
18
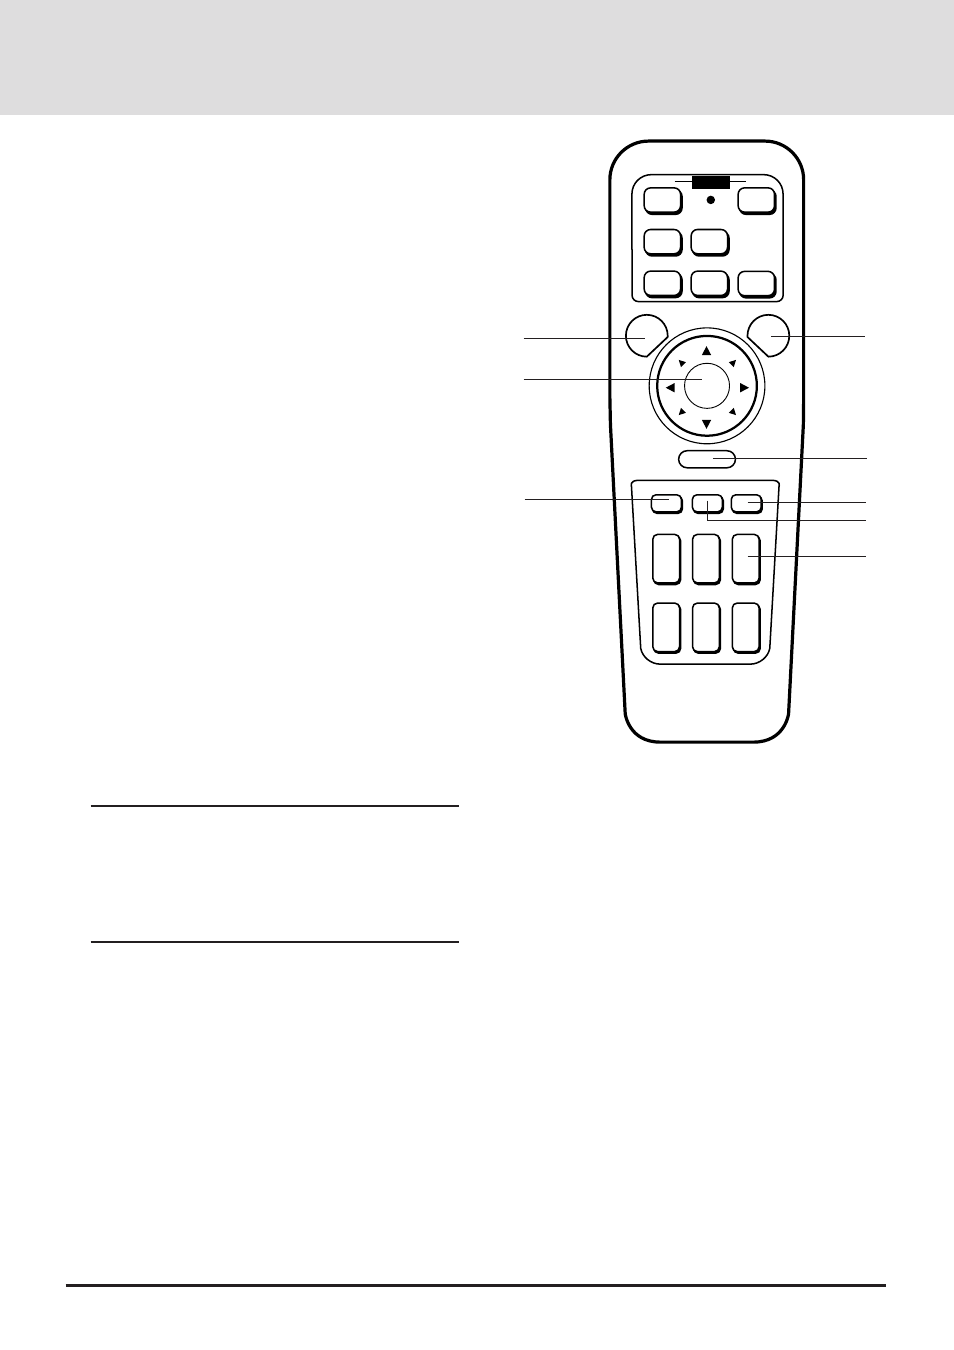
11 Laser Button
Press and hold this button to activate the laser pointer. When
lit, you can use the laser to draw your audience's attention to
a red dot that you can place on any object within 10 m.
12 Menu Button
Use this button to call up the On-Screen Menu so you can
adjust and set the image. After you press this button, it will
light up. During this time you can use the mouse pad and
right/left click buttons to make menu selections.
If no buttons are pressed within 10 seconds while it illumi-
nates, the light goes out. To return to the main menu from a
submenu, press this button again.
13 Mouse Pad(
▲▼
ᮤ
ᮣ
/+ -)
Works as a mouse for your projected computer image. This
pad is also used to adjust position.
This pad selects the submenu you want to adjust. (See page
E-27.)
After you make your on-screen menu selection, use this pad
to adjust the level up or down. (See page E-27.)
14 Right Click/Cancel Button
Press this button to exit "Menus" or "Pointer."
15 Freeze Button
This button will freeze a picture. Press again to resume
motion.
16 Picture Mute Button
This button turns off the image for a short period of time.
Press again to restore the image.
17 Pointer Button
Use this button to move your Pointer icon to the area you
want on the screen, then press the Magnify button on the
remote control to enlarge the selected area on the screen.
When you're finished, the "Pointer" button will remain lit for
10 seconds.
NOTE:
* Eight kinds of Pointers (icons) are available. You can
select one from the Settings Menu. The magnifying glass
icon is selected at the factory. See page E-32 for more
details.
* With the Pointer button pressed, the Mouse Pad is used to
move the picture.
18 Volume Button
Press (+) to increase the volume and (-) to decrease it.
11
12
13