Rear panel, Identification of controls – NAD C426 User Manual
Page 8
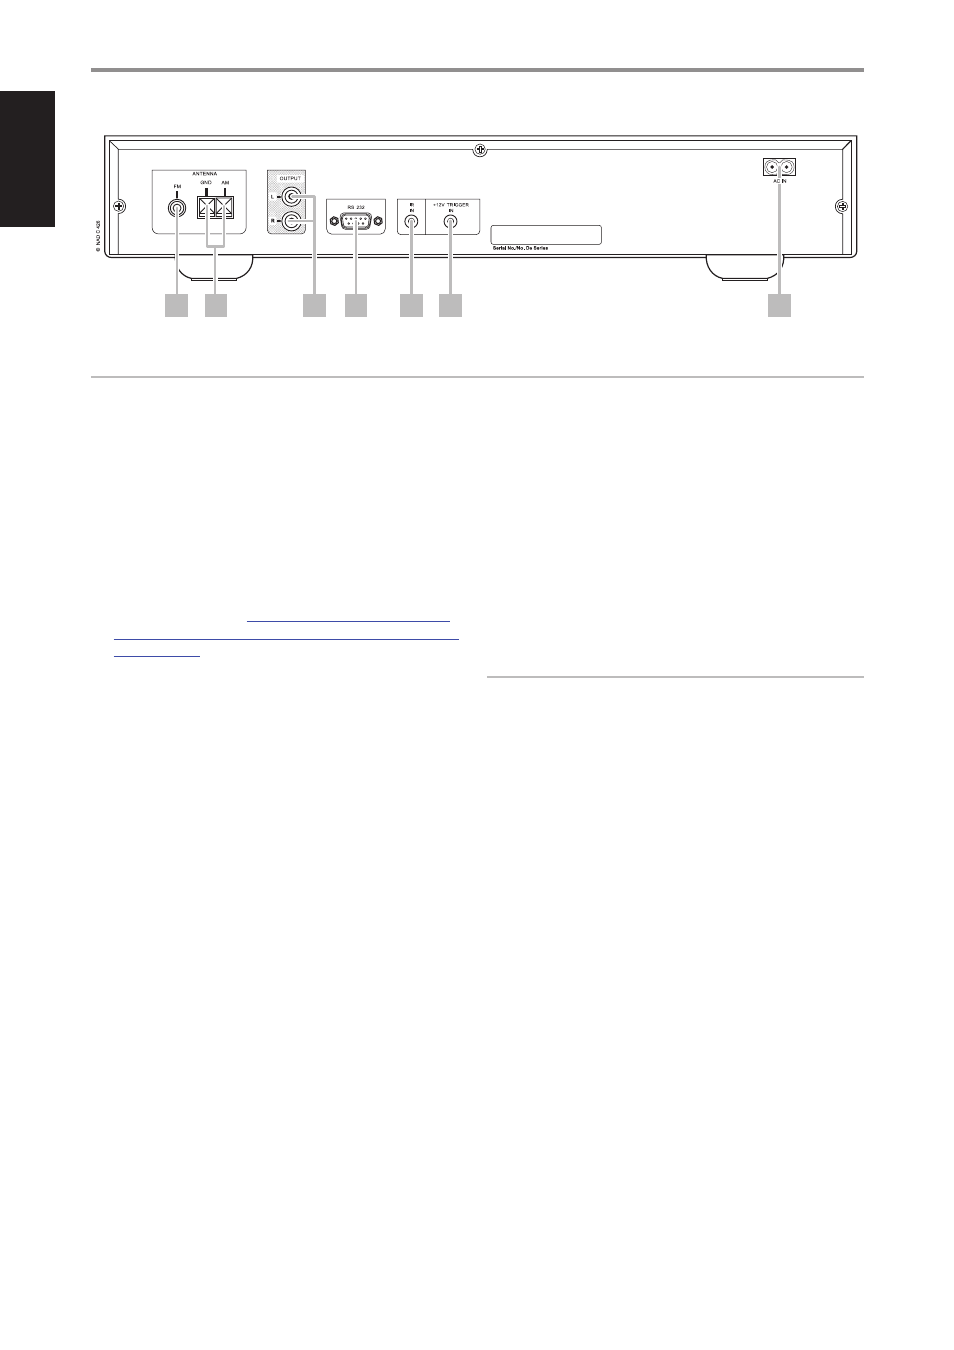
1 FM ANTENNA TERMINAL: Connect the supplied wire “dipole” FM
antenna to the FM antenna terminal using the supplied “balun” adapter.
It will usually work best when mounted on a vertical surface such as a
wall, with arms fully outstretched forming a horizontal “T” perpendicular
to the origin point of the signal.
2 AM ANTENNA TERMINAL: Connect the supplied AM loop antenna to
these terminals. If an external AM antenna is used, make connections
to the AM and GND terminals in accordance with the instructions
supplied with the antenna.
Refer also to the item about ASSEMBLING
THE LOOP ANTENNA at the LISTENING TO AM/FM RADIO section of the
OPERATION page.
3 OUTPUT (L, R): Connect to the corresponding analog audio input of
an amplifier, receiver or stereo system.
4 RS-232: Connect this interface using RS-232 serial cable (not supplied)
to any Windows® compatible PC to allow remote control of the C 426
via compatible external controllers. NAD is a certified partner of AMX
and Crestron and fully supports these external devices. Check out the
NAD website for information about AMX and Crestron compatibility
with NAD. See your NAD audio specialist for more information.
5 IR IN: This input is connected to the output of an IR (infrared) repeater
(Xantech or similar) or the IR output of another component to allow
control of the C 426 from a remote location. Most NAD products with IR
OUT are fully compatible with the C 426.
6 +12V TRIGGER IN: This input allows the C 426 to be switched remotely
to standby mode and ON by ancillary equipment, such as an amplifier,
preamp, AV processor, etc. The controlling device must be equipped
with a 12V trigger output to use this feature. Connect this +12V trigger
input to the remote component’s corresponding +12V DC output jack
using a mono cable with 3.5mm male plug.
7 AC MAINS INPUT: The C 426 comes supplied with a separate AC Mains
cable. Before connecting the cable to a live wall socket, ensure that it
is firmly connected to the C 426’s AC Mains input socket first. Connect
only to the prescribed AC outlet, i.e., 120V 60 Hz (for 120V version
models of C 426 only) or 230V 50 Hz (for 230V version models of C 426
only). Always disconnect the AC Mains cable plug from the live wall
socket first, before disconnecting the cable from the C 426’s Mains input
socket.
If you intend not to use the C 426 for long periods of time, disconnect
the AC mains cable plug from the live AC wall socket.
WARNING
If the male plug of the mono cable (with or without +12V DC) is
connected to C 426’s +12V TRIGGER IN, the Standby button in the front
panel as well as the corresponding ON/OFF function keys in the remote
control will be disabled. Unplug the mono cable to maintain normal
power ON/OFF function procedures.
IDENTIFICATION OF CONTROLS
REAR PANEL
1
4
3
2
5
6
7
ATTENTION!
Please make sure that the C 426 is powered off or unplugged before making any connections. It is also advisable to power down or unplug all associated
components while making or breaking any signal or AC power connections.
8
EN
G
LIS
H
FR
A
N
Ç
A
IS
ES
PA
Ñ
O
L
IT
A
LIA
N
O
D
EU
TS
CH
N
ED
ER
LA
N
D
S
SV
EN
SK
A
РУ
СС
К
И
Й