Trouble shooting guide, Symptom problem test solution – Napoleon Fireplaces GSS36N User Manual
Page 10
10
W415-0369 / F / 12.10.07
Main burner goes
out; pilot stays on.
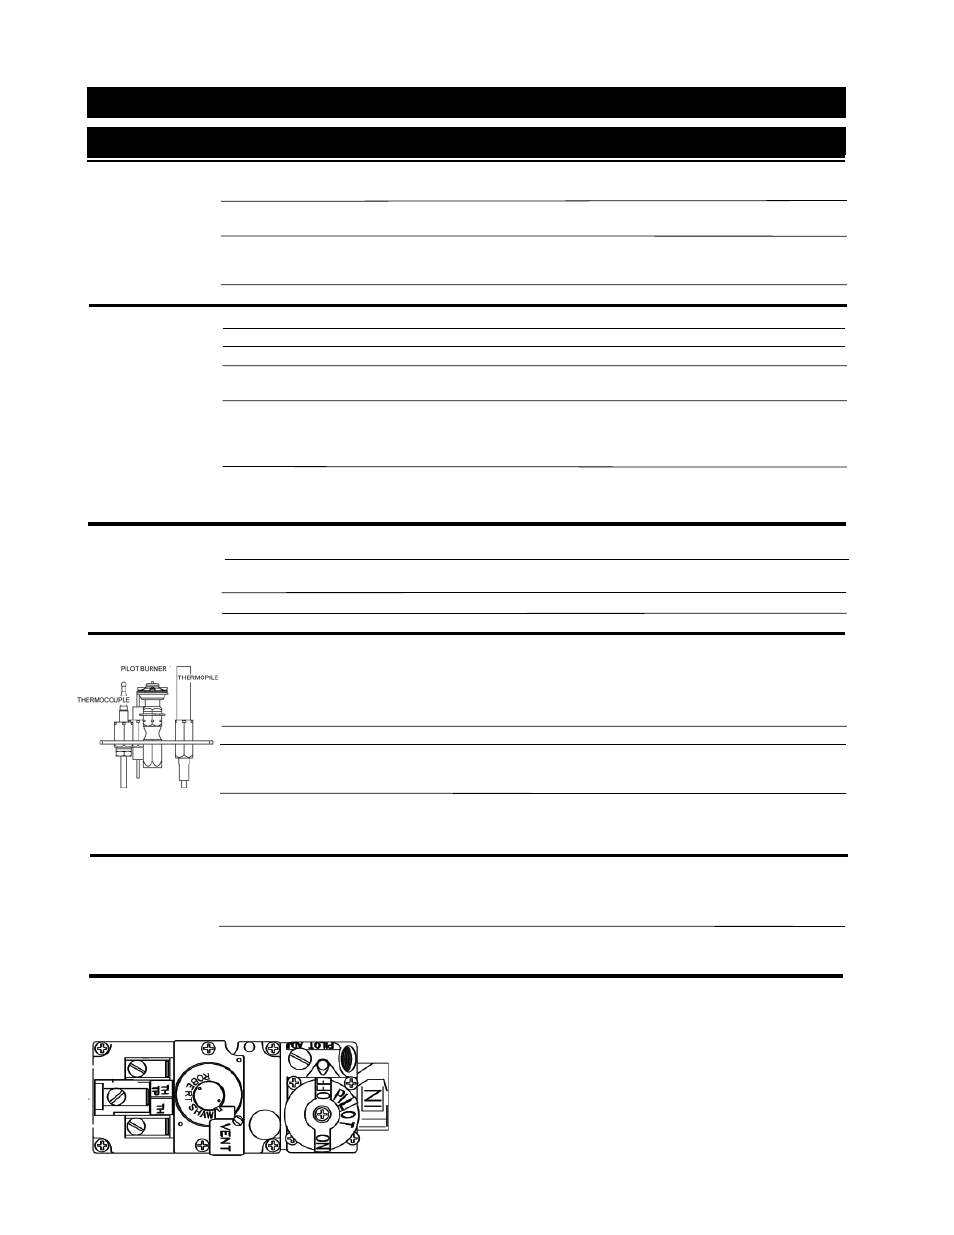
Pilot fl ame is not large enough
or not engulfi ng the thermopile
- turn up pilot fl ame.
- replace pilot assembly.
Thermopile shorting
- clean thermopile connection to the valve. Reconnect.
- replace thermopile / valve.
Remote wall switch wire is too
long; too much resistance in the
system.
- shorten wire to correct length or wire gauge.
Faulty thermostat or switch.
- replace.
Pilot will not light.
- check if pilot can be lit by a match
- check that the wire is connected to the push button ignitor.
- check if the push button ignitor needs tightening.
- replace the wire if the wire insulation is broken or frayed.
- replace the electrode if the ceramic insulator is cracked or broken.
- replace the push button ignitor.
No spark at pilot burner
- fi ll the tank.
Out of propane gas
Spark gap is incorrect
- spark gap should be 0.150” to 0.175” (5/32” to 11/64” approx.) from the
electrode tip and the pilot burner. To ensure proper electrode location, tighten
securing nut (fi nger tight plus 1/4 turn).
No gas at the pilot burner
- check that the manual valve is turned on.
- check the pilot orifi ce for blockage.
- replace the valve.
- call the gas distributor.
Pilot goes out when
the gas knob is
released.
The gas valve
has an interlock
device which will
not allow the pilot
burner to be lit until
the thermocouple
has cooled. Allow
approximately 60
seconds for the
thermocouple to
cool.
System is not correctly purged.
- purge the gas line.
Out of propane gas.
- fi ll the tank.
Pilot fl ame is not large enough
- turn up the pilot fl ame.
- gently twist the pilot head to improve the fl ame pattern around the thermo-
couple.
Pilot fl ame is not engulfi ng the
thermocouple.
Thermocouple shorting / faulty.
- loosen and tighten thermocouple.
- clean thermocouple and valve connection.
- replace thermocouple.
- replace valve.
Faulty valve.
- replace.
Pilot burning; no gas
to main burner; gas
knob is on ‘HI’; wall
switch / thermostat
is on.
Themostat or switch is defec-
tive.
- connect a jumper wire across the wall switch terminals; if main burner
lights, replace switch / thermostat.
Main burner orifi ce is plugged.
- remove stoppage in orifi ce.
Faulty valve.
- replace.
Wall switch wiring is defective.
- disconnect the switch wires & connect a jumper wire across terminals 1 & 3;
if the main burner lights, check the wires for defects and / or replace wires.
TROUBLE SHOOTING GUIDE
SYMPTOM
PROBLEM
TEST SOLUTION
Pilot goes out while
standing; Main
burner is in ‘OFF’
position.
Gas piping is undersized.
- turn on all gas appliances and see if pilot fl ame fl utters, diminishes or
extinguishes, especially when main burner ignites. Monitor appliance supply
working pressure.
- check if supply piping size is to code. Correct all undersized piping.
High Wind.
- unit has been exposed to a high wind condition.
A “sheltered” area is recommended for the installation location.
- close mesh screens.
Flames are consist-
ently too large or too
small. Carboning
occurs.
- check pressure readings:
Inlet pressure can be checked by turning screw (A) counter-clockwise 2 or
3 turns and then placing pressure gauge tubing over the test point. Gauge
should read 7” (minimum 4.5”) water column for natural gas or 13” (11” mini-
mum) water column for propane. Check that main burner is operating on “HI”.
Outlet pressure can be checked the same as above using screw (B). Gauge
should read 3.5” water column for natural gas or 10” water column for pro-
pane. Check that main burner is operating on “HI”.
AFTER TAKING PRESSURE READINGS, BE SURE TO TURN SCREWS
CLOCKWISE FIRMLY TO RESEAL. DO NOT OVERTORQUE.
Leak test with a soap and water solution.
Unit is over-fi red or under-fi red.