Installing a keyboard tray – NEC EXPRESS800 User Manual
Page 61
Installing Rack Components 5-13
To install your PDU:
1. Place two cage-nuts (Figure 5-9,A) on each rail at the location you have
chosen to mount your PDU.
2. Secure the PDU to the rails using the black plastic washers and plated-finish
screws (Figure 5-9, C).
3. Using a self-tapping screw, connect the green ground strap
(Figure 5-9, D) to the rail.
4. Connect the AC power cord to the PDU.
5. If you install your PDU behind the keyboard tray, midway up the rack rather
than in the bottom of the rack, dress and secure the power cable to provide
some strain relief to the cable connection.
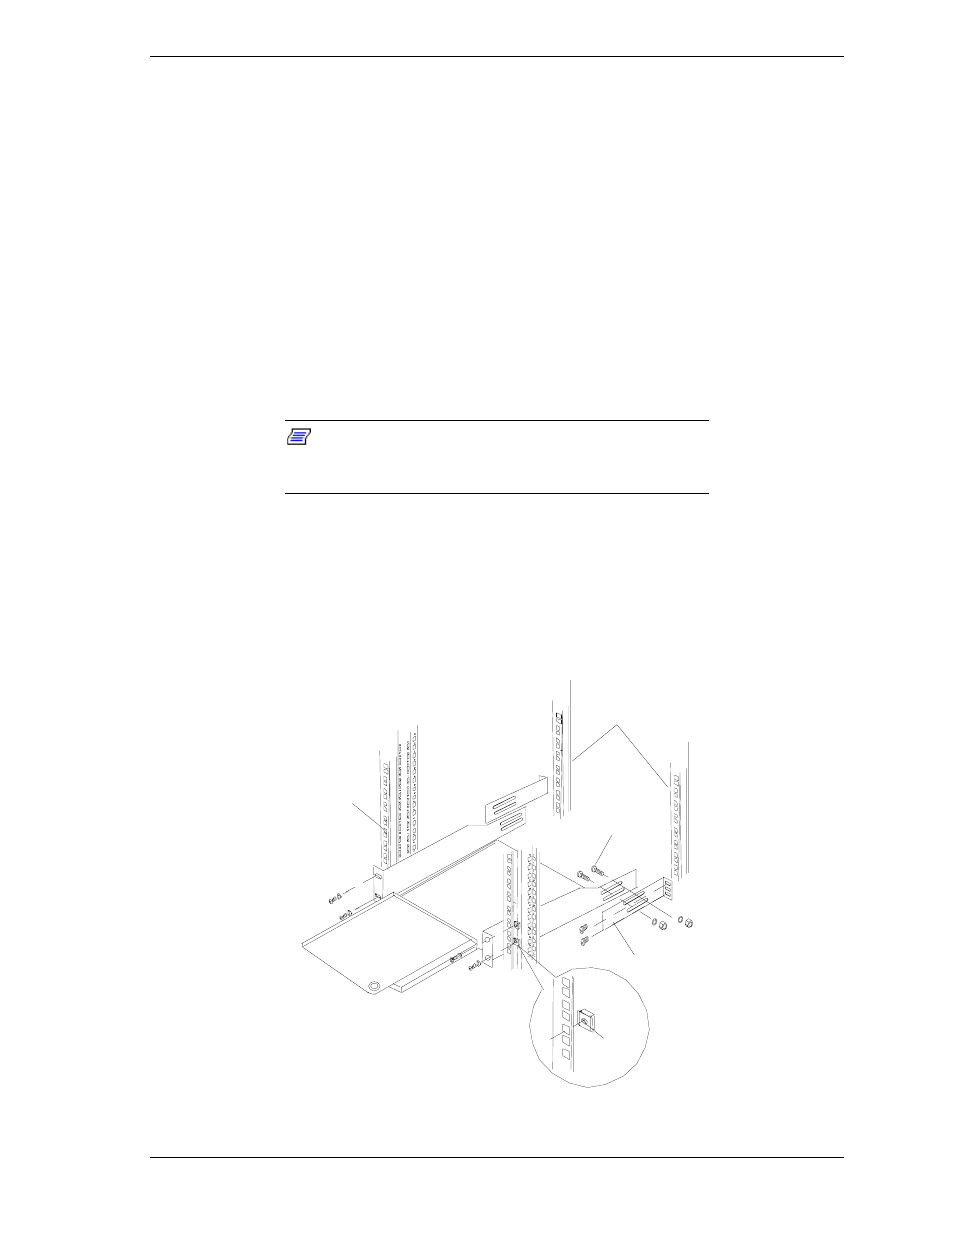
Installing a Keyboard Tray
Note: Some keyboard tray models are front-mount only,
and are secured only to the front rails. Your keyboard tray
may not look like the model pictured in Figure 5-10.
This section describes how to install a keyboard tray into a system rack.
The keyboard tray provides you with:
!
a convenient work surface that stores your keyboard and mouse
!
a secured compact enclosure when your keyboard and mouse are not in
use
Front Rail
Rear Rails
A
B
C
Figure 5-10. Securing the Keyboard Tray