3 firmware upgrade – Network Technologies CS-16/8 User Manual
Page 36
NTI RACK MOUNT CONSOLE TERMINAL WITH CONSOLE SWITCH
31
3.3 Firmware Upgrade
It may be desired to upgrade the firmware that controls the SERIMUX as soon as improved versions become available. Once the
firmware file has been downloaded from
www.networktechinc.com
to a local CPU, follow these instructions to install it.
1. Using a CPU connected to Port 1, start a terminal program (e.g. Windows HyperTerminal) and configure it as follows:
•
direct connection (using the appropriate CPU local serial Com port)
•
9600 bps
•
8 bits
•
no parity
•
1 stop bit
•
no flow control
•
ANSI or VT100 terminal mode.
2. Log-in as administrator (page 12).
Note: During the transfer and the internal upgrade, all ports (except the TERMINAL and Port 1) and all users are
disconnected.
3. Locate on the local hard disk the binary file containing a valid firmware version (downloaded from the NTI website at
www.networktechinc.com)
.
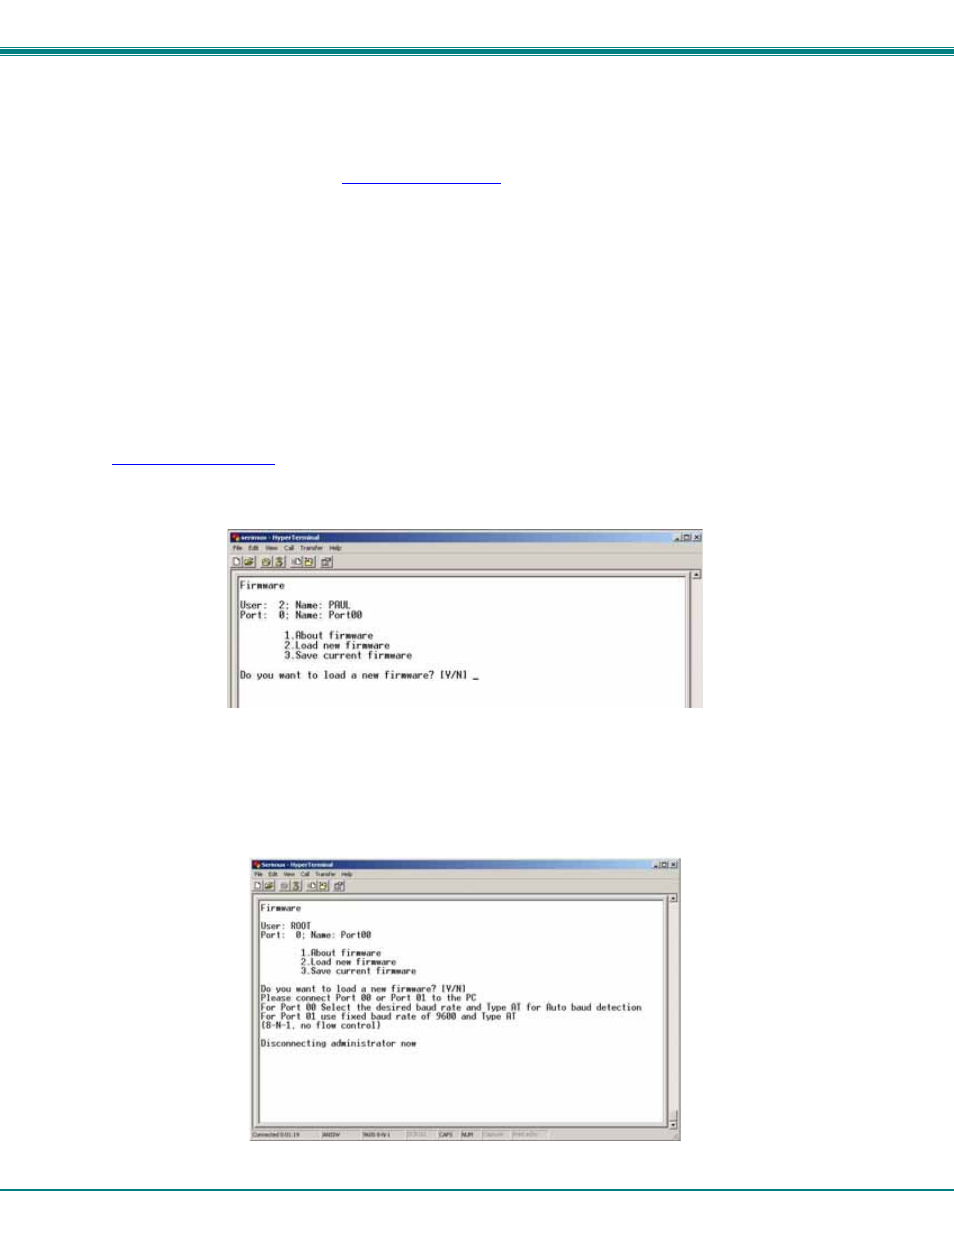
4. From the "Firmware" menu (pg 24) press [
2], then [Y] to confirm. All other ports will be disconnected and disabled during the
firmware update procedure.
.
Figure 26- Firmware upload window
5. Type [
A] + [T] “AT” (case sensitive, must be uppercase) to activate the SERIMUX auto baud detection.
6. When prompted, press [
Y] to confirm, and [C] to continue with the procedure.
Note: Proceeding past this point will erase all programming. The firmware upgrade must be completed for the SERIMUX
to function.
Figure 27- Type "AT" to auto-detect baud rate