Nokia 9300 User Manual
Page 2
Xpress Mail Personal Edition Set Up Instructions
Xpress Mail Personal Edition Set Up Instructions (continued)
1
Calendar synchronization is disabled by default. If you are using Xpress Mail Personal Edition to access your
corporate email and calendar via Microsoft Exchange or Lotus Notes, follow the steps below to enable calendar
synchronization:
a. Press the
Messaging
application button.
b. Press
Ctrl
+
Shift
+
T
.
c. Scroll to and select
Xpress Mail
.
d. Scroll to the
Calendar
tab.
e. Under
Calendar sync
select
On
.
f. Press the
Done
command key.
Calendar data will be automatically synchronized on the next synchronization.
If you are using Xpress Mail Personal Edition to access your personal email, you may now choose to synchronize
calendar and contacts from a compatible PC to your Nokia 9300 using Nokia PC Suite. Proceed with the Getting
Started CD-ROM and select the option
Install Nokia PC Suite Only
. This option will guide you through the
remaining steps.
Your Xpress Mail Personal Edition email account
should now be set up. To access your email, select
the
Messaging
application key, then scroll down
to the Xpress Mail folder.
Xpress Mail
Step 1. Complete the Nokia 9300 set up.
See the Nokia 9300 Set Up Instructions Guide included in your product packaging and complete device set up
through step 7. Be sure to have an active data rate plan to enable email and other data related wireless transfers
to your device.
Step 2. Create an Xpress Mail Personal Edition account.
a. Using a compatible PC, visit
http://xpressmailpe.cingular.com
.
b. At the web site, select
Register Now
and follow the on-screen instructions to create your Xpress Mail account.
Create a user name, password, and input the rest of the necessary information on that screen.
c. Download, install, and configure the Xpress Mail Personal Edition desktop software onto your PC.
Step 3. Download Xpress Mail Personal Edition application onto your Nokia 9300.
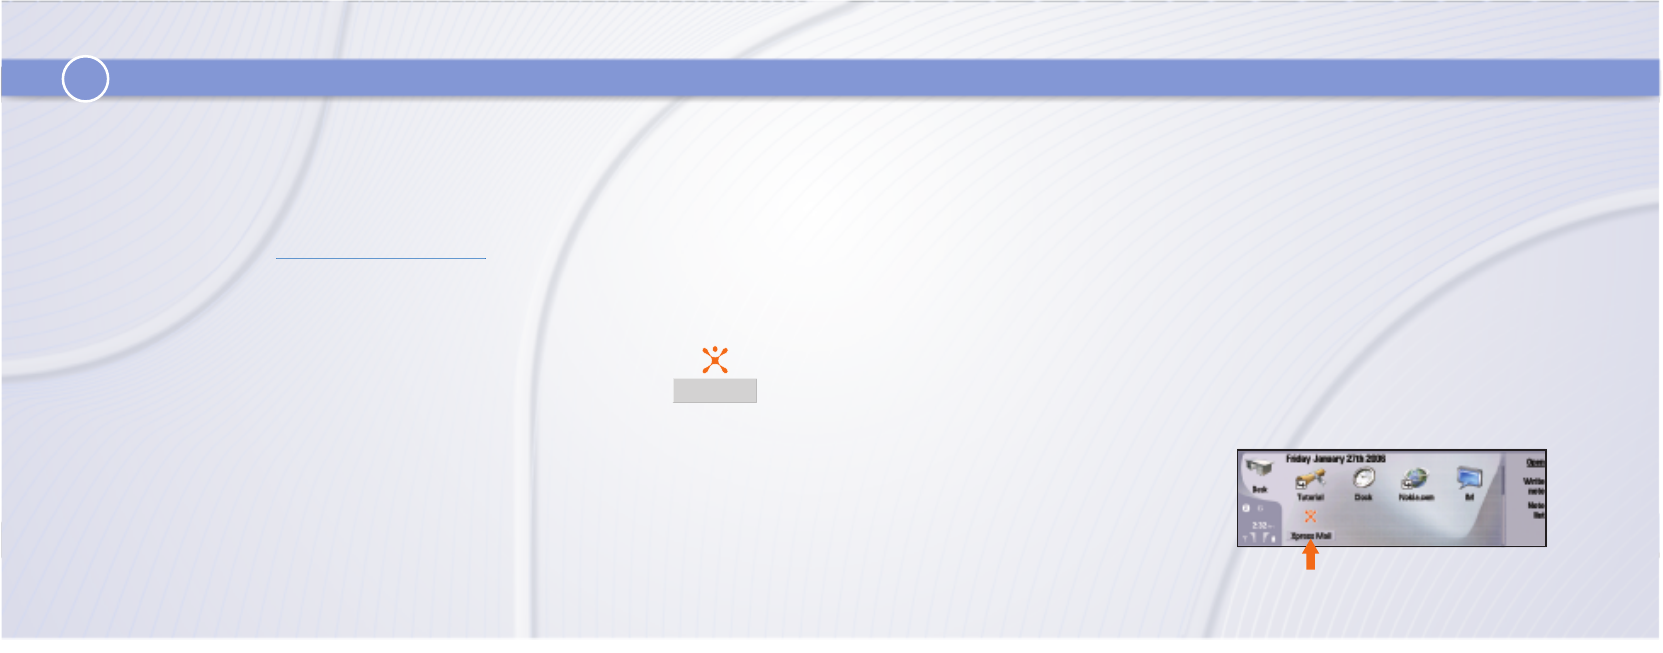
a. At the Desk (Home screen), scroll to and select the
Xpress Mail
icon (fig. 1 next page).
b. From the screen that appears, select
Install Now
.
c. On the next page, select
Download Now
to begin downloading Xpress Mail.
d. After download has completed, on the next screen select
Install
.
e. When the install is complete, open Xpress Mail from the Nokia 9300 Desk screen (fig. 1 next page) which will
bring up the Registration screen. Enter your 10-digit mobile number, then press
Next
.
f. On the next screen, select
Personal Edition
, then press
Next
.
g. On the next screen, enter your Xpress Mail user name and password that was created in Step 2b above, then
press
Next
.
h. Xpress Mail will automatically generate the security keys and synchronize your email.
fig. 1