Control.buttons.and.menu...navigatio, Connections, Memory.card – Philips 6FF3FP User Manual
Page 8: Usb.connections
2.2
Control Buttons and Menu
Navigation
• Use your PhotoFrame by pressing the control
buttons in the back.
• The control buttons and instructions are
shown at the bottom of the menu screen.
Use the navigation controller to move
between the menus. Move it left and right to
cycle through the menu tree.
2.3
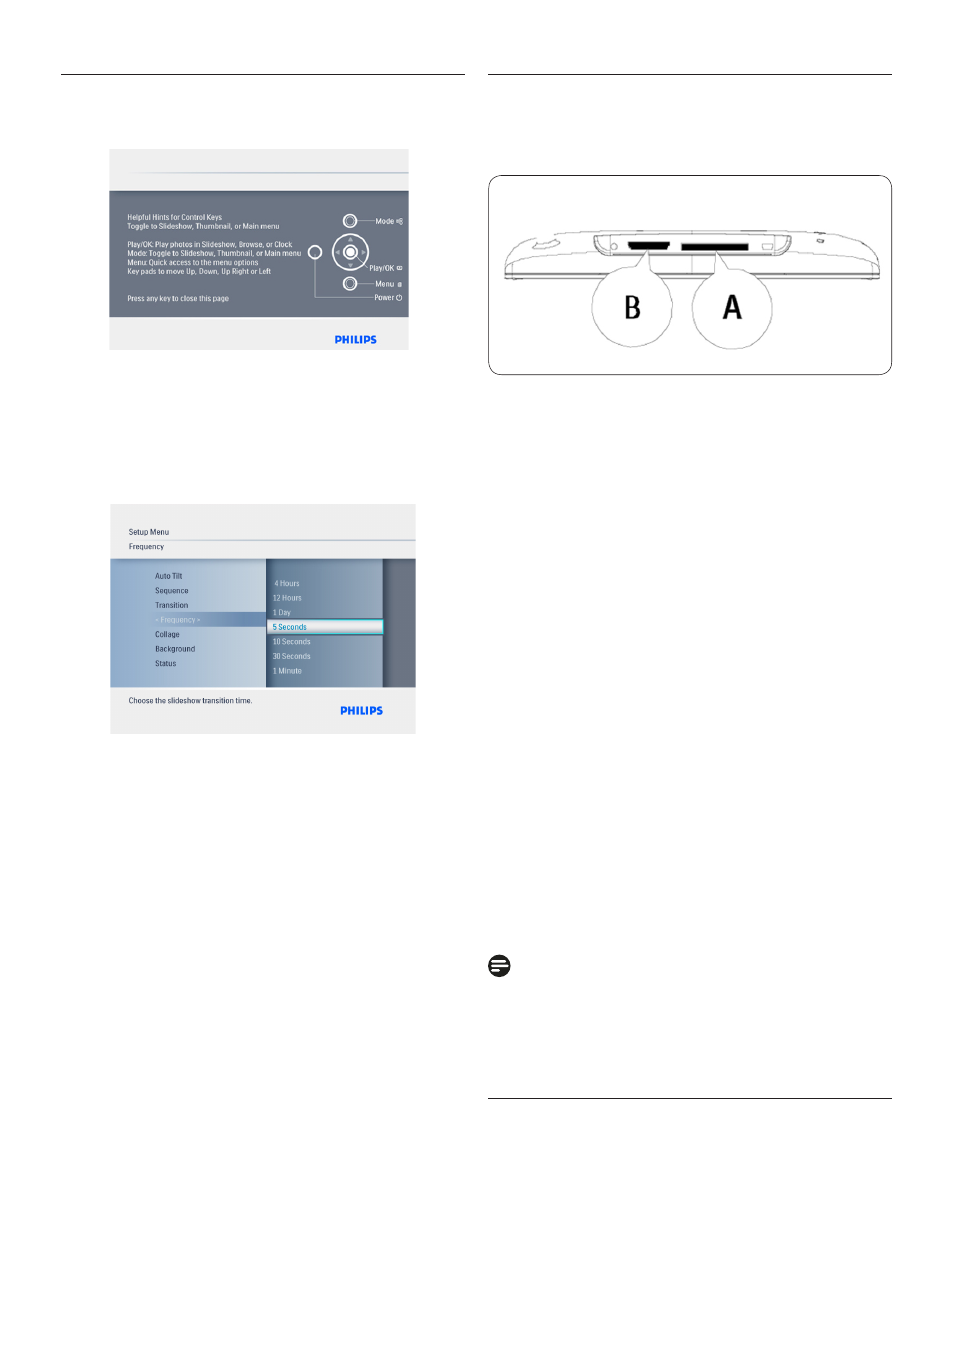
Connections
2.3.1 Memory Card
Photo display (underside)
A. CF Card
B. SD/ MMC /MS / xD Card
Inserting a memory card:
• Insert the memory card into the slot in the
frame.
• For xD, SD, MMC, MMC+, or Memory Stick
cards slide the card until it locks in place.
• Push the USB drive in the slot.
• After a few seconds, photos on the memory
card will display and a slideshow will start.
DO NOT remove the memory card immediately
after inserting it in to the PhotoFrame or when
PhotoFrame is counting the Photos. Wait until
the screen is stable
Removing a memory card:
• To remove the xD, xD, SD, MMC, or Memory
Stick card, push the card again to unlock and
then pull out the card.
Note:
To be able to delete photos from the memory
card it must NOT be locked. To unlock the card
follow the manufacturer’s instructions.
2.3.2 USB Connections
For Windows PC (XP & Vista):
• Connect PhotoFrame to a PC via the supplied
USB cable where it will be recognized as a
mass storage device.
Your PhotoFrame